
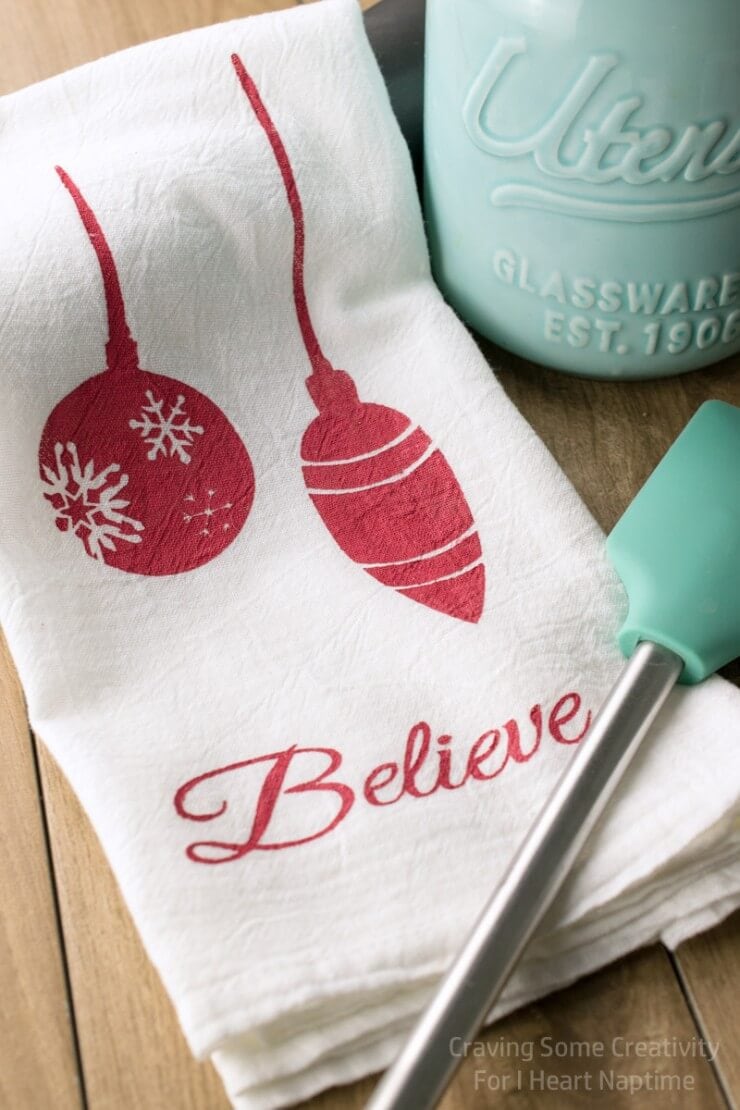
Christmas Stenciled Kitchen Towels
Christmas Stenciled Kitchen Towels – the perfect DIY to bring some holiday cheer into your kitchen!
Hello! I’m Rachel from Craving Some Creativity and I am very excited to be apart of this year’s Crazy Christmas Event. Today, I have some fabulous stenciled kitchen towels to share with you. As a bonus, I am sharing the files for your personal use to create these beautiful Christmas icon stencils.
Christmas time is my favorite time of year. I don’t about you, but I have been working so hard on getting the house decorated and all of the shopping done. We bought a fixer upper home so we like to keep the decorating budget to a minimum. And by fixer upper, I mean bad. So bad, in fact, that the floors required replacing before we could move in. Almost everything in the house is DIY or a thrift-finds in some way. Now that the Craft Room is completed, I want to work on cute projects all the time. I wanted to spread some Christmas cheer to the kitchen and that is how these stenciled kitchen towels came to be.
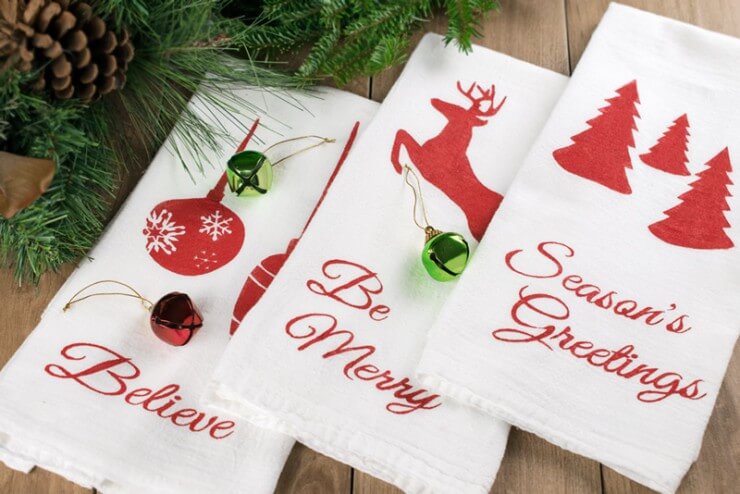
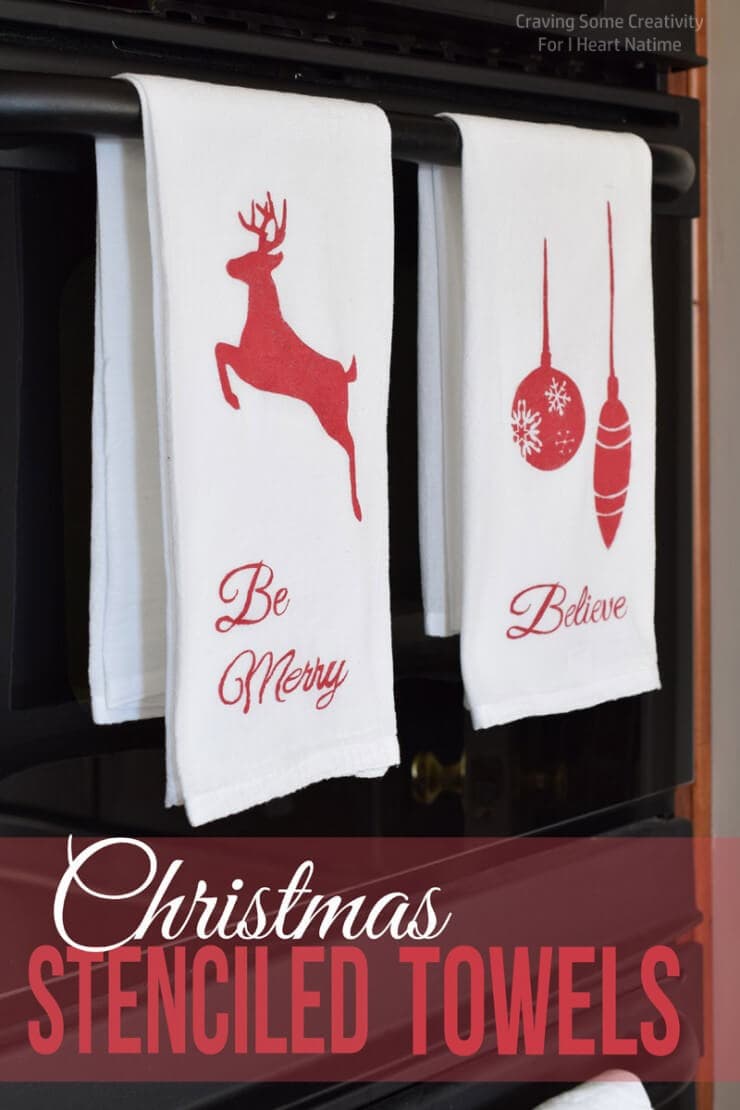
There are 3 designs: a leaping deer, Christmas trees, and ornaments. Each design has text and can be interchanged as you see fit.
If you have a Silhouette and the Silhouette Studio Software, you can download the SILHOUETTE CUTFILES HERE.
Don’t worry if you don’t though! I also have the stencils available as a PDF DOWNLOAD.
Leaping Deer and Be Merry // Christmas Trees and Season’s Greetings

For this project you will need:
- Cotton, Canvas, or Linen Towels (I purchased mine from Walmart)
- Craft Knife (only if you do not have a Silhouette Cutting Machine)
- Adhesive Backed Vinyl or Adhesive Stencil Material
- Fabric Paint
- Foam paint brush (pouncer or stencil brush preferred)
- Cardboard or plastic sheeting
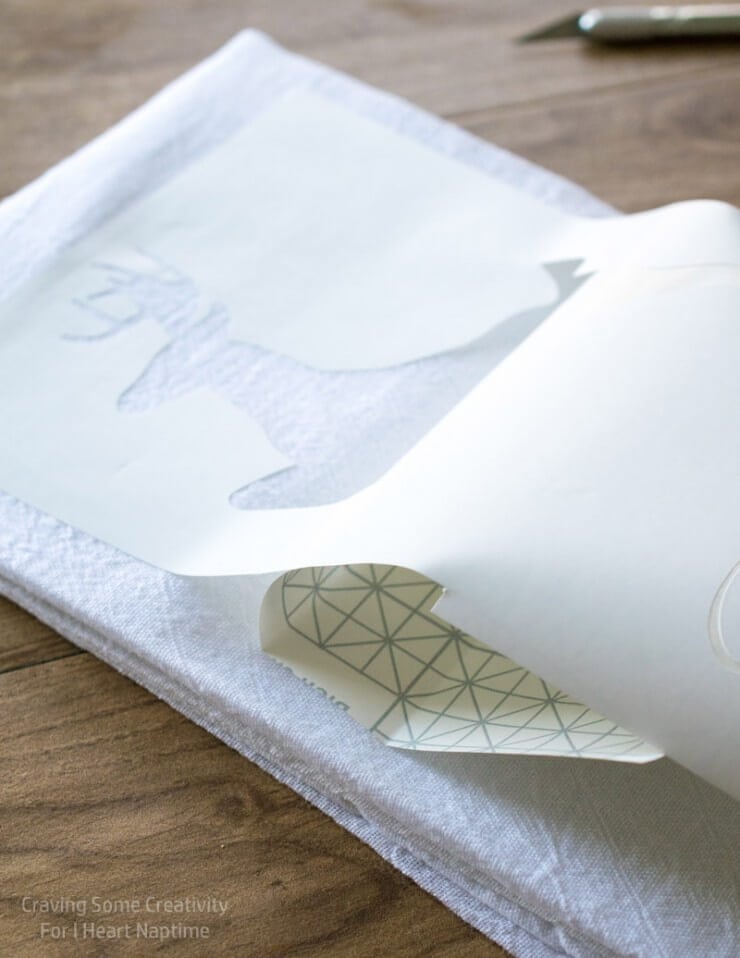
First, wash and iron your towels, then fold the towel so that the stencil is placed where you want it to be. Using the vinyl or other adhesive stencil material, cut the images with either a Silhouette cutting machine or with a craft knife. Slide a piece of cardboard or plastic sheeting under where you will be stenciling to prevent the paint from bleeding through. Lay the stencil into place. I like to roll from the top down to prevent mistakes like the paper sticking to itself. I’ve had that happen before and, let me say, better safe than sorry.
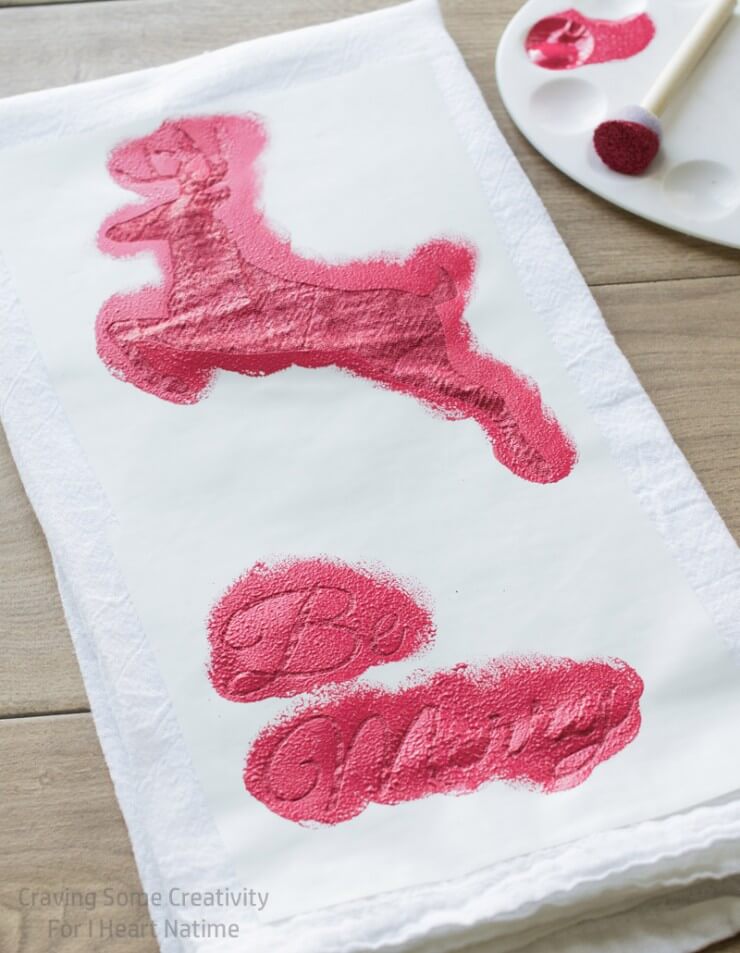
Now, the fun painting part! But hold on, I have a few fabric stenciling tips. First, make sure you are using a vertical stamping motion and not a side-sweep brush stroke or you risk pushing the paint under the stencil. Secondly, I like to work from the inside to the outer edge. After you finish stenciling, leave the stencil in place and allow to dry about 1 hour. If you notice any spots that need touching-up, you can apply a second coat in those areas.
After it’s mostly dry, peel the adhesive material off of the towel and remove the cardboard backing. In my house, these towels are made to look pretty and no one dares dry the dishes with them. However, if you are using the fabric paint, they should be machine washable. Check the instructions on your fabric paint to be sure. I hope you enjoy them as much as I do!
Thank you so much to Jamielyn for inviting me to participate and I wish everyone the best holiday season ever! If you love this simple Christmas project, there are plenty more on Craving Some Creativity.
I am also active on social media. I would love if you followed along and, hopefully, find some inspiration for your next project.

If you iron the painted designs once it’s dry, it’ll be completely washable!
the Circut does support an pdf is there anyway you can share the Ornaments-and-Believe in a different format
Hi Donna! This was a guest post from several years ago, so I do not have access to the original print. I’m sorry!
Would this also work with Cricut instead of Silhouette
Hi MaryLou! I have heard that you can, but I am not too familiar with how to do it!