
How to Paint Furniture and Ombre Dresser
The easiest tutorial on how to paint furniture …creating a DIY ombre dresser. Just 4 easy steps to creating this look.
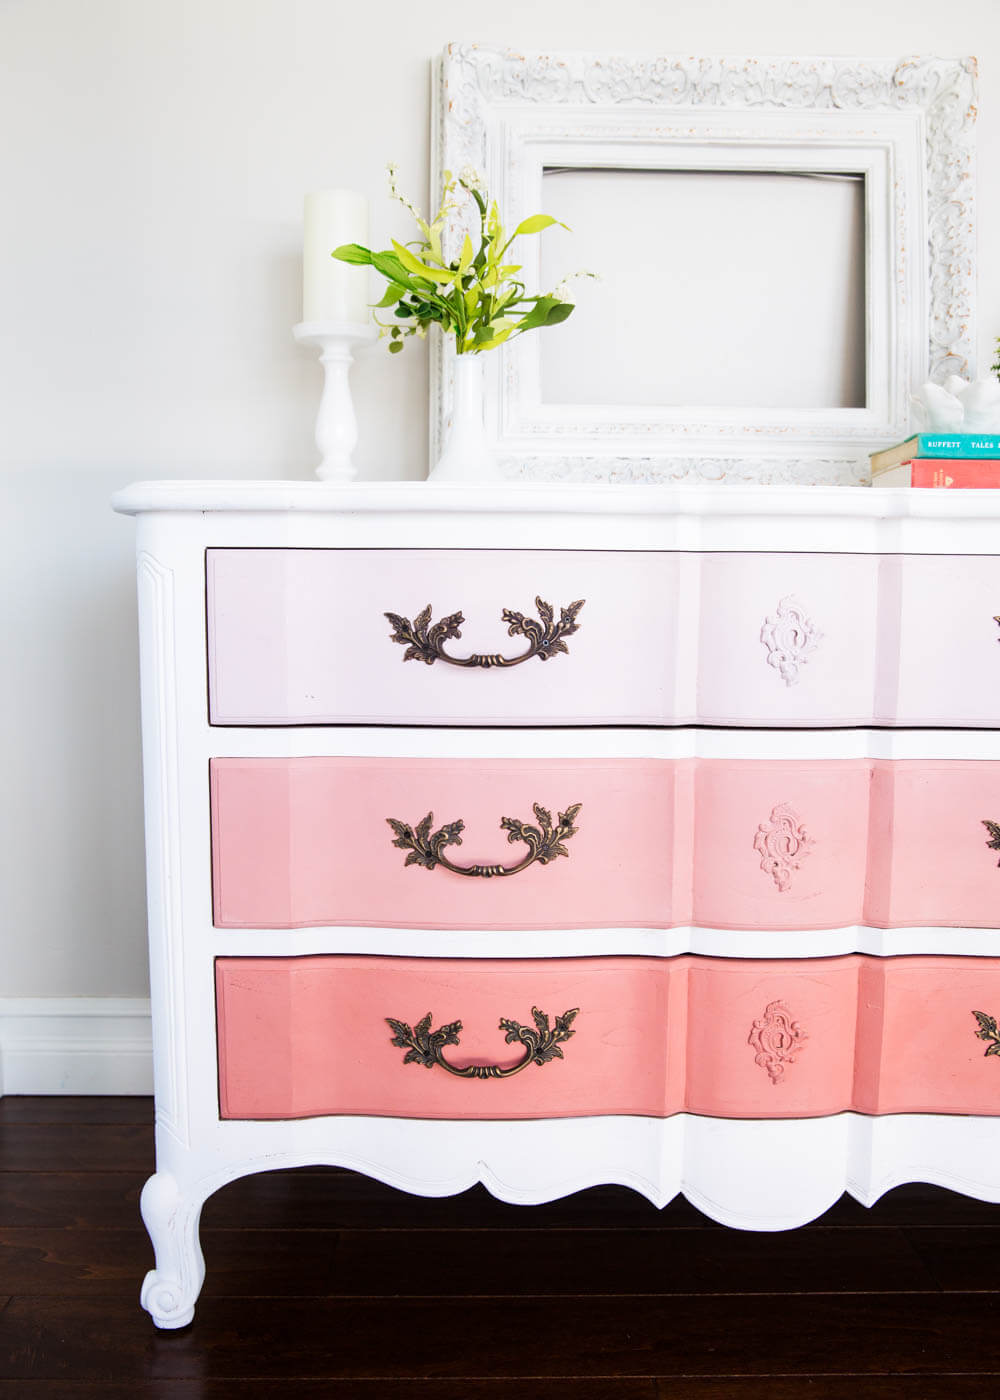
One of my favorite things ever is painting furniture. I don’t do it often enough (mainly because my house is full of furniture), but I find it relaxing. Weird, I know! I absolutely love how this ombre dresser turned out for my daughters room.
I am SO excited to be partnering with Ave Home and AVE Raw today for this post. I recently picked out the Genevieve Dresser and am completely in love with all the curves. Here is the beauty before I began painting. Such a good quality piece. I love that it came raw, so I didn’t have to strip or sand anything. Made it a a piece of cake!
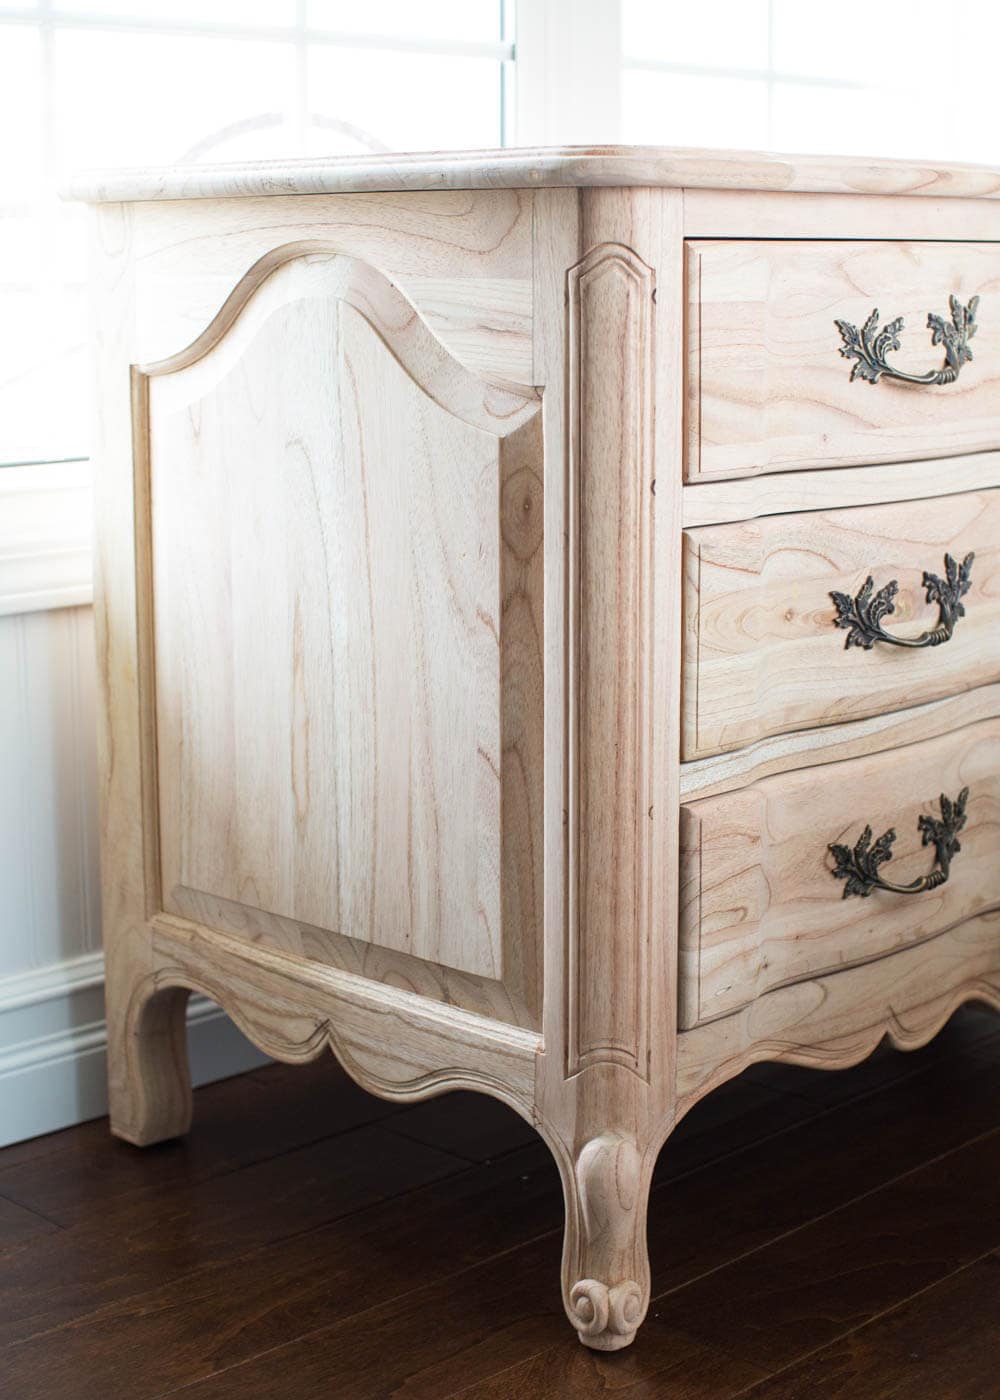
Although there are many techniques on how to paint, today I’m just going to cover the basics. First you need to start with a raw piece of furniture. If you’re refinishing a piece, you will need to sand it down and then clean it. Murphy’s Oil soap or Simple Green works great for cleaning. Make sure to wipe it down with water lightly afterwards so the residue does not stay on the piece. I’m kind of in love with AVE Raw because I can skip all the pre-work get started painting… which is my favorite part anyway.
Supplies needed:
- Drop cloth
- Paint Brush
- Furniture paint (I prefer chalk paint)
- Soft Wax
Step 1: Remove all the drawers and hardware from your piece of furniture. You want to make sure to paint each piece individually. I actually prefer to only paint the outside of the drawers and either leave the inside raw or line it with contact paper.
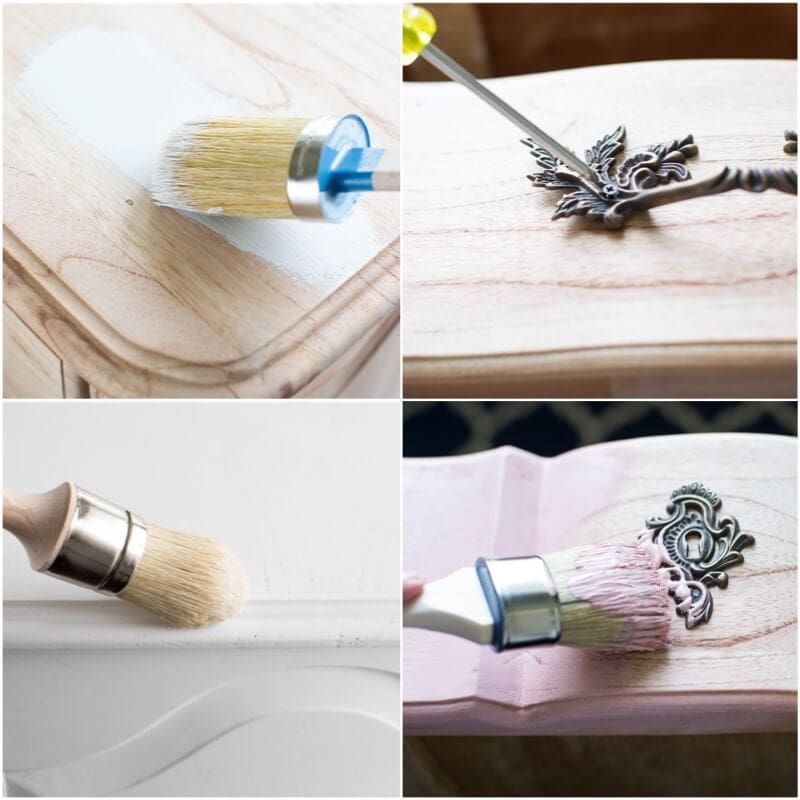
Step 2: Dip your brush into the paint can and then allow larger drips to fall back into the can. Then place brush going WITH the grain and do an even THIN coat of paint on the entire piece. Don’t rush this process. Work around the piece of furniture, one section at a time. Next work on your drawers. I painted over the middle piece but left the handles off. For the OMBRE drawers, I used two shades of pink. Then for the middle drawer, I mixed even parts of the two colors.
Allow finish to dry for at least FOUR hours. If there are any thicker spots or areas you’re not happy with use a fine grit sand paper to lightly sand it down. Then wipe down your piece, so there is not dust remaining.
Step 3: Add a second coat of paint to your piece of furniture. Allow to dry for at least another FOUR hours. You can add a 3rd coat if necessary, but I typically only do 2.
Step 5: Allow your piece to set for 24 hours before sealing. I know you’ll be tempted (trust me), but wait the whole 24 hours so it has time to cure. Then you’re going to seal it with a wax finish to protect your piece of furniture. All you do is brush or wipe it on your piece of furniture. Allow it to sit for 15 to 20 minutes. Then lightly buff it with a clean rag. After you’ve got the wax on I would wait another day before handling it. This way it has time to soak in and cure the piece.
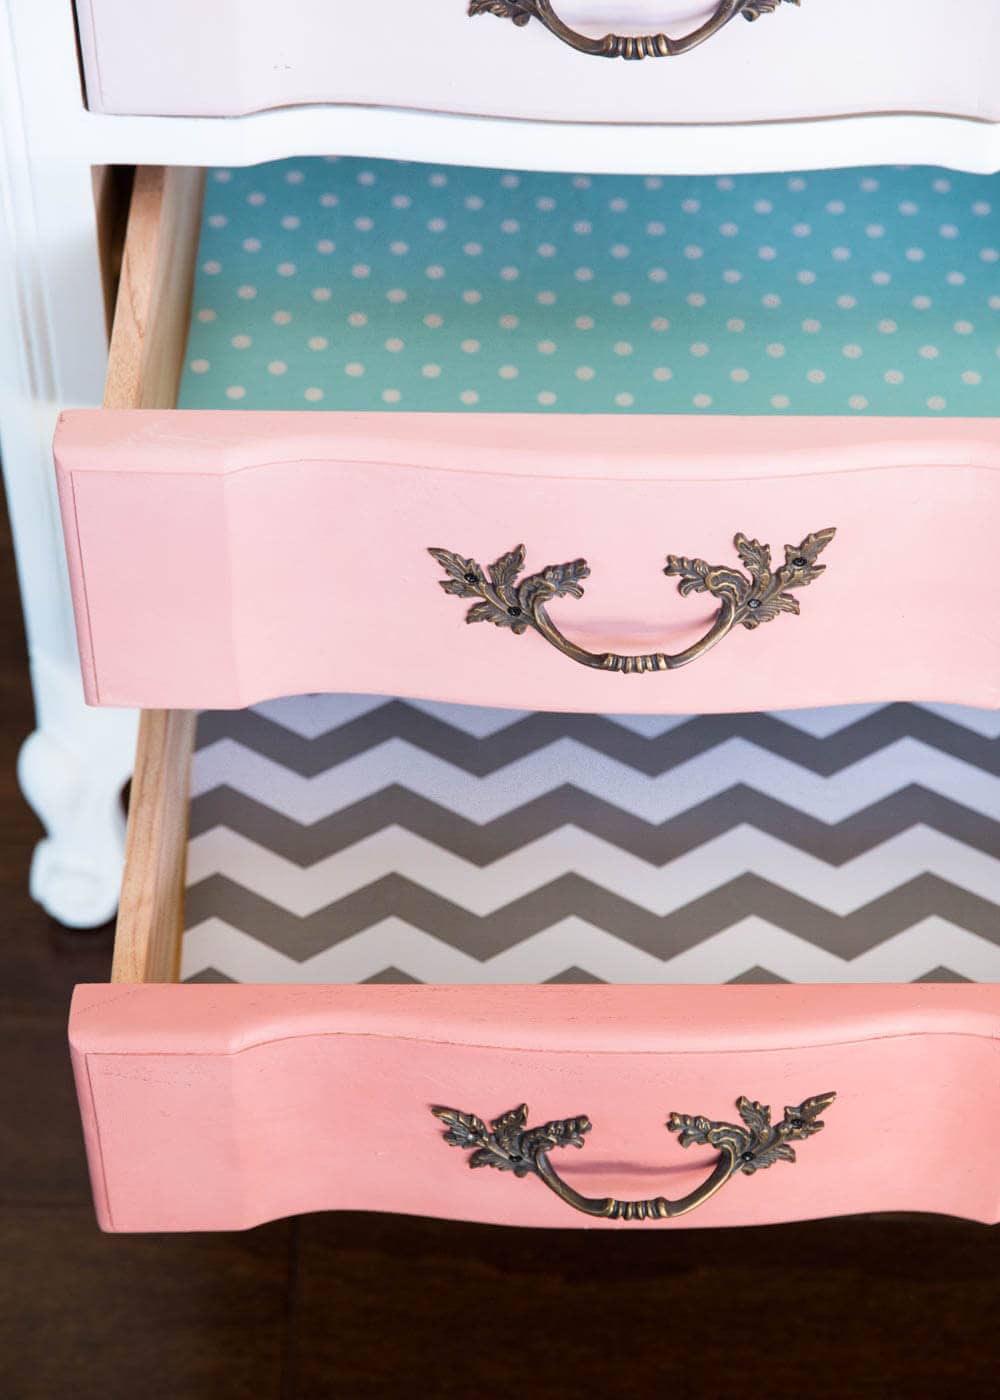
I also added some liner paper to the inside of the drawers. We couldn’t decide, so we did a mix of patterns/colors. 🙂
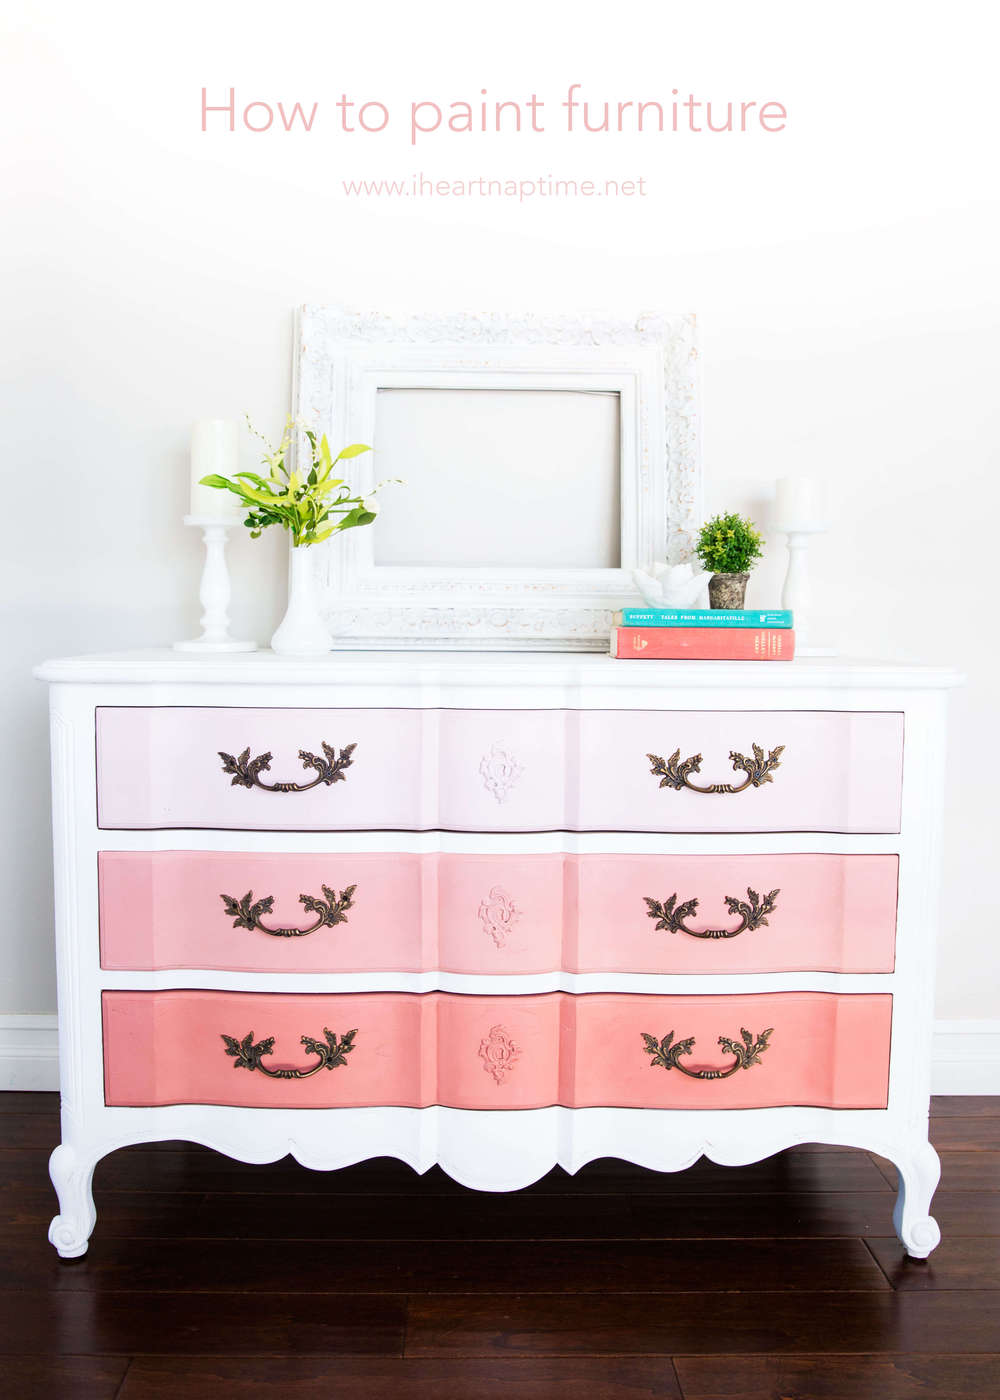
So there you have it, an easy way to paint furniture. Isn’t she a beauty? This piece is going in my daughters room. Can’t wait to show you the whole makeover!


Your daughter is one lucky girl! I love what you’ve done with that dresser: I would have used blue or green to match my interior. Such a great idea!
GORGEOUS piece of furniture!
Love this. I’m planning to use your tutorial to redo a dresser for my daughter. Do I need to prime it first? And what brand of chalk paint do you recommend?
If you’re not using raw wood, it will depend on what type of paint you use and what their instructions say. I’ve done another desk in chalk paint, too.
Stunning! I love the way you painted it with the different colors. 🙂
I absolutely love this and want to do this to my daughters nursery set as we are getting ready to convert to big girl
The furniture is
“Crafted with Sustainable American Poplar Hardwood, fine Birch wood veneers and Green Guard certified composite materials”
Would I be able to paint this?
Thank you
Hi Katie! You’ll want to sandpaper the exterior a bit. If that veneer is shiny, you’ll want to use some sort of bonding agent, because veneer has a tendency to not accept paint well.
Hi! I love the white dresser color! What shade is it? And do you happen to know the color of your walls?! I’m in a battle of choosing white wall paint and a white dresser paint color!! I want to make sure they don’t clash!
Hi Amber!
I used agreeable grey and incredible white for the walls and then Pure white for the dresser.
Happy painting! 🙂
Gorgeous! What color pinks did you use? I want to do this for my daughter’s room.
Thanks for sharing these tips. It is very useful 🙂
Wow, those colors is amazing!
Wow, this piece is GORGEOUS! I’m hoping to do a “copy-cat” piece in my daughters bedroom, using this as inspiration. 🙂 You mentioned you favorite paint was chalk paint; is that what you used on this piece? Could you let me know the exact type, brand, etc of paint you used? Thank so much!
Thank you! I used Annie Sloan Pure white and Scandinavian pink. I diluted it with white to create the ombre look on the drawers 🙂