
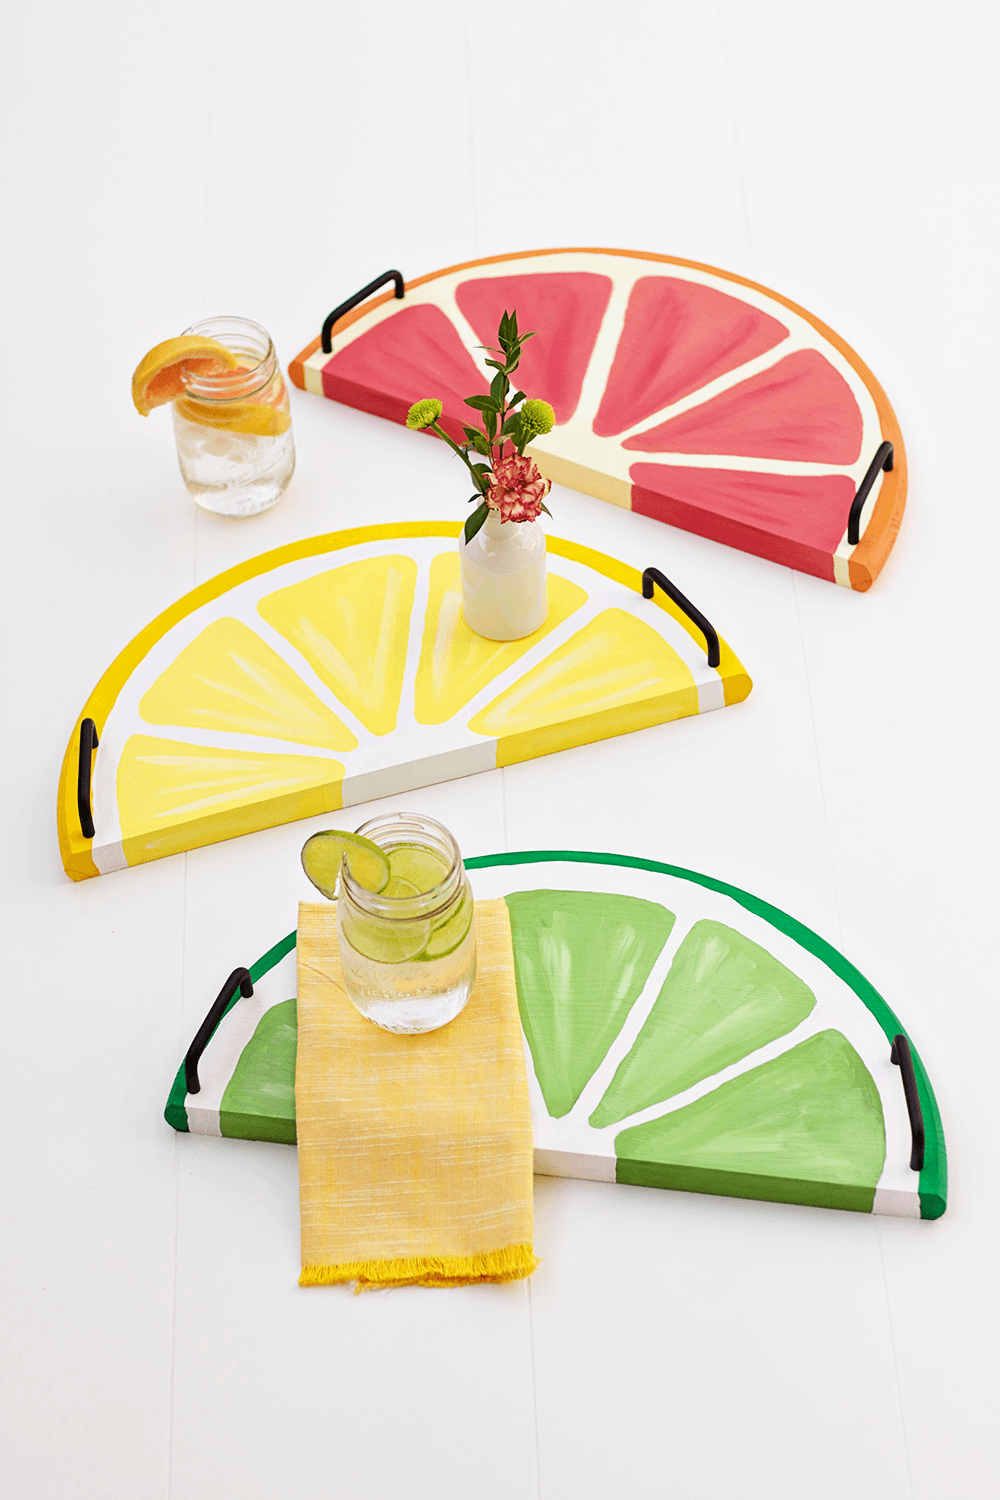
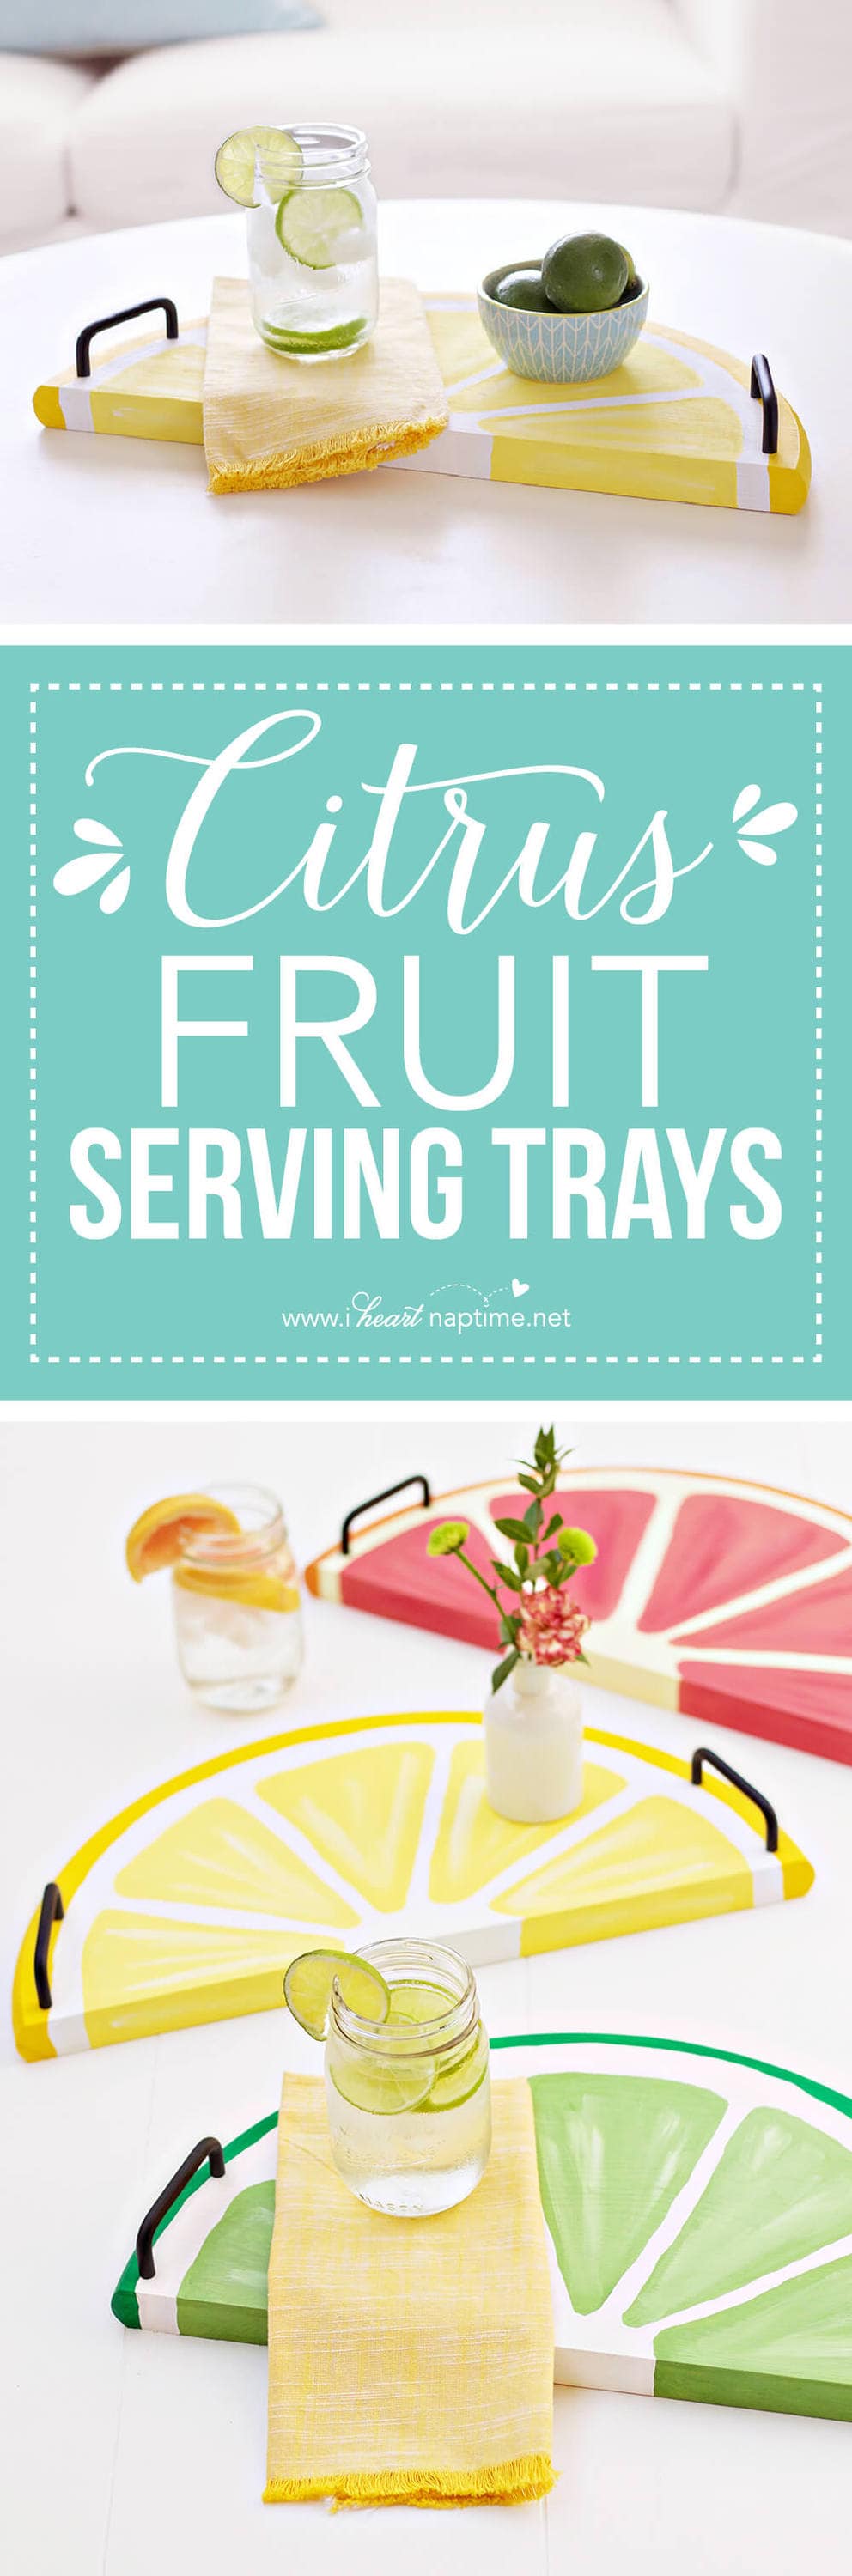
Citrus Fruit Serving Trays
Citrus Fruit Serving Trays – an easy DIY, perfect for serving cold refreshments on a hot summer day – or anytime!
Summer is one of the most inspiring times of the year for me, the bright colors, bold flavors, and warm sunny days make me want to lounge by the pool with an ice cold lemonade drink in my hand. I recently made some really fun themed serving trays that captured the bold colors of summer citrus fruits. After all summer wouldn’t be summer with out those wonderful citrus fruits we love so much.
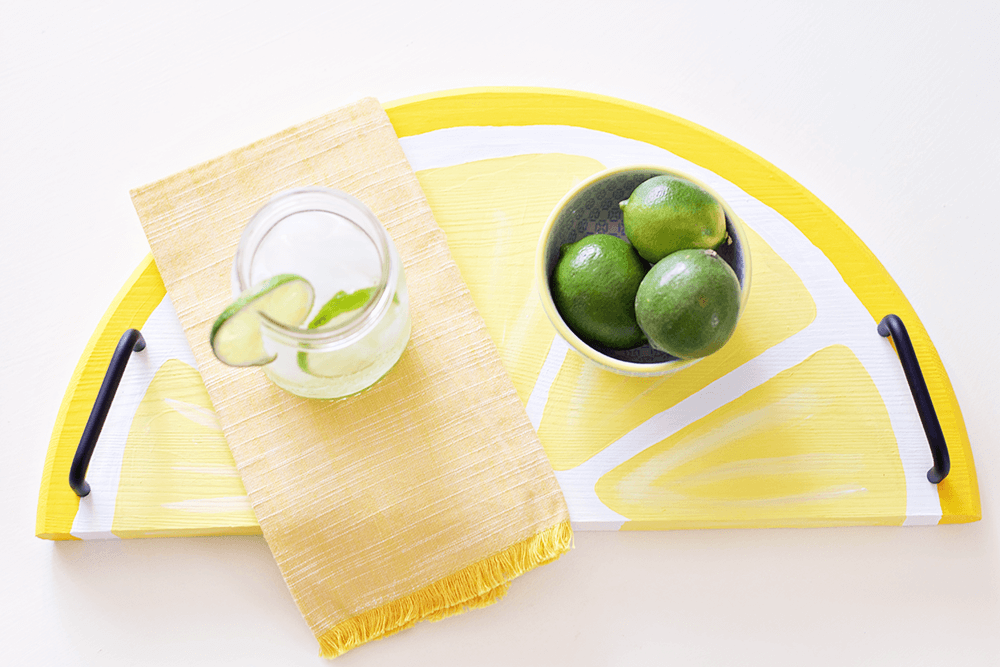
These trays are bright, fun, and inspired my favorite summer citrus fruits: lemons, limes, and grapefruit!
They are perfect for serving cold refreshments on a hot summer day or anytime you are entertaining this summer!
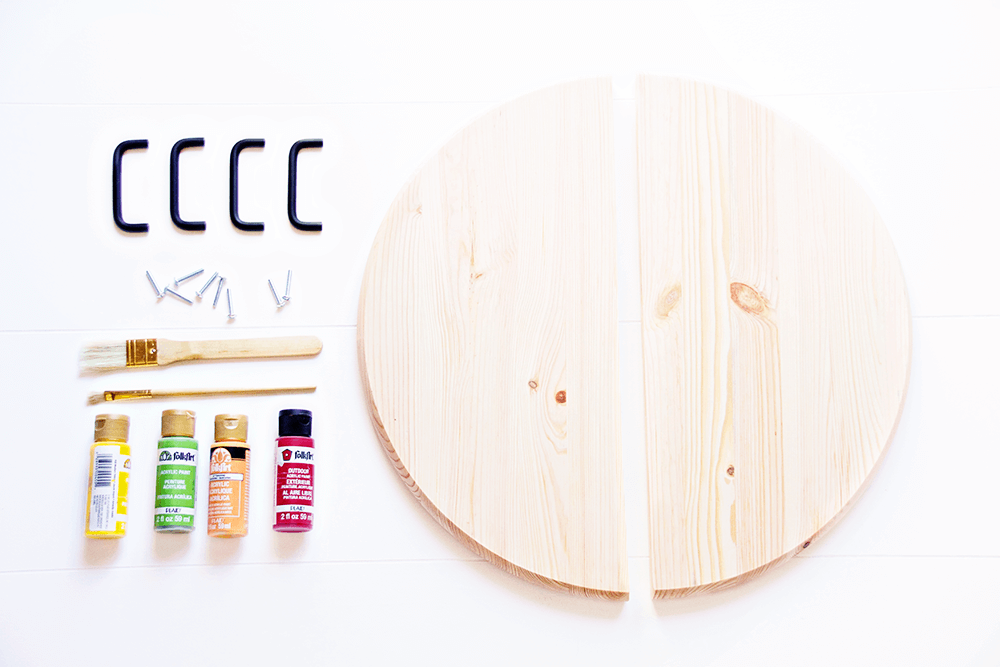
Citrus Fruit Serving Trays Supplies:
- Large 18″ Wood Rounds
- Acrylic Paints
- Paint Brushes
- Handles and Screws
- Drill
- Minwax Polycrylic
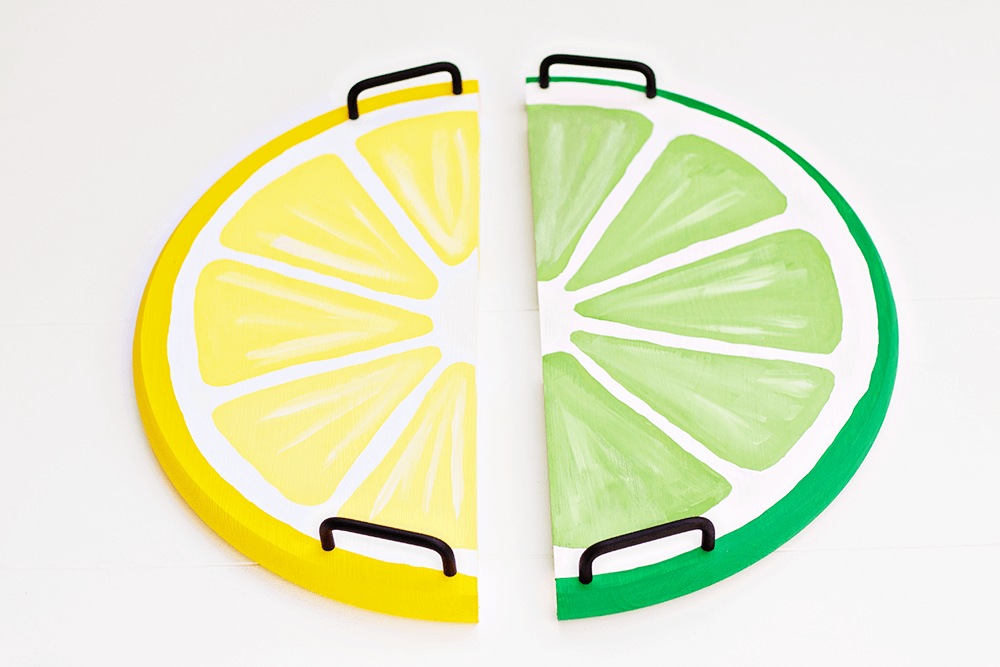
Step 1: Cut your 18 inch wood round in half using a circular saw. This particular wood round is heavy and thick so you’re going to need a wood cutting tool to cut through it. You can purchase the wood rounds and handles at Lowes.
Note: I could have left the wood round whole, but I found it to be to heavy and bulky. So, I decided to cut it in half and make two trays for the price of one. Now it’s lighter and it takes half the space on the table!
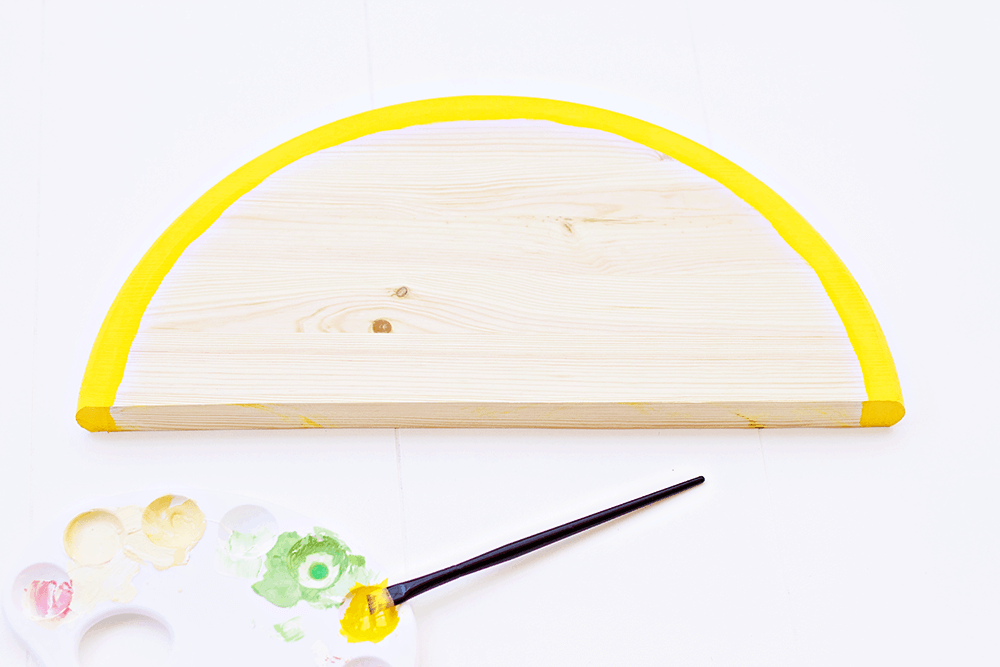
Step 2: Using your desired paint brush, paint the outer edge of the wood round and a 1/2 inch round the inside. Make sure you paint straight down the flat edges too.
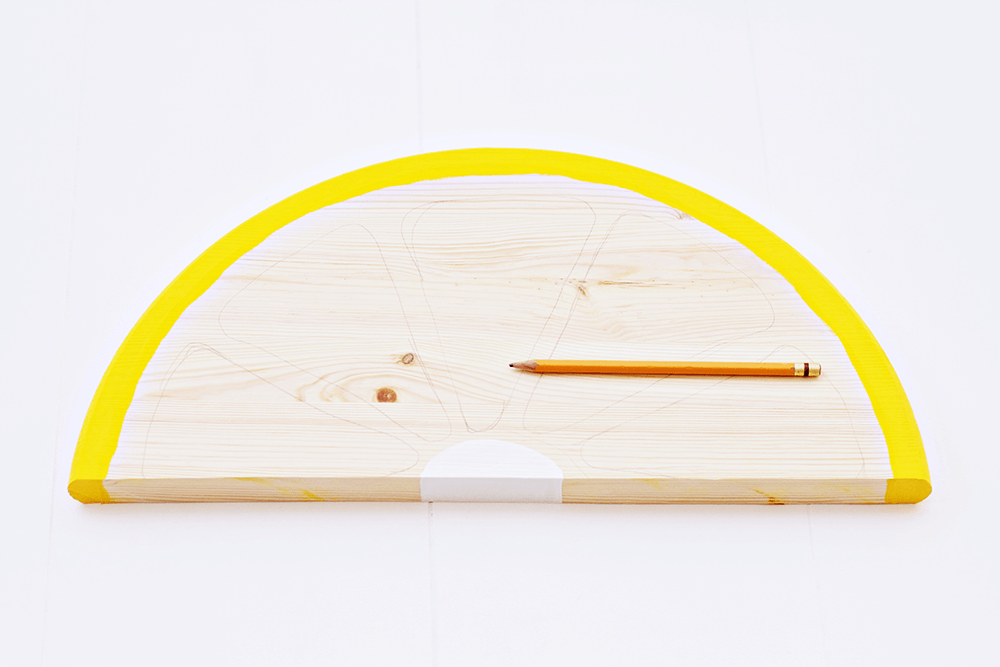
Step 3: Paint a 2 inch wide half circle in the middle and with a pencil draw your lemon sections leaving about a 1/2 inch between the border, each section and the center.
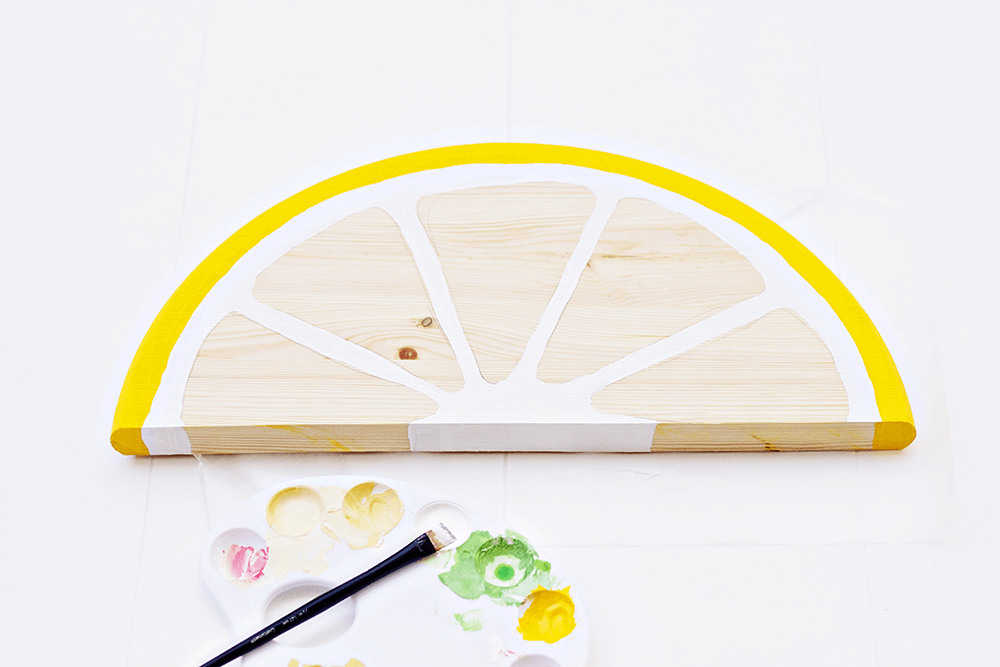
Step 4: Paint and fill around the lemon sections in white and using a lighter yellow paint the inside of the lemon sections. I used the same painted guide lines for all three trays, I just changed the colors to fit the theme of the citrus fruit.
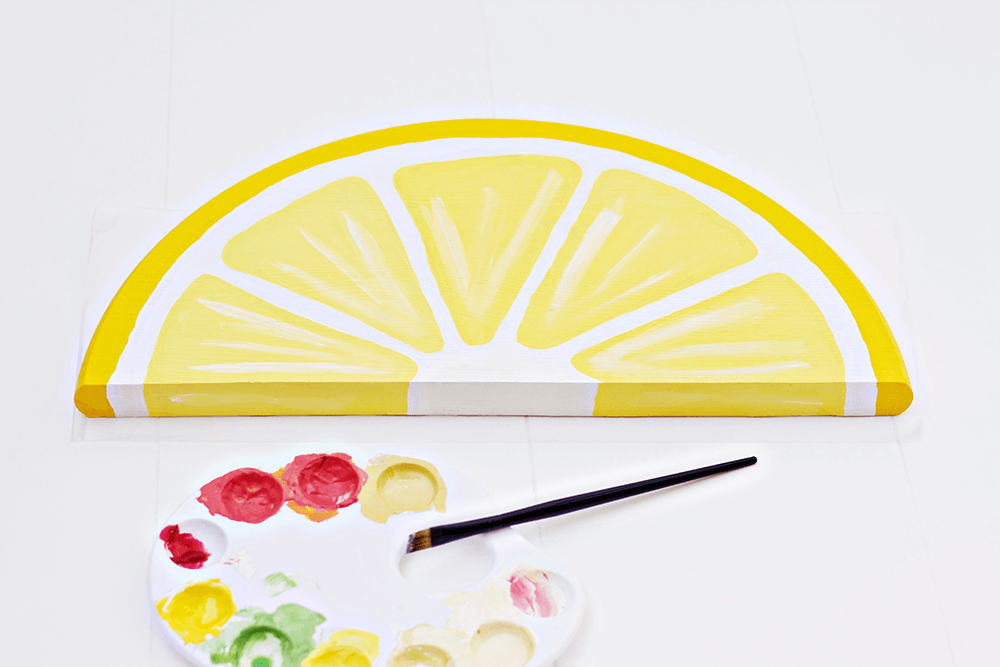
Step 5: After the acrylic paint dries apply a coat of Minwax Polycrylic to the entire tray. This will protect the painted surface. Put on the finishing touches by using an electric drill to install the handles.
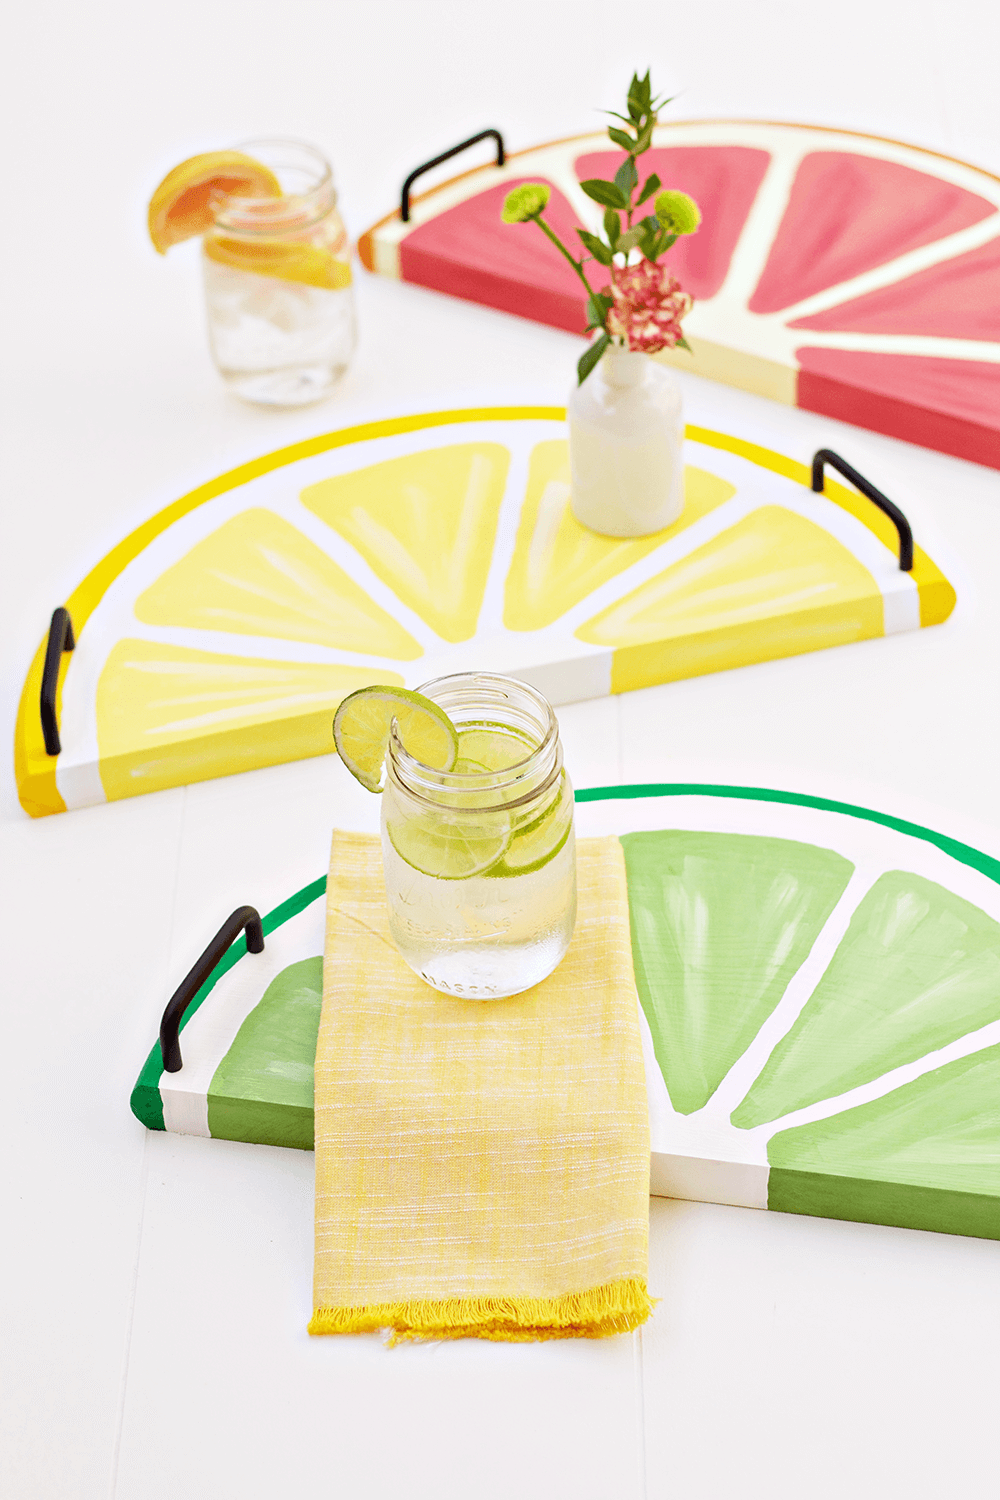
What a fun way to celebrate summer with these colorful citrus trays!
Thanks, Norma!


Oh how cute are these! I just love this project. Sharing….
These trays are so cute and would be the perfect addition to a backyard cookout.The kids would love these. I think I could totally do this.
You definitely could – they are so easy (and fun!) to make!
What a lovely tray to have at a summer party! You can really get creative with the colors. Love this!
These are incredible! I’m obsessed!
Love the trays!!! They are so cute and summery!!
Very clever idea!!!!!! Will have to give that shot!!!!
I absolutely love this idea! I work for a public library in Florida, and I would like to recreate this for one of my monthly craft sessions with adults. Nothing better than a citrus craft to kick off the summer here! Do you by any chance know the names of the paint colors you used? I want to get as close to them as I can.
Thanks!
I’m afraid I don’t have the bottles anymore! I got the acrylic paints at the craft store and picked out the brightest, most citrus colors I could see.
Hello… i love in Miami , where do you give crafts sessions?
Thank you for getting back to me! Would you mind if I used one of your images to advertise the program on my library’s website?
i have been to Michaels,lowes, craft cut, and online and I cant find them anywhere
I just saw them on Amazon! 🙂
I wanted you to know that my daughter and I made these trays and they are crazy adorable! We actually made whole fruit slice trays, not halves. She made an orange and I made a lime, and we attached white handles. I smile every time I see it and it was very easy and so much fun!!!!
I’m so glad you tried these! Glad you and your daughter had fun making them. 🙂
I wonder if you could seal them with something to use as a fruit, cheese tray?
You definitely could! Great idea!