Easy no-fail rice krispie treats that require only 3 simple ingredients! Gooey, soft, and incredibly delicious. This no-bake dessert is perfect to have in your back pocket!

Table of Contents
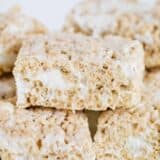
The Original Rice Krispie Treat
Rice Krispies are such a nostalgic treat that is simple and super kid-friendly. My littles love to help me in the kitchen when I’m whipping up a batch. They also love to help me make peanut butter no-bake cookies, cake mix cookies, and no-bake cornflake cookies.
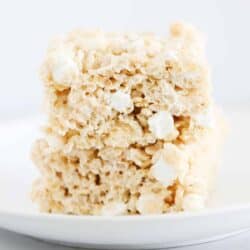
Rice krispie treats have to be the easiest dessert ever. When you’re in a pinch, they are one of the best no-bake treats to have in your back pocket. They come together quickly and are both kid and adult friendly. These rice krispy treats are the BEST and the secret is to reserve some of the mini marshmallows for the end.
This no-fail recipe is so simple and requires only 3 ingredients, although you can add nut butter for peanut butter rice krispie treats. I love to whip up a batch or two if I need a quick treat to bring to a get-together. The end result is a gooey, soft, and incredibly delicious treat that is loved by all. So easy and yummy!
3 Simple Ingredients
Take your rice krispies cereal to the next level with melted marshmallows and butter! Every kid to adult loves a good krispie treat. Combined they make the world’s famous homemade rice krispies treat!

Find the full printable recipe with specific measurements below.
- Butter: This is a smooth and velvety texture. Melted unsalted butter doesn’t take long to do in a pan. Make sure it does not overheat or burn.
- Mini marshmallows: These take a little longer to melt together. Marshmallows will be the glue and stick everything together.
- Rice krispies cereal: The main ingredient! The cereal will help give it structure and a delicious snack to hold.
How to Make Rice Krispie Treats
Slowly cook, stir, and mix the ingredients together in a large pot. The marshmallows are ooey gooey, while the butter makes them silky smooth, and the rice krispies cereal gives it a base and structure form. Altogether this is a delicious and yummy treat!

- Prepare. Line a 9×13″ (or 9×9″ for thicker bars) baking dish with foil and butter. Set aside.
- Melt. Melt butter in a large saucepan over low heat. Add marshmallows and stir until they begin to melt.
- Mix. Once the marshmallows are almost melted, stir in the cereal and the extra marshmallows. Mix until completely coated in the marshmallow mixture.
- Press. Add mixture to a baking dish and push down with a spoon coated in butter or wax paper.
- Cool. Let cool completely before cutting. I like to cut mine with a plastic knife.

5 star review
“These really are the best, so gooey and delicious. I guess my baby in my belly loved them too cause she made me eat almost the whole pan alone.”
-Michelene
Key Tips for the Best Rice Krispies
Here are some ways to make sure that you have the very best rice krispie treats! Follow these tips and you will have an easy treat in no time. These are simple to make and come together quickly!
- Butter your Pan. Because rice krispies are on the sticky side, they tend to stick to the pan. My favorite method to avoid this is to line my baking dish with aluminum, then butter the foil. I let the foil hang a little over the edges of the dish, so that I can easily grab it and remove them from the pan.
- Use Low Heat. In order to get that gooey and fluffy texture that makes them so delicious, it’s important to melt the butter and marshmallows over low heat slowly. It may take a little longer, but it will result in a perfectly soft rice krispie treat. If you use too high of heat, you could end up with a hard texture.
- Mix in Extra Marshmallows at the End. What takes them from ordinary to extraordinary is to reserve about 2-3 cups of the mini marshmallows to mix in at the very end. This makes them super gooey and delicious.
- Let Cool Before Cutting. It’s important that you let them cool completely and harden a bit before cutting. If you try to cut them while the butter and marshmallows are still warm, they won’t hold their square shape. I usually let mine cool for about 30 minutes prior to cutting. You could even stick them in the fridge or freezer for a few minutes to speed up the process. I find it works best to cut the rice krispies into squares with a plastic knife.
Recipe FAQs
There are about 10 to 12 cups of cereal in a 12-ounce box of rice krispies. So to make this recipe, you’ll need about half a box of cereal. If doubling the recipe, you’ll use a full box. I love to have multiple boxes on hand so that I can easily whip them up whenever I’m in a pinch!
Most rice krispie treats don’t get soggy. They usually do become dry and hard if they are not stored properly. Cover the pan with the lid or plastic wrap tightly. When ready to serve, cut the treats into squares or shapes.
In all recipes especially baking it is all about balance and ratio. You will need the perfect balance or ratio between marshmallows and butter to make this treat perfect. Too much marshmallow and butter can make the treat too sticky, soggy, or wet whereas not enough can result in a dry and hard treat.

Storage and Freezing
To keep them fresh, store them in an airtight container or zip-top bag. You could even wrap the squares in foil or plastic wrap to eliminate sticking. They will keep at room temperature for 1-3 days.
To freeze, individually wrap the squares in foil and place them in a zip-top freezer bag. Store in the freezer for up to 2 months. Let thaw at room temp for about an hour or so before enjoying.
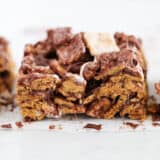
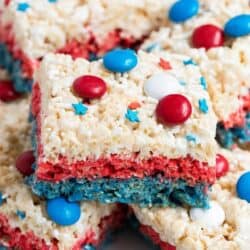
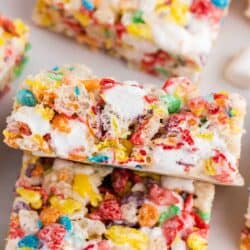
Check out These Other Fun Variations

HUNGRY FOR MORE? Subscribe to my newsletter and follow on Facebook, Pinterest and Instagram for all the newest recipes!
Rice Krispie Treats Recipe
Ingredients
- 5 Tablespoons butter
- 16 ounce mini marshmallows
- 6 cups rice krispies cereal (about 1/2 a box)
Instructions
- Line a 9×13″ (or 9×9″ for thick bars) baking dish with foil and butter. Set aside.
- Melt butter in a large saucepan over medium-low heat and then add 7-8 cups marshmallows. Once they are almost melted, stir in the rice krispies cereal and remaining 2-3 cups of mini marshmallows. Mix until completely coated with the marshmallow mixture.
- Add mixture to baking dish and press down with a spoon coated in butter or wax paper to compact and level out surface.
- Let cool before cutting. I find using a plastic knife to cut them works best.
Notes
Nutrition
Nutrition provided is an estimate. It will vary based on specific ingredients used.
Did you make this recipe? Don’t forget to give it a star rating below!

Jamielyn Nye is the founder and recipe creator at I Heart Naptime. She is also the author of the I Heart Naptime Cookbook. Here you will find easy family-friendly recipes for every occasion.