
How to paint perfect striped walls
Today I’m going to show you how to paint perfect striped walls. I will say it comes with a little (okay A LOT) of patience, but the outcome is fabulous!
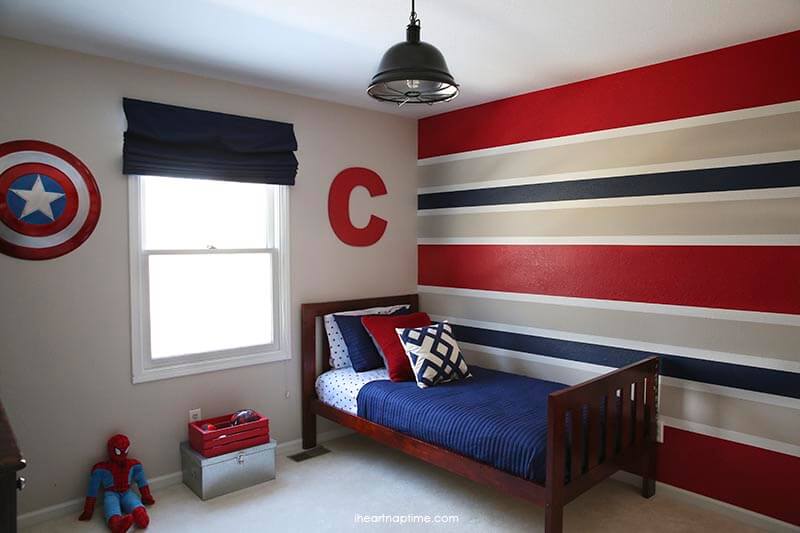
You may remember seeing my son’s room makeover a few weeks ago. Several of you have e-mailed me asking for a tutorial on the wall and I apologize this post has taken me so long to get up! I almost didn’t take pics along the way, but I’m glad I snapped a few! 😉
How to paint perfect striped walls
Supplies:
- Blue painters tape
- Plastic to lay on the floor
- Paint (desired colors)
- Paint brushes
- Laser level
Instructions:
1. The first thing you’ll need to do is measure your wall. You’re going to need to figure out how thick you want your stripes, how many stripes, etc. Then comes some math to make sure everything evens out. My red stripes were 13 1/2 inches thick, the white were 2 inch, the grey 7 inches, and the blue 5 inches to give you a perspective.
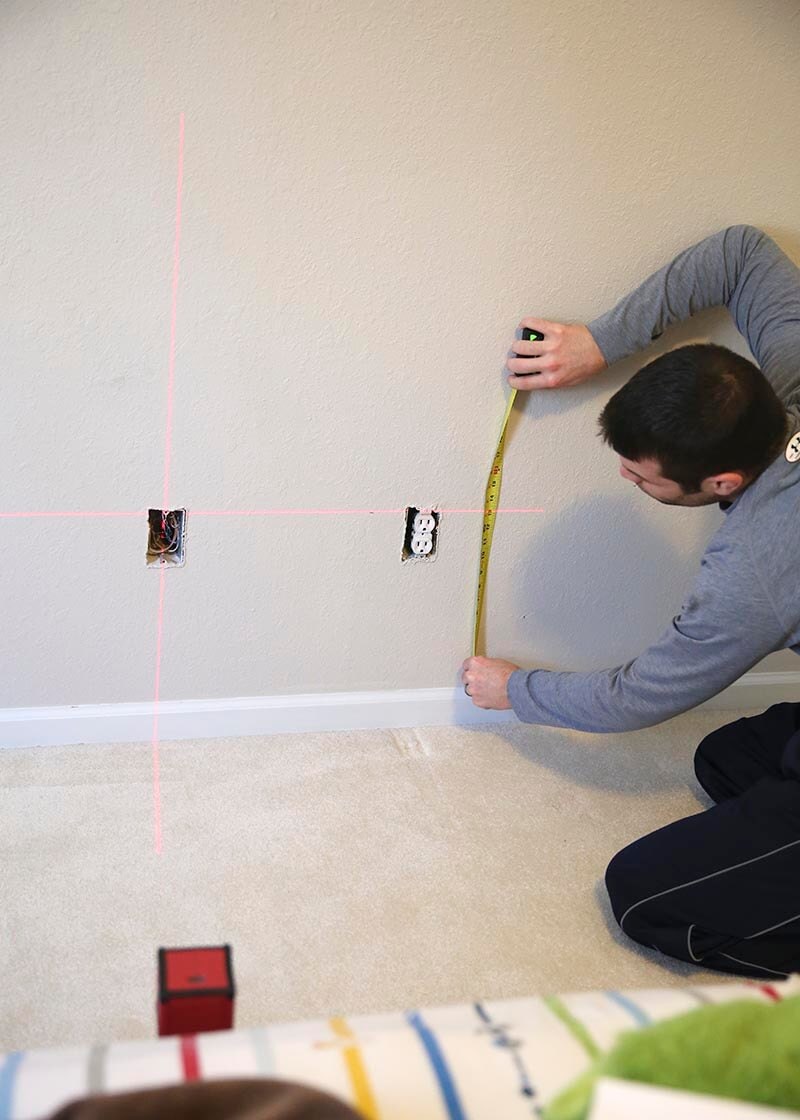
2. Then you’re going to grab a laser level (if you don’t have one borrow one) and start marking out the lines according to the math that you did earlier. It’s best to mark little lines across with a pencil and then line up the tape. Make sure to measure equidistant all the way across to make sure you have a straight line. There is nothing worse than having to start over!
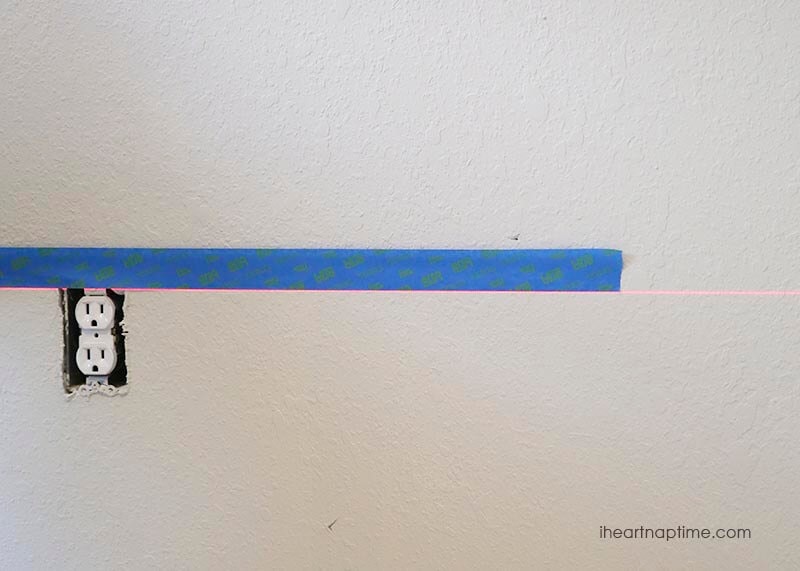
3. Line up that tape and push down to secure the edges. You can see that the one of the taped lines is a little off in the picture below so we made changes before we started painting.
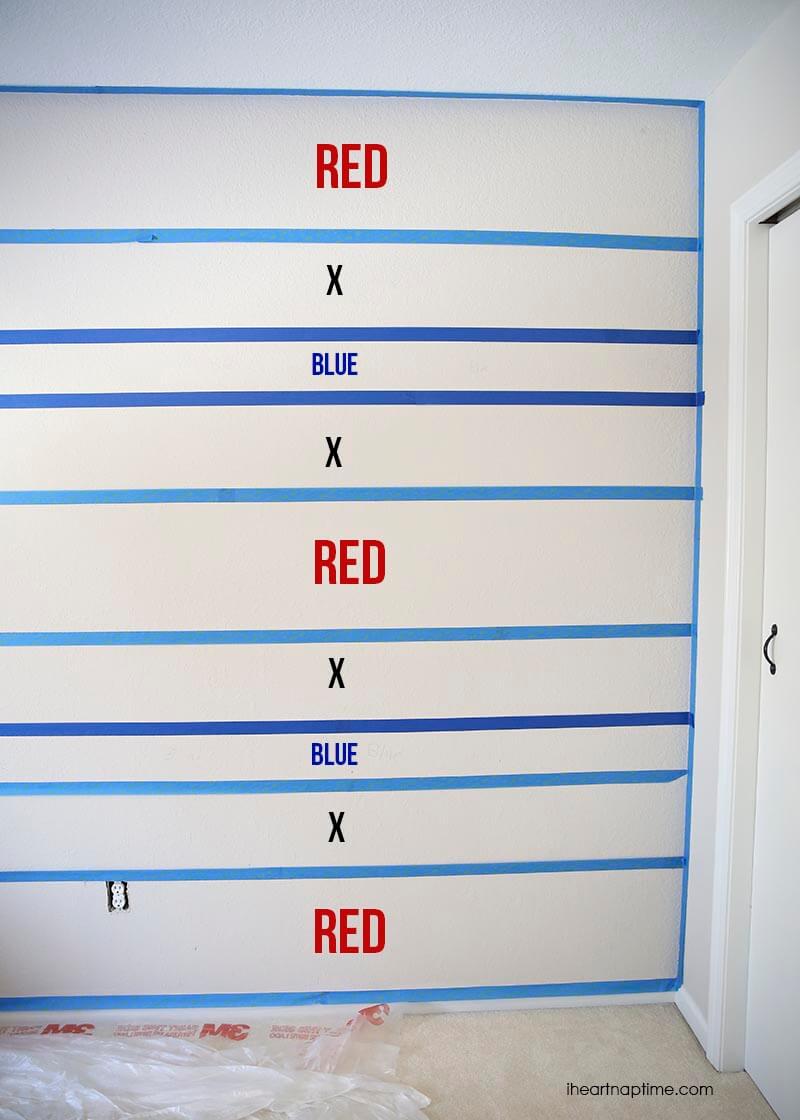
4. For the first round we just painted the red and blue. You can paint every other space at this point if you want to maximize your time, just remember that the wall underneath the tape needs to be painted as well according to your preplanned measurements. This can get tricky if you try painting too many spaces at once.
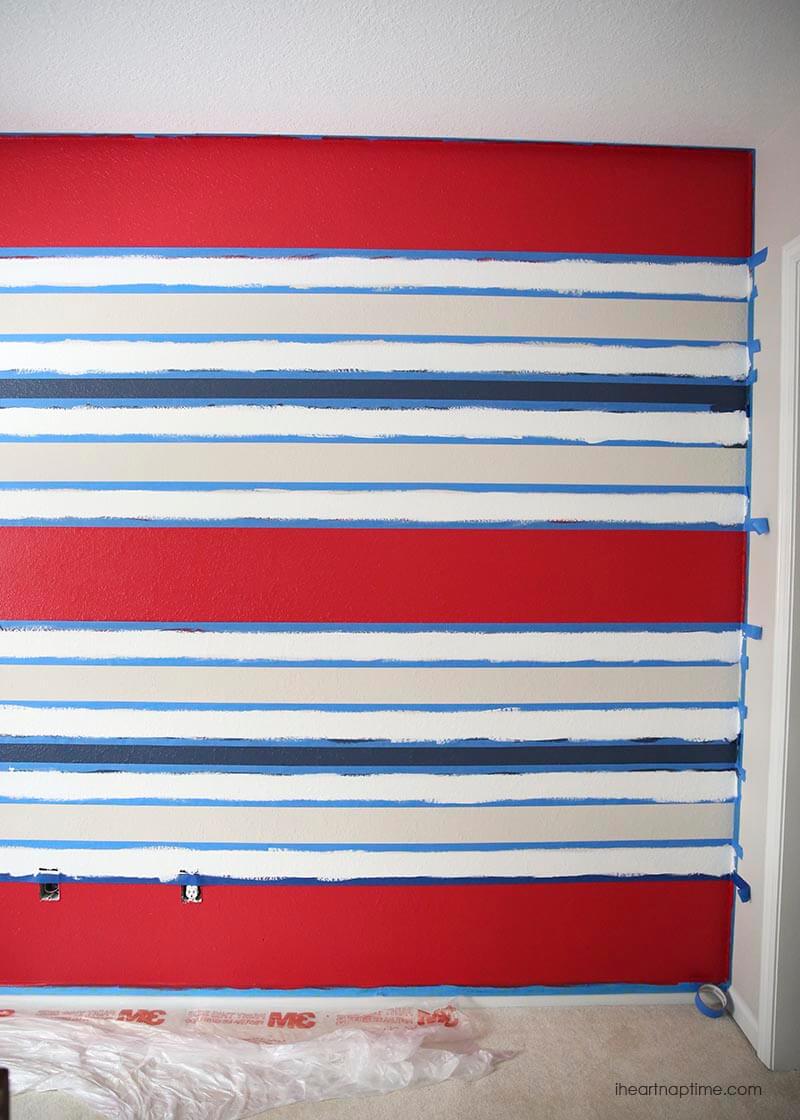
5. Once the red and blue dried (you may require more than one coat!) we went back and sealed off the red and blue so we could paint the white stripes without bleeding onto our recently finished stripes.

6. Now here is a tip for getting perfect lines, without any bleeding, smudging or smearing. BEFORE painting two adjacent stripes, paint onto the tape’s edge to seal it with the base color (you can see the grey color I used above). Basically you paint the incorrect color along the edge of the tape (in this example the gray first, then white once it dries). Allow to dry. Then proceed to paint the stripe as you desire. This will insure that nothing leaks through. You can even use a faux clear glaze like we did in this post, but we didn’t have any on hand so this was cheaper and easier than going to buy more.
7. Once your paint has started to dry, slowly peel the tape away at an angle. Don’t wait too long to take the tape off or it could get stuck and peel some paint off with it.
Now grab a Dr. Pepper, some chocolate, good music and a painting buddy! That will make it more fun! 😉
Feel free to leave any questions in the comments.
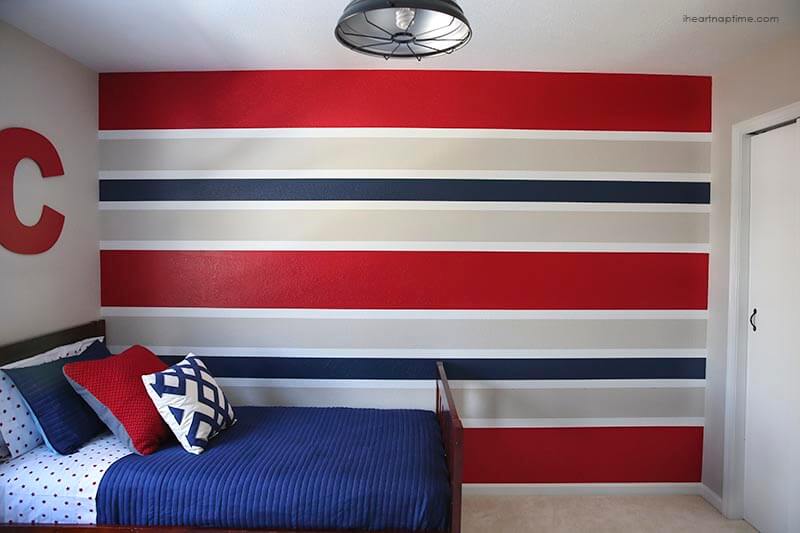
To see the whole room reveal click HERE.


His room turned out great! LOVE it!!
I was going to say that I use a clear matte medium from the craft store or art supply store. I put the tape down, then paint of the edges of the tape with the clear matte medium. No bleeding edges. 🙂
So after sealing the edges and then painting, taking the tape off won’t pull up the sealant and paint?
Hi Laurel! No it doesn’t, just pull slowly and at an angle. 🙂
So you started with the wall completely one color and added stripes in top. Does it matter what order you paint the stripes..light to dark? Or did you just go from top to bottom? It looks like you did red and then white? We are doing a similar pattern in my daughters room and she is convinced if I paint the wall light blue first it will tint all the other stripes.
Hi! Yes basically I did the bigger stripes first and worked my way from top to bottom. It may be wise to start with the lighter colors first though so you don’t have as many coats to cover the paint underneath. I would paint the base color whichever stripes will be the biggest (preferably a lighter color). If it’s a lighter blue I think it will cover fine. Hope that helps! Good luck!
Which paint specifically did u use? I’m looking to recreate this look for my son. It’s stunning!
wanting to confirm: when you went back and painted the white stripes, you used the main wall color to seal the paint–not the red or the blue. I want to do this but am concerned about getting the white stripes’ edges that meet the blue and red crisp and straight!
I have the same last question as Tricia, to seal the tape, you used the main wall color, or the color of the adjacent line?
Perfection!!
What colors did you use? I am looking at doing an accent wall with blue, grey, red and maybe brown. We usually use Sherwin Williams. Reds can be so challenging to use.
Hi Sarah! I love Sherwin Williams! The red we used is Showstopper Red (SW 7588) and it is the perfect red…not too orange or pink. We also used Agreeable Gray (SW 7029) for the other walls, Pure White (SW 7005) for the small stripe and Indigo Batik (SW 7602) for the medium stripe. All of these colors were satin finish with the Emerald line of paint. We also used Pure White in Pro Industrial (semi-gloss) for the trim. Hope that helps!
Thanks for the measurements! Worked like a dream in my son’s room.
I’m so glad you were able to use this tutorial in your son’s room!!
Hi I love your project, is there anyway u could tell me which brand paint and colors u used? My son loves the color u used
Hi Monica! The red we used is Showstopper Red (SW 7588) and it is the perfect red…not too orange or pink. We also used Agreeable Gray (SW 7029) for the other walls, Pure White (SW 7005) for the small stripe and Indigo Batik (SW 7602) for the medium stripe. All of these colors were satin finish with the Emerald line of paint. We also used Pure White in Pro Industrial (semi-gloss) for the trim. Hope that helps!