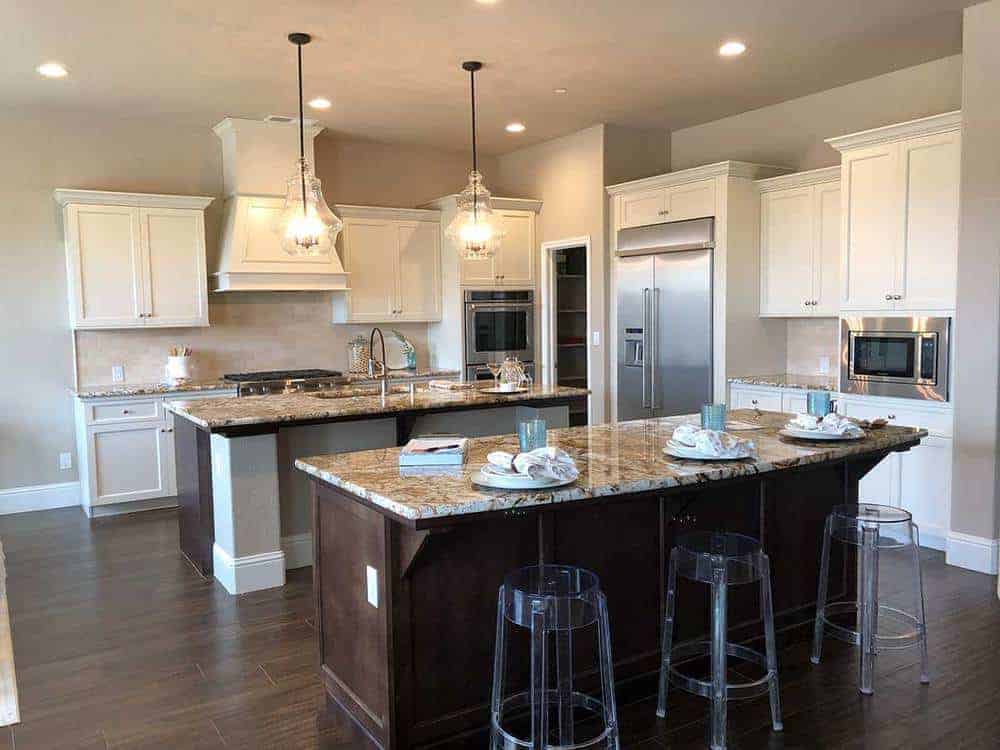
Welcome to our new kitchen! This is the heart of our home and where we spend most of our time together baking and making memories. I can’t believe I get to take you on a tour. I wish I could have you all over for a dessert party! Wouldn’t that be fun?
When I walked into our home and saw the kitchen I instantly fell in love. I spent years dreaming of this kitchen and honestly still can’t believe I get to cook here every day. I am so so grateful and I’m so excited to be able to cook in our new kitchen and to create more recipes and videos for you!

I remember in my first kitchen being able to reach all of the cupboards, stove and fridge by standing in the same spot. It was about the size of our current pantry. And I honestly adored that kitchen. It’s where I first learned to cook. We have so many fond memories there. You also may remember our third kitchen which was one of our first big remodels we did on our own. My fourth kitchen was the one I wrote my cookbook in. I honestly love remodeling kitchens and love how this space turned out. Gah, still pinching myself!

Before
Here’s what the kitchen looked like when we bought it. Now I know some of you will be thinking… it was already nice before. It was already a SUPER nice kitchen and we were SO grateful that we didn’t need to change the cabinets, appliances and light fixtures. This project was nothing like remodeling our fixer upper. Since I do cook for a living and shoot all of my photos in my kitchen, I really needed the space to be a little brighter. There were also a few cosmetic things I knew we could do to make the home more our style.
Here’s what we changed
- Countertops – I wanted to be able shoot my photos on my countertops, so we added a marble looking surface. The name is Neve quartz.
- Paint -The whole house was painted in a beige flat paint (even the ceilings), so we had the main living area painted Repose Grey at 50% (SW 7015 Sherwin Williams) and then did pure white on the ceilings.
- Back splash – When we did our fixer upper I had planned to do a white subway tile all the way to ceiling and then we went WAY over budget. So in this house I really wanted to have that and luckily it was in the budget. I think it makes such a big statement and makes the ceilings feel taller.
- Islands – On the first island we added X trim on the edges and then wrapped the existing dry wall with shiplap. We had the painters match this island to the existing cabinets. For the second island we wanted to make that more of a stand alone piece. We had them add two columns and then paint it Blue Note (2129-30 Benjamin Moore)
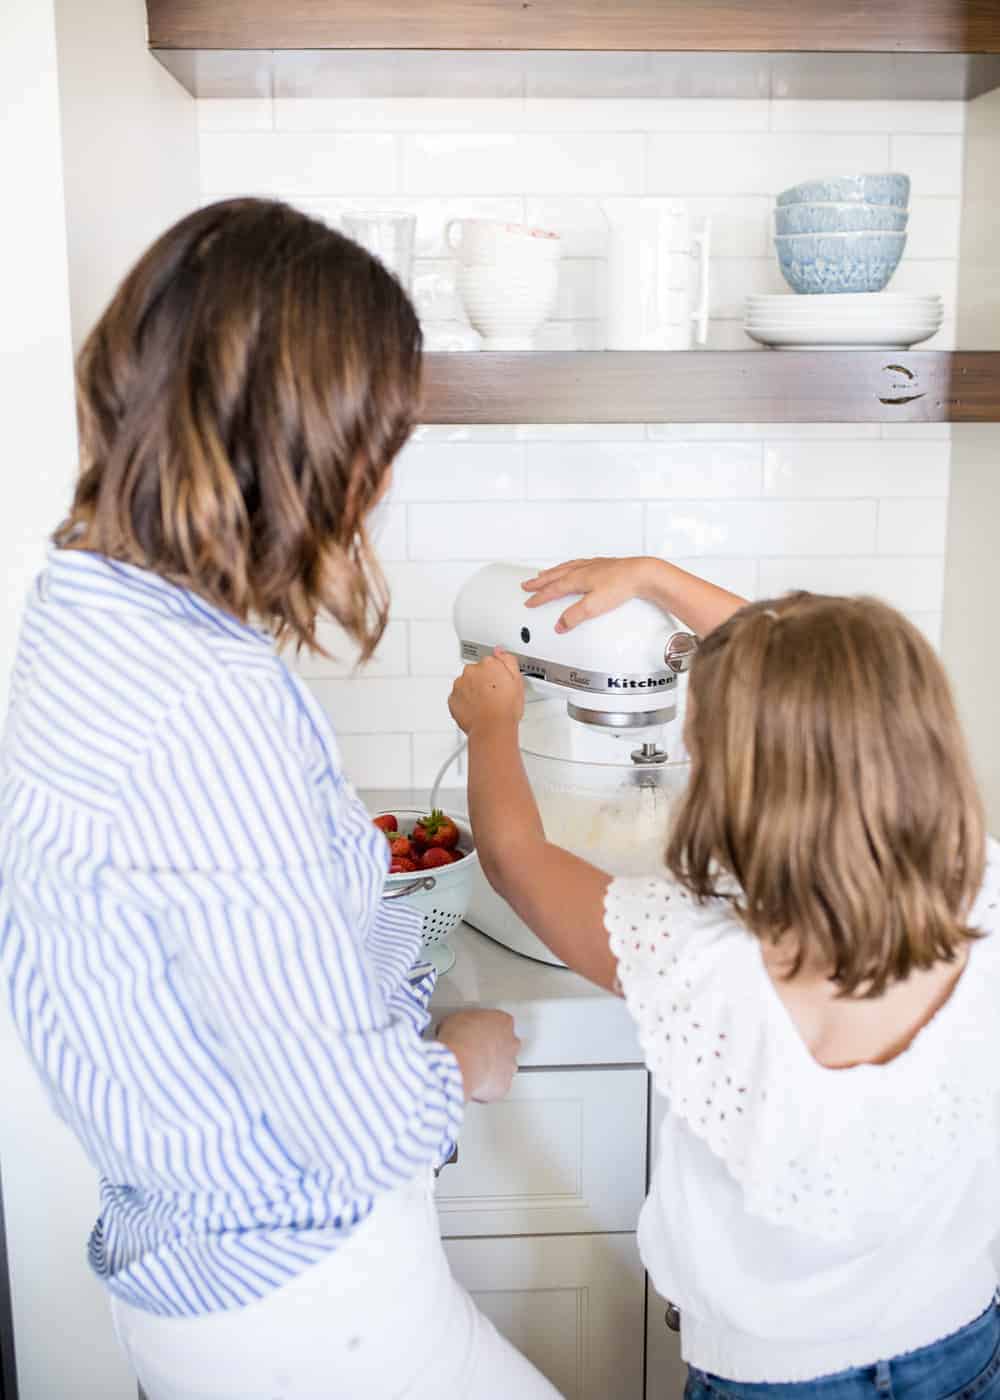
- Added floating shelves – I wanted to add floating shelves to open up the space and be able to have a spot for easy access to dishes. We ended up removing the upper cabinets in between the fridge and microwave and added them there.

We also ended up adding a pot filler above the stove. I love how it looks, but I’m not going to lie… I’m not completely sold on it yet. It’s nice to be able to fill the water right there, but it seems like any time I open the faucet the water is a little brown. Any tips?


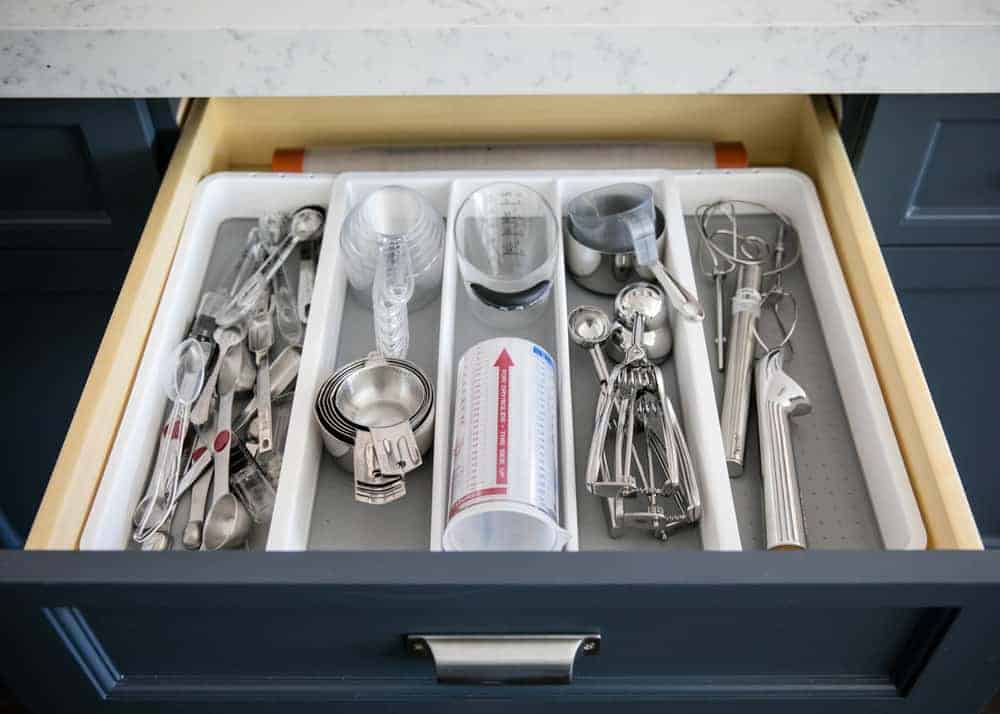
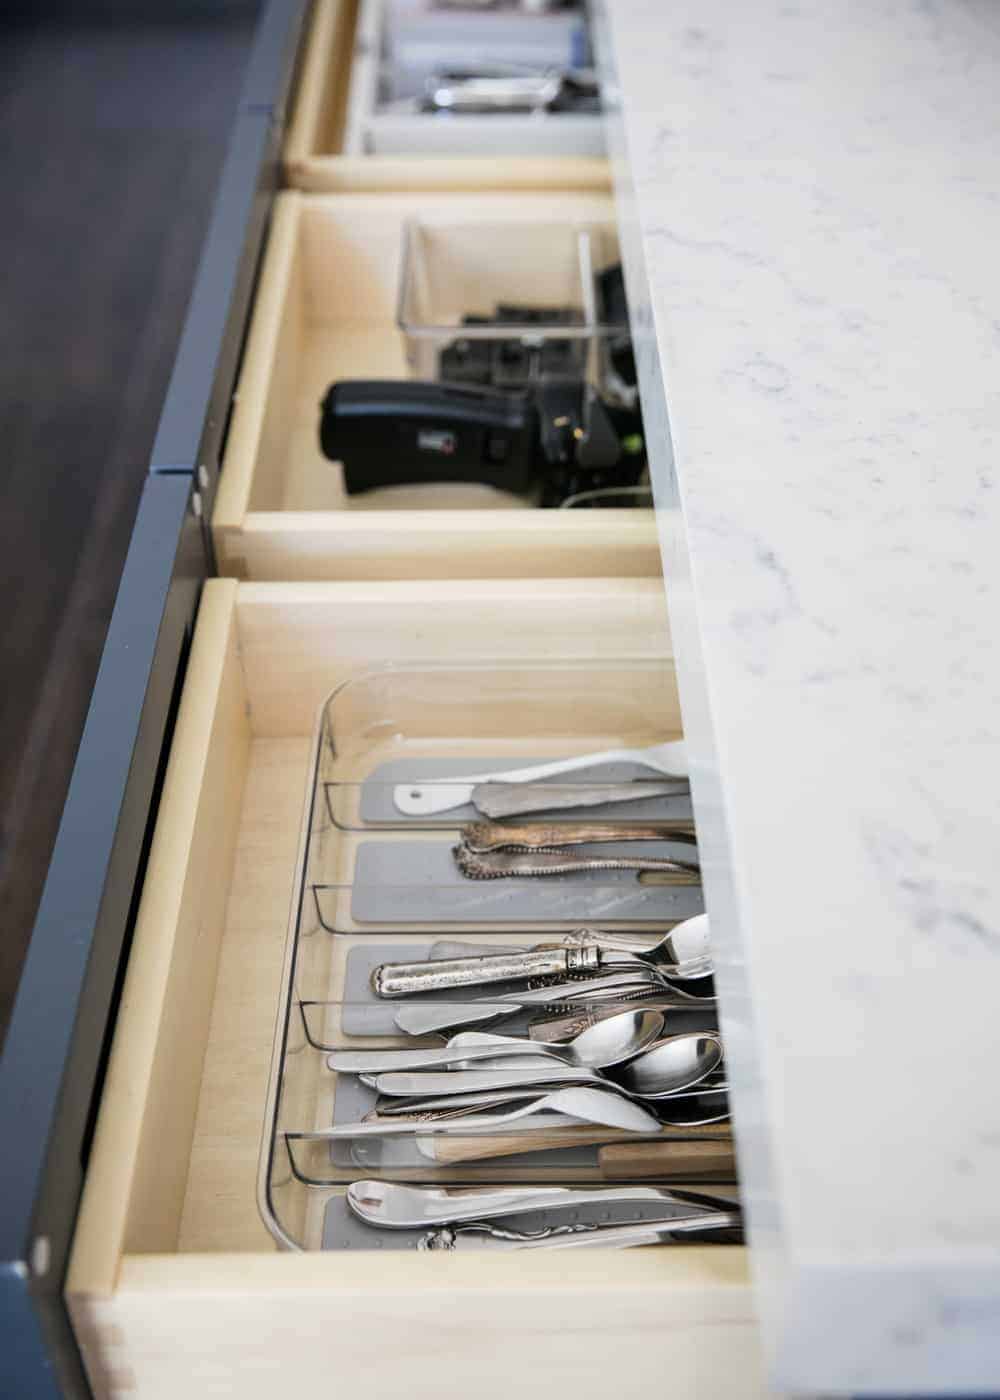
One of my main goals with this kitchen was to keep it organized! I bought expandable drawer organizers from Home Goods to help keep all my measuring spoons and tools organized for baking. The blue island is where I keep most all of my baking supplies and styling accessories for my photo shoots. It’s been really nice to have the space in my kitchen instead of running back and forth from room to room during a photo shoot.
Last week I shared all of my tips for organizing my pantry. Check out that post for all the details. I LOVE having a container for each item and surprisingly the kids have kept it pretty organized.

Open floor plan
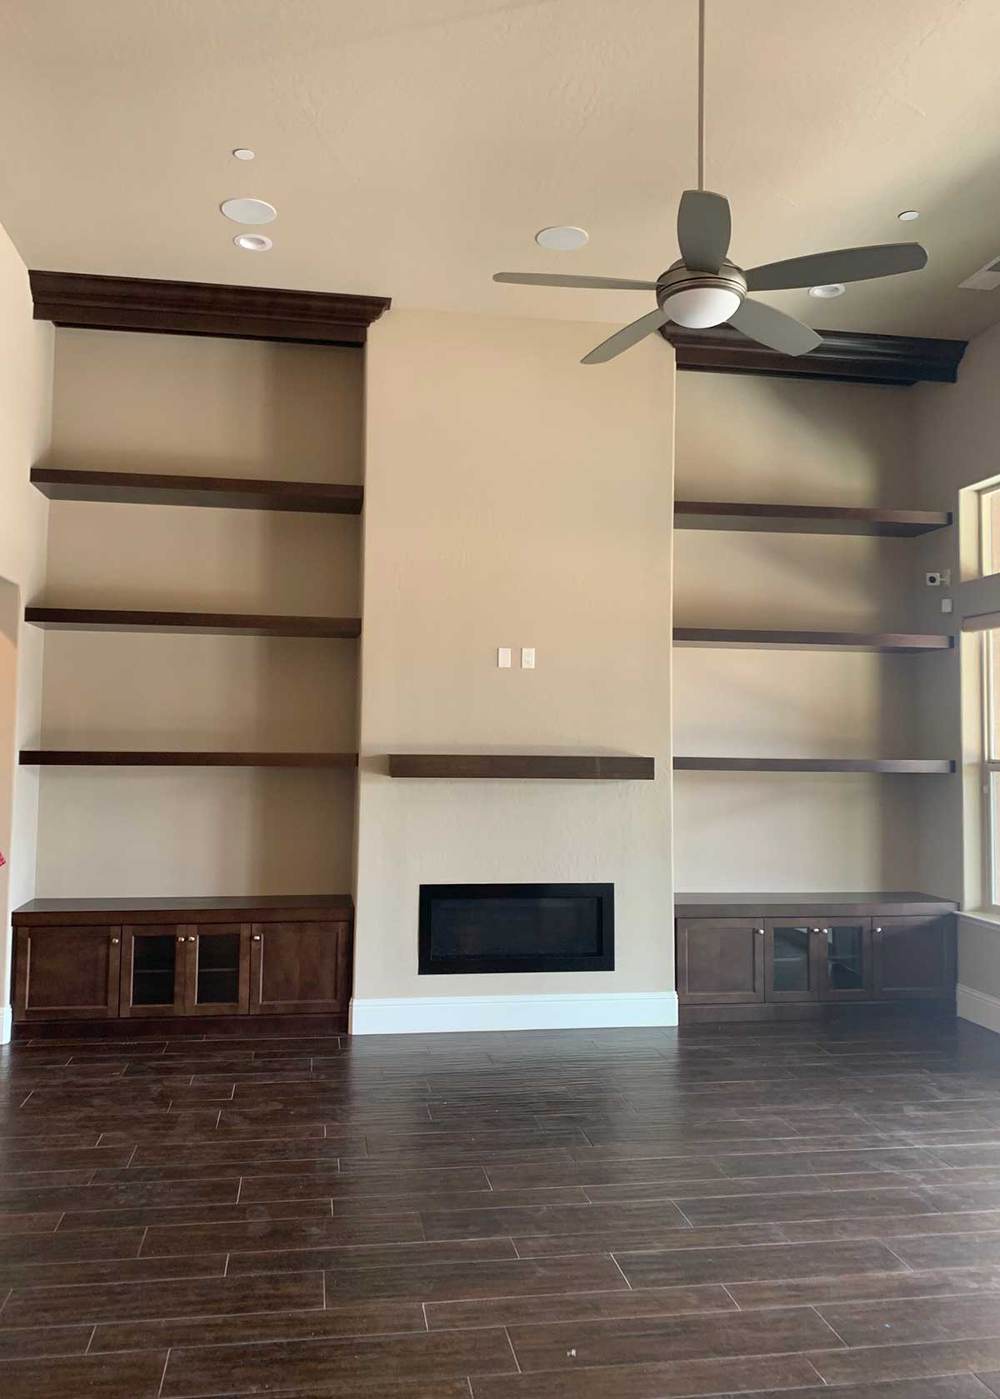
Honestly the open floor plan with the kitchen and living room completely sold us. I love that they flow right into each other. I’m still working on rearranging a few things in the living room, but I absolutely love this cozy space. I can’t wait to decorate for Christmas! Here’s a little before of the living room.

In this space we did the same color on the walls (repose grey at 50%) and pure white on the ceilings. Then we had white shiplap added behind the shelving and painted the base of the cabinets white. We also added beams to the ceiling and then had a mantel built around the fireplace to make it feel a little more cozy.

Kitchen resources:
- Kitchen paint colors: Repose Grey at 50% (SW 7015 Sherwin Williams)
- Blue kitchen island: Blue Note (2129-30 Benjamin Moore)
- Countertops: Neve quartz
- Fixtures: Unfortunately I don’t have any info on the lights or anything built in because they were already here when we bought the home.
- Backsplash: 3×12 Italian white subway tile (Daltile Shape 3121P, Color AR93) with rolling fog color grout
- Stools: we found the backless stools at Target. I found the leather stools on clearance at West Elm, but they also have a similar leather counter stool at Target.
- Drawer organizers: I love these expandable drawer organizers. You can find all different sizes.
Thanks for joining me on my kitchen tour! If you have any questions, leave them below and I’ll do my best to answer them. Now let’s get cooking!! Can’t wait to make some more recipes for you!
Categorized as: DIY, Kitchen Tips

Jamielyn Nye is the founder and recipe creator at I Heart Naptime. She is also the author of the I Heart Naptime Cookbook. Here you will find easy family-friendly recipes for every occasion.

Absolutely beautiful, we just moved back in our home after a natural disaster after 18mos. Was able to redesign my whole kitchen to make it my dream. Now to conquer my pantry. Would love to know where you got the canned goods organizers & white bins
Thank you
So sorry to hear that but glad you were able to make it your dream kitchen! You can find the links to both of those in this pantry organization post: https://www.iheartnaptime.net/pantry-organization/ under the “Pantry storage containers” section :)
Your Home is beautiful! I’m hoping for easy and healthy meals.
Really interesting. How about a pure water tap or bar. With mineral dispenser? Then you have the perfect kitchen??
Everything is beautiful!! Where did you get the wooden beams??
Hi Erik! My contractor found them from a local wood shop.
I am loving the two islands and the colours! So fresh and bright. Enjoy your new kitchen!
Thank you so much! :)
we just finished our kitchen! Lots of similar elements! I have not shared full photos but a few snippets on instagram! Now I just need to learn how to cook! ha
I love the tile up to the ceiling! You have a great style!
Thank you!!
So beautiful!
Absolutely gorgeous. I’ve enjoyed following you over the years, you always have great content. Congratulations on 10 years.
Thank you so much Connie! :)
Beautiful space! Love the changes you made.
Thank you so much!