Easy Homemade Gravy
How to make an easy homemade gravy with or without pan drippings! You'll never buy a store-bought packet again with this easy, flavorful gravy recipe.
Ingredients
- 2-3 cups pan drippings (can subsidize with chicken broth)
- 3 Tablespoons unsalted butter
- 3 Tablespoons all-purpose flour or cornstarch
Optional seasonings: Salt & Pepper, Worcestershire sauce
Instructions
- Separate drippings from fat. Pour 2-3 cups meat drippings, getting every last drop and loosening any browned bits, from the roasting pan into a fat separator, or through a fine-mesh sieve. If you don't have 2 to 3 cups, add chicken or beef stock until you do.
- Make the roux. In a large saucepan, melt 3 Tablespoons butter over medium heat until it starts to bubble. Whisk in 3 Tablespoons flour until thickened and formed a paste. Cook 2 minutes or until smooth and creamy, but not browned. Wait to add any seasonings until after the broth has been added.
- Whisk and simmer. Slowly whisk in the meat drippings. Alternate whisking and adding liquid until you reach the consistency you like. Bring to a light simmer. Cook 3 to 5 minutes, or until it has thickened. If you'd like a thicker gravy, add less liquid. Add more liquid for a thinner gravy.
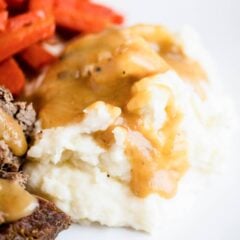
- Season and serve. Season with salt and pepper (or additional seasonings), to taste. Add 1 to 2 dashes Worcestershire, if desired. Pour into a gravy boat. Serve warm over meat and mashed potatoes.
Notes
Cooking Note: If I'm making a roast, I will add beef broth. If I'm making turkey gravy, I will use chicken broth.
Gravy too thin? Remove 1/4 cup liquid from the pan and whisk in an extra Tablespoon flour. Then whisk back into gravy and allow to simmer a few minutes. Repeat as necessary.
Gravy too thick? Add more drippings or liquid until you reach your desired consistency.
Storage: This gravy will keep in an airtight container in the fridge up to 4 days.
Freeze: Because this is not a cream-based gravy, you can absolutely freeze it for up to 3 months without it separating. Freeze in individual portions and only thaw what you need!
Nutrition
Calories: 35kcal, Carbohydrates: 1g, Protein: 1g, Fat: 3g, Saturated Fat: 2g, Polyunsaturated Fat: 0.1g, Monounsaturated Fat: 1g, Trans Fat: 0.1g, Cholesterol: 8mg, Sodium: 149mg, Potassium: 24mg, Fiber: 0.1g, Sugar: 0.01g, Vitamin A: 87IU, Calcium: 4mg, Iron: 0.2mg
Nutrition provided is an estimate. It will vary based on specific ingredients used.
