

How to make an easy homemade gravy with or without pan drippings! You’ll never buy a store-bought packet again with this easy, flavorful gravy recipe.
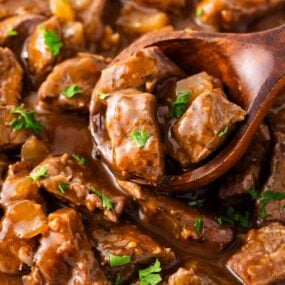
I used drippings from pot roast but you can also use pan drippings from a roasted turkey breast like I do in this turkey gravy or use roasted chicken.

This post may contain affiliate links. Read disclosure policy.
Table of Contents
Easy Gravy Recipe
Growing up, one of my favorite jobs was to help my grandma make the mashed potatoes and brown beef gravy with our Sunday pot roast. This recipe is adapted from hers but with the addition of rich, flavorful butter.
The key to making easy homemade gravy is creating a creamy roux before adding the liquids. The roux helps to thicken the consistency and gives it a perfect gravy-like texture. It tastes amazing over roasted turkey, sides, and even dipped in a dinner roll or biscuit.
3 Ingredients for Easy Homemade Gravy
Simple to make and perfect for beginners, you’ll never purchase store-bought gravy again!

Find the full printable recipe with specific measurements below.
- Butter: I like to use unsalted butter. That way I can control the amount of salt used and my gravy isn’t overly salty.
- Flour: This helps thicken the gravy. Flour is my first choice, although corn starch also works great.
- Pan drippings: Use the pan drippings (every last bit) from cooking your meat. You can also use chicken broth.
How to Make a Gravy Roux
Making a perfect roux (or slurry) for homemade gravy is very simple with these tips!
- Melt butter over medium-low heat in a large saucepan. Allow to start to bubble but don’t overheat.
- Whisk in flour and continue whisking until it has darkened, thickened and formed a paste. Stir constantly to avoid burnt flour!
- Cook for 3-5 minutes breaking up any lumps to avoid a lumpy homemade gravy recipe. It should be smooth and creamy.
How to Make Homemade Gravy from Scratch

- Make the roux. Use the following steps above to make your roux with flour and butter.
- Whisk in broth. Slowly whisk in the broth from the meat. Alternate whisking and adding liquid until you reach the consistency you like.
- Simmer, then season. Simmer for a few minutes. Season with salt and pepper (or additional seasonings), to taste. Add a dash or two of Worcestershire if desired.
Tips for the Best Gravy
- Fat is essential for perfect gravy! Strain the drippings in a mesh strainer to separate fat from drippings.
- If you don’t have 3 cups of drippings, pour in some beef broth or chicken broth to compensate.
- Whisk, whisk, whisk! You’ll basically be whisking the entire time until the consistency is just right.
- Add in poultry seasoning, garlic powder, onion powder or fresh herbs like parsley, sage, rosemary or thyme for additional flavor.

More comfort food recipes we love include homemade biscuits and gravy, Swedish meatballs and this homemade meatloaf recipe !
More Ways to Use Gravy
Easy Homemade Gravy
Ingredients
- 2-3 cups pan drippings (can subsidize with chicken broth)
- 3 Tablespoons unsalted butter
- 3 Tablespoons all-purpose flour or cornstarch
Optional seasonings: Salt & Pepper, Worcestershire sauce
Instructions
- Separate drippings from fat. Pour 2-3 cups meat drippings, getting every last drop and loosening any browned bits, from the roasting pan into a fat separator, or through a fine-mesh sieve. If you don't have 2 to 3 cups, add chicken or beef stock until you do.
- Make the roux. In a large saucepan, melt 3 Tablespoons butter over medium heat until it starts to bubble. Whisk in 3 Tablespoons flour until thickened and formed a paste. Cook 2 minutes or until smooth and creamy, but not browned. Wait to add any seasonings until after the broth has been added.
- Whisk and simmer. Slowly whisk in the meat drippings. Alternate whisking and adding liquid until you reach the consistency you like. Bring to a light simmer. Cook 3 to 5 minutes, or until it has thickened. If you'd like a thicker gravy, add less liquid. Add more liquid for a thinner gravy.
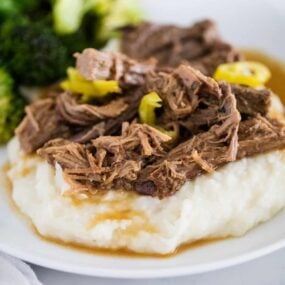
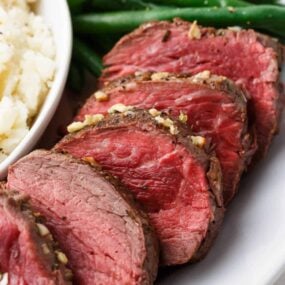
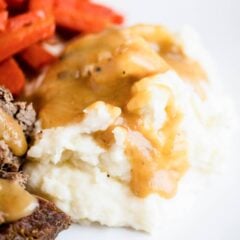
- Season and serve. Season with salt and pepper (or additional seasonings), to taste. Add 1 to 2 dashes Worcestershire, if desired. Pour into a gravy boat. Serve warm over meat and mashed potatoes.
Last step: Please leave a comment and rating after you make the recipe.
Notes
Nutrition
Nutrition provided is an estimate. It will vary based on specific ingredients used.
Recipe FAQs
Really any type of meat you roast will make a wonderful gravy, including chicken, turkey, rack of lamb or prime rib.
You sure can! Simply use cornstarch in place of the flour and you should be good to go.
Cook the roux until it reaches a medium brown color for a regular brown gravy. It will smell somewhat like popcorn cooking (but not burnt popcorn!). For a dark brown gravy, you will need to cook the roux for a longer time over very low heat. It will have a dark appearance and smell nutty.
Everything! Ok, maybe not everything, but I pour it over mashed potatoes, sausage stuffing, turkey, and even Parker House rolls.
This gravy will keep in an airtight container in the fridge up to 4 days. Because this is not a cream-based gravy, you can absolutely freeze it for up to 3 months without it separating. Freeze in individual portions and only thaw what you need!

Bethani
Exactly what I was looking for! 💗
I Heart Naptime Community
I’m so glad! I hope you enjoy it Bethani :)
Adele
Nice and easy. Coloring was good.
Sara
Perfect! Used some turkey broth I had frozen instead of pan drippings and it was great!
Martise
It was so good thanks 👍 for the recipe 😄 made my mom so happy
I Heart Naptime
So glad your mom was loved it! Thanks for sharing!
Jessica Formicola
You had me at 3 ingredients and 10 minutes! Such an easy recipe that is perfect for the busy holidays!
Beth
I love the idea of butter in the gravy! I haven’t tried that before. Can’t wait to test it!
Emily Liao
This gravy recipe was so delicious! Loved this one.
Jamielyn Nye
I’m so glad you enjoyed it!
Dannii
I think I will finally make my own gravy this Christmas and this looks really easy. Thanks!
Sara Welch
This looks so smooth and delicious; will be perfect on some mashed potatoes! Yum!
Britni
Loved this and it was so easy! Thank you1
Claudia Lamascolo
This is perfect timing! I just made a roast for tonight and this actually will go perfectly with the potatoes thanks!
Cathy
My family is such a fan of mashed potatoes + gravy!
Krista
Homemade gravy is the best! I have to try yours!
Michelle
Homemade gravy is the BEST!! The store bought stuff just doesn’t compare.
Abeer
Looks great! This gravy would be the perfect addition to my Christmas dinner!
Chrissie Baker
This gravy was delicious! Also so easy! I’m so glad to finally have a wonderful gravy recipe. Thanks, as usual, a winner!
Erin | Dinners,Dishes and Dessert
I have to put this on my menu!
Alyssa Brantley
Super easy to make and looks delicious! This homemade gravy is perfect for the holidays or any time a comfort food dinner is on the menu!