
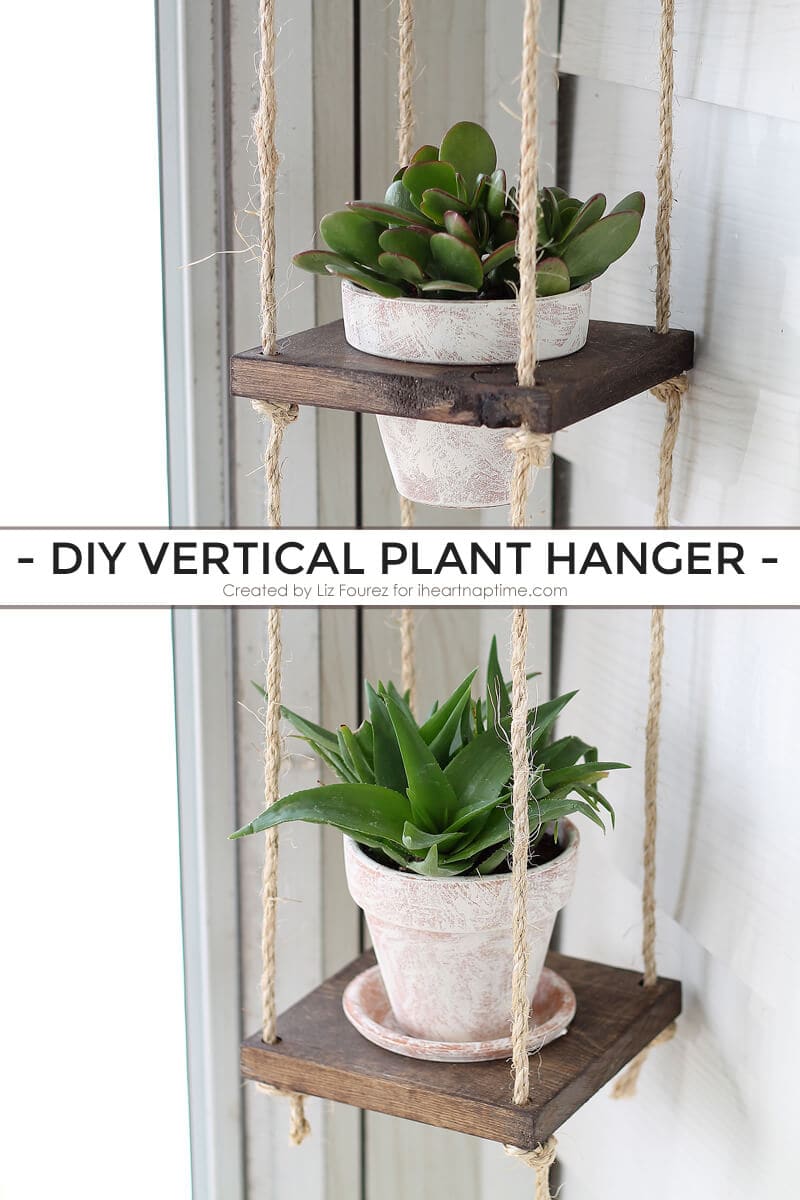
DIY Vertical Plant Hanger
DIY Vertical Plant Hanger By Liz of Love Grows Wild for I Heart Nap Time.
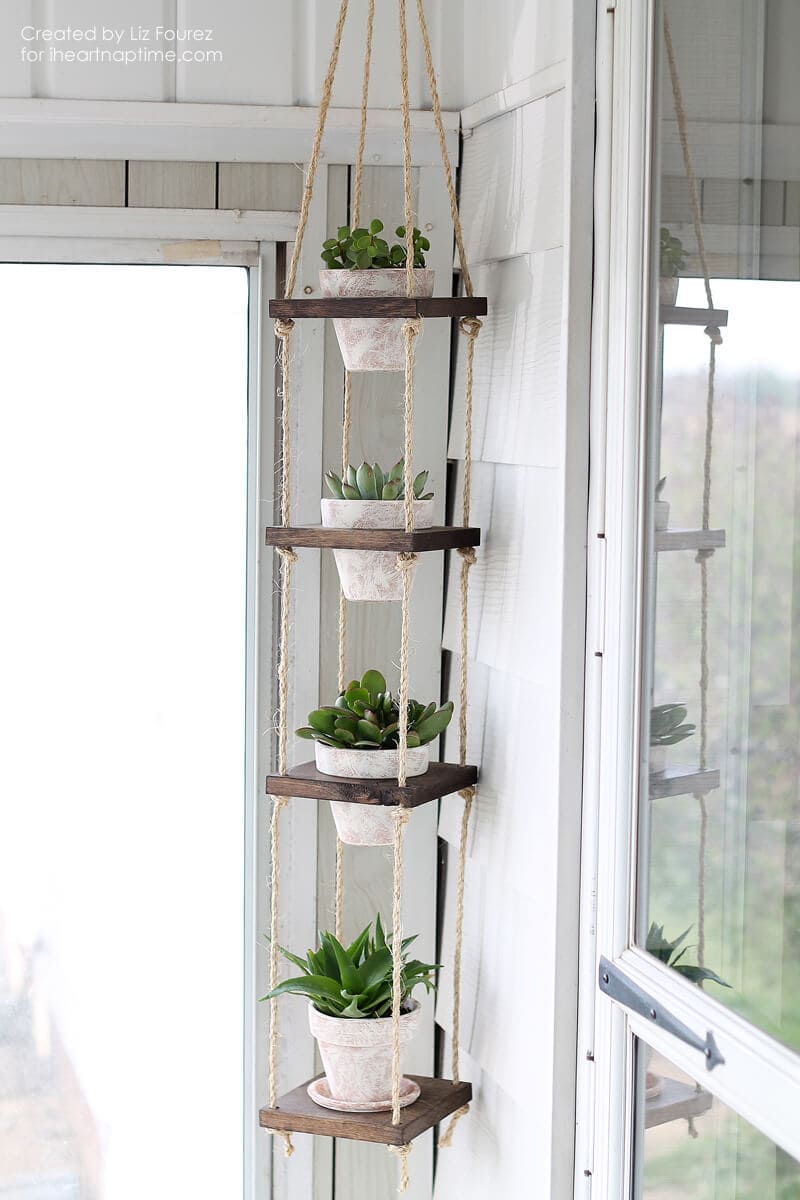
Hi again, friends! Are you ready to get your hands a little dirty? Go grab your garden gloves and some pretty plants, because today we’re going to create a gorgeous DIY Vertical Plant Hanger! This project makes a beautiful display for your potted plants without taking up a ton of room. Perfect for small spaces! Let’s get started…
Supplies:
– scrap wood
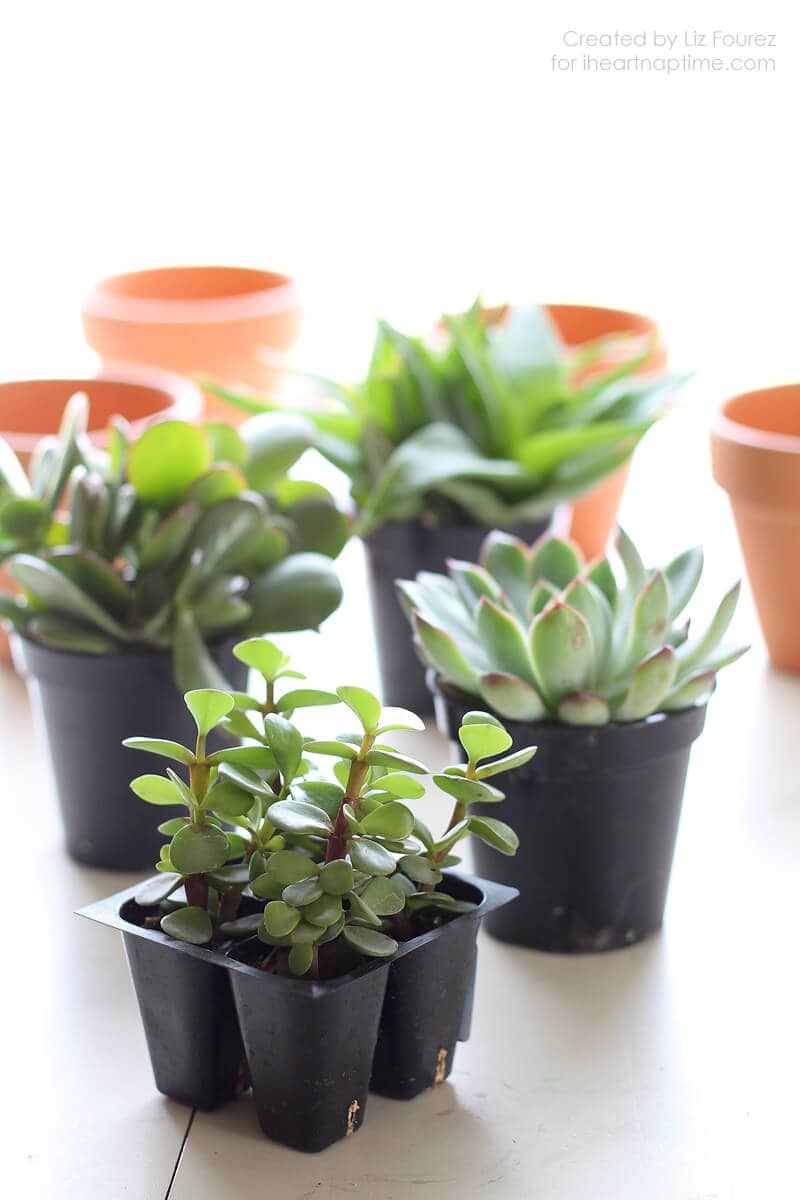
– terra cotta pots
– plants
– rope
– metal ring
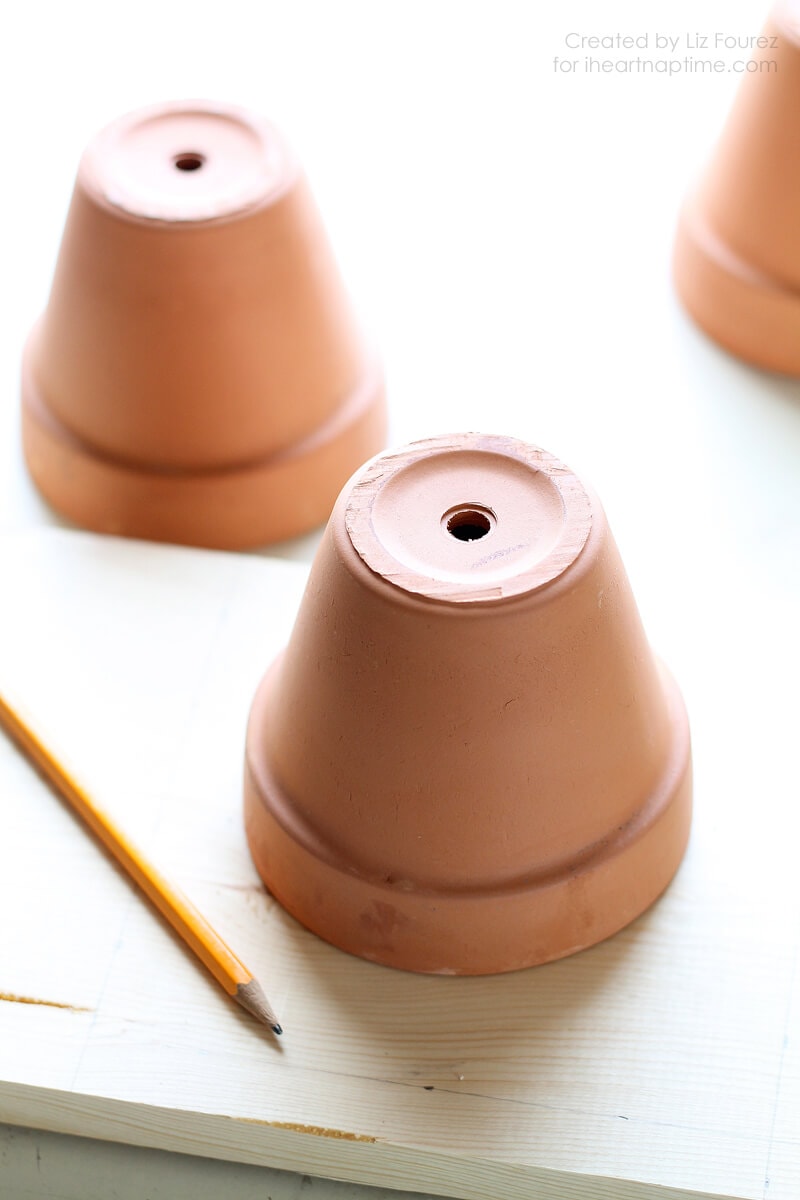
– drill and 3/8″ bit
– jigsaw
– sandpaper
– paint and/or stain
This project has a few different steps, but they’re all really simple to do. I’ve included plenty of pictures to show you how everything looks along the way!
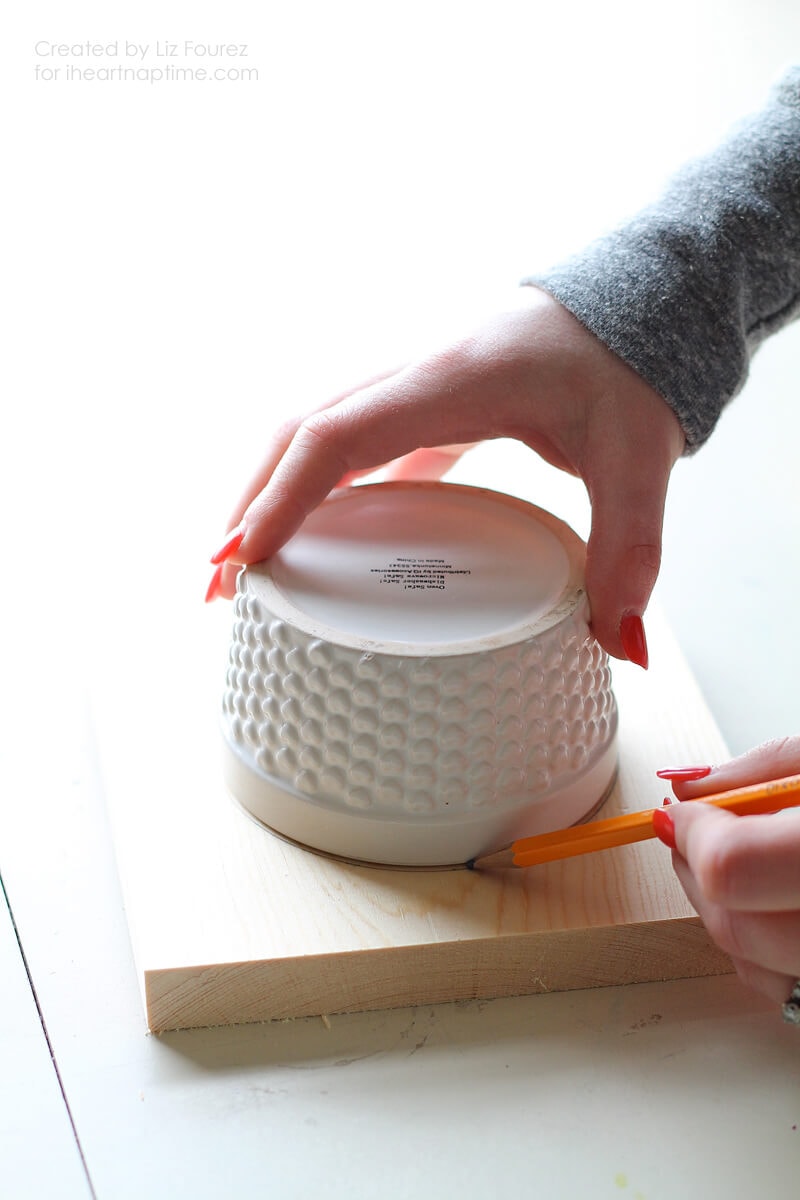
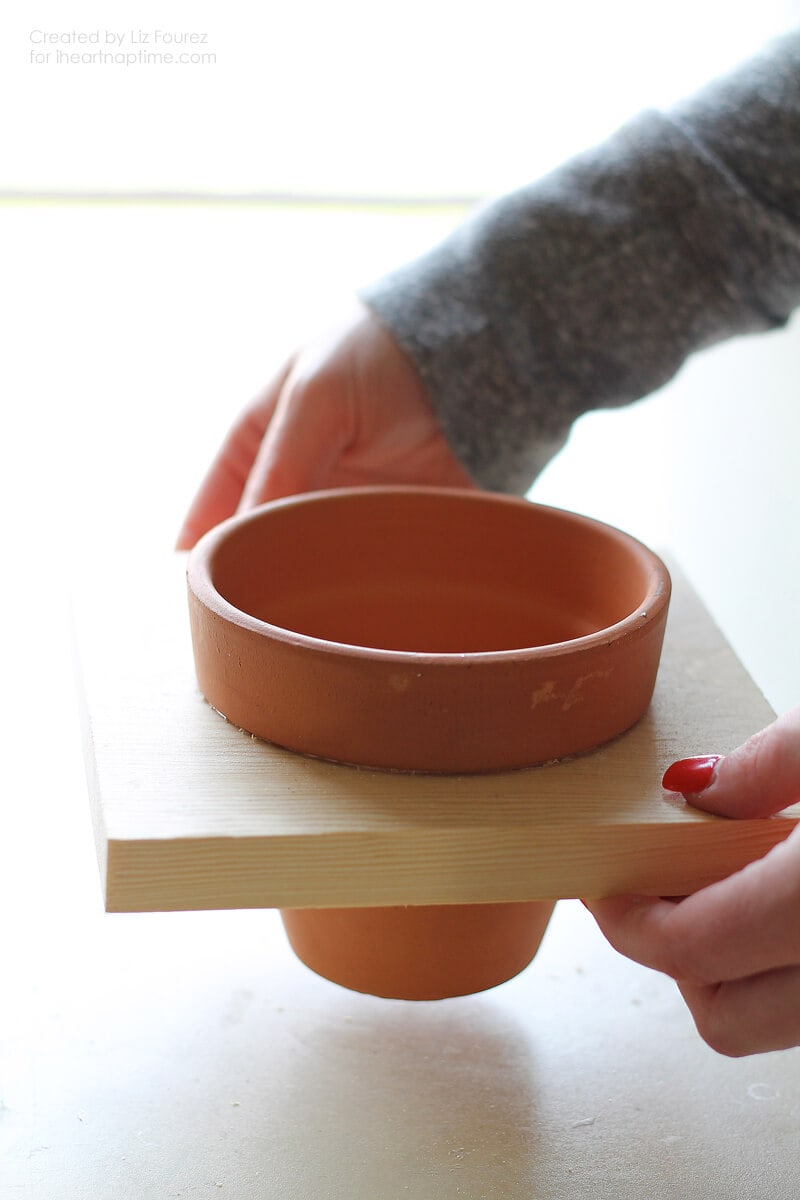
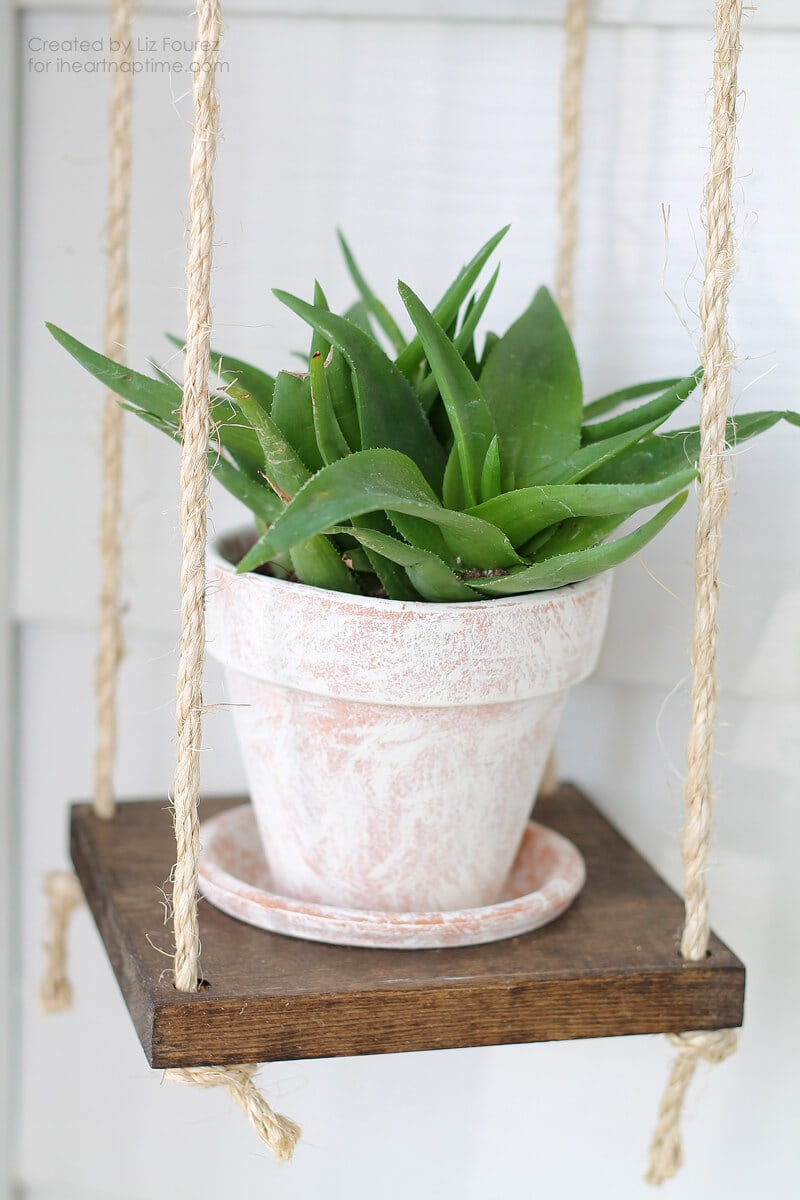
Start by placing a pot upside down on the wood. Measure and mark a square around the pot, leaving a 1″ border on the sides. I used 4 – 4.25″ pots for my plant hanger, so I drew 4 – 6.25″ x 6.25″ squares on my wood and cut them with a chop saw.
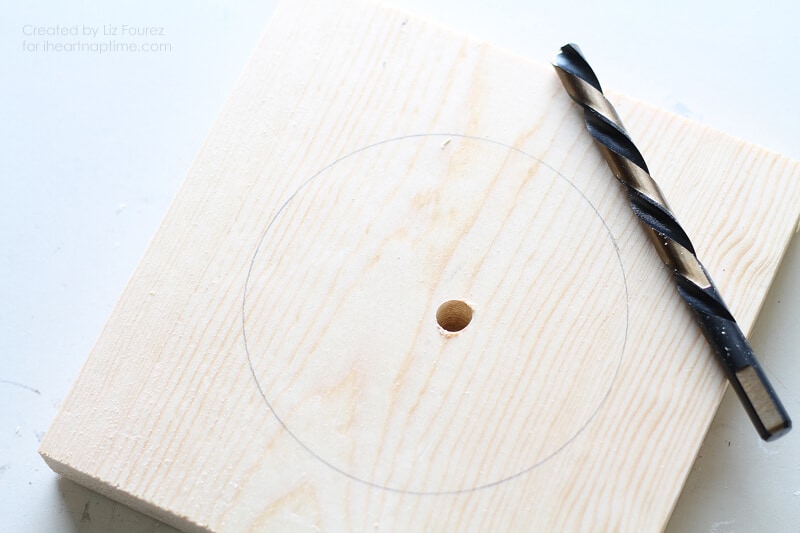
To create a hole for the pots to sit in, first trace the top of the pot in the center of the wood. Then draw another circle that is 1/4″ SMALLER inside the first circle. I traced around a small ramekin for mine.
Now you’ll need to cut the smaller circle out. I used a 3/8″ drill bit to create holes in the circle so I could fit my jigsaw blade inside. Then I used the jigsaw to cut around the circle until the piece popped out.
And now your pots should fit inside the wood squares!
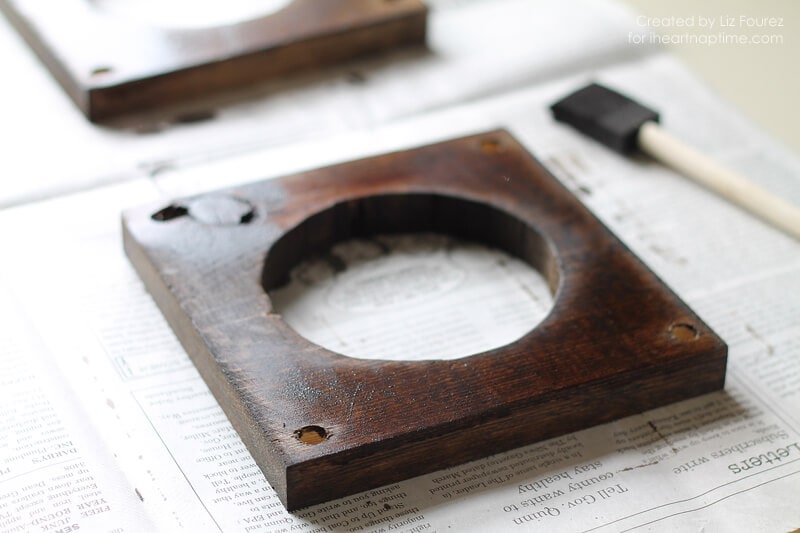
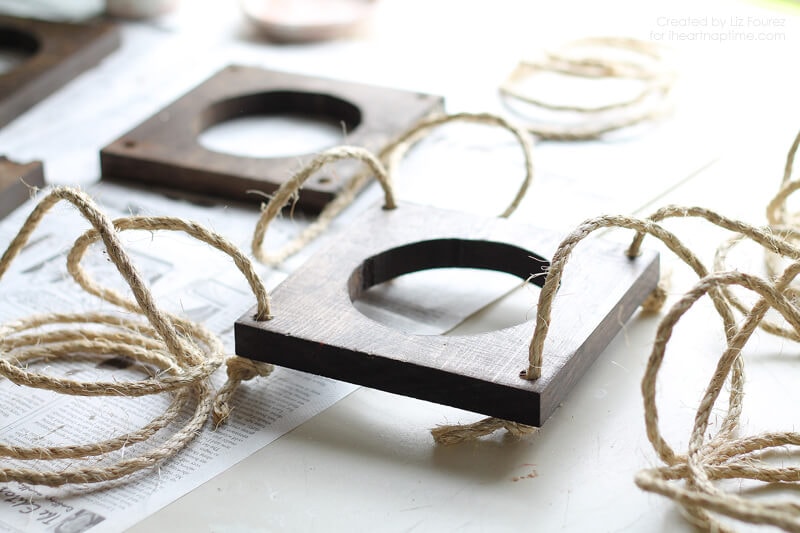
Next, drill a hole in each corner of the wood with a 3/8″ bit. This will be where the rope threads through.

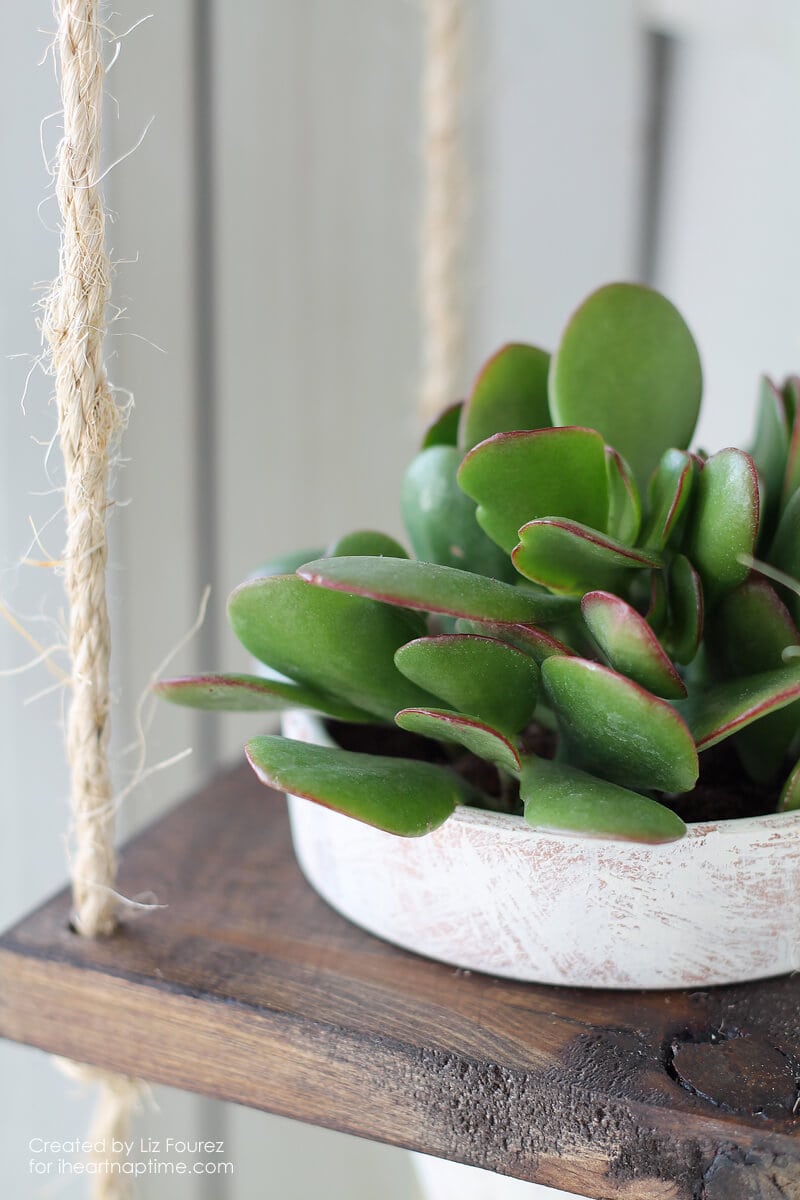
Sand the wood squares down to remove any splinters and paint or stain them however you like. I chose a pretty dark walnut stain for mine!
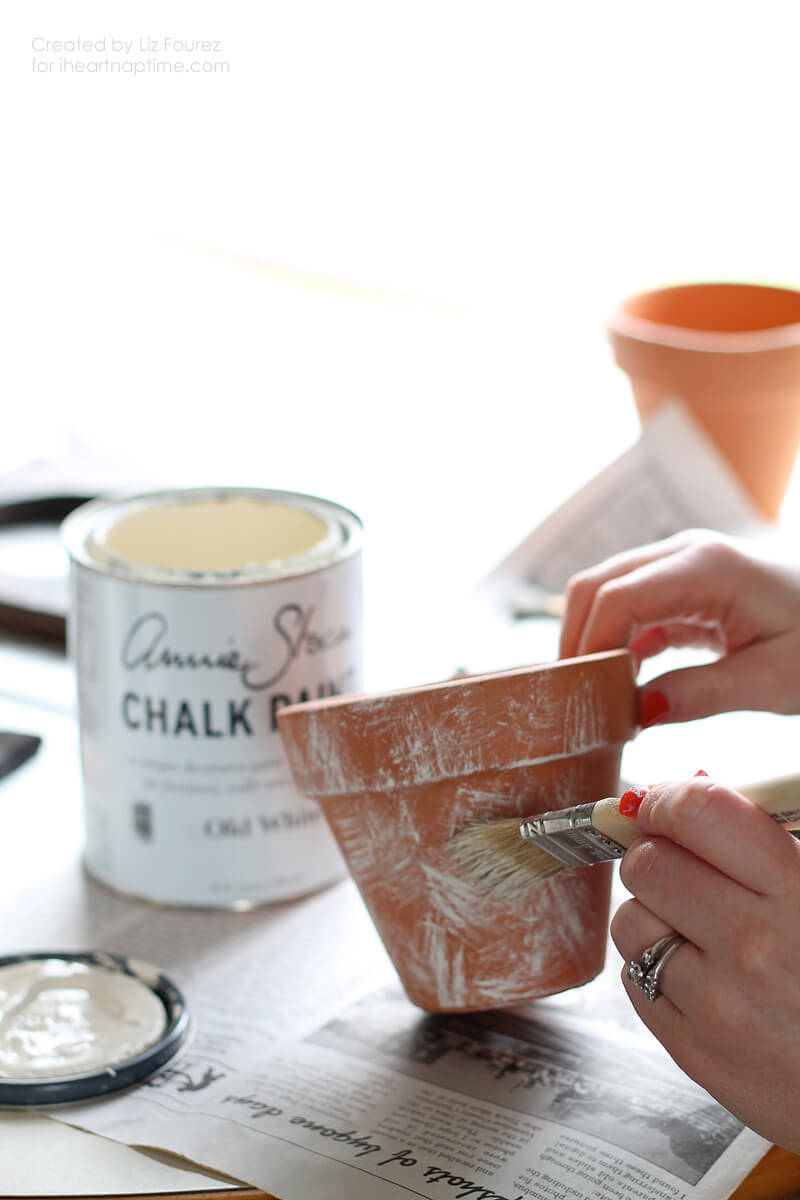
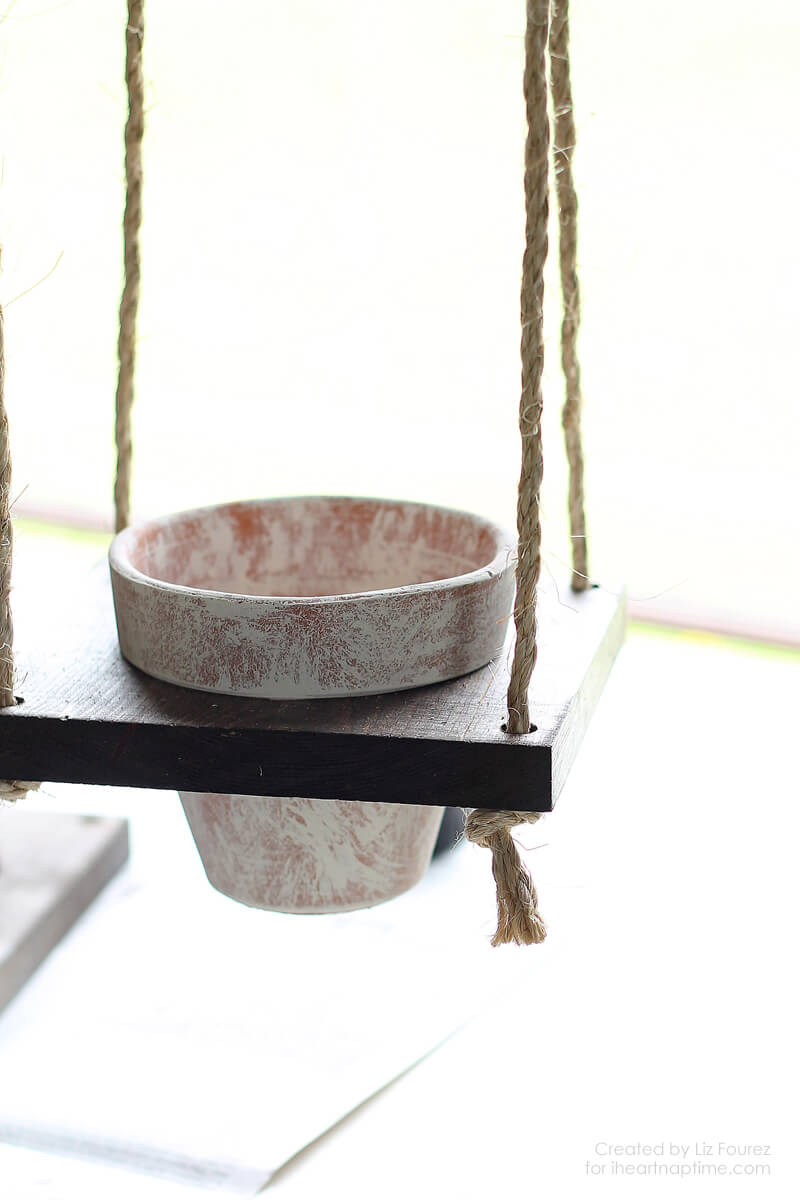
You can leave your pots plain or paint them if you like. I chose to dry brush some white Chalk Paint on mine to brighten them up while leaving some of the terra cotta showing underneath. I love this look! You can see this easy dry brushing technique << here.
Now it’s time to assemble! The size of your hanger will depend on how big and how many pots you’re using, so adjust the dimensions as needed.
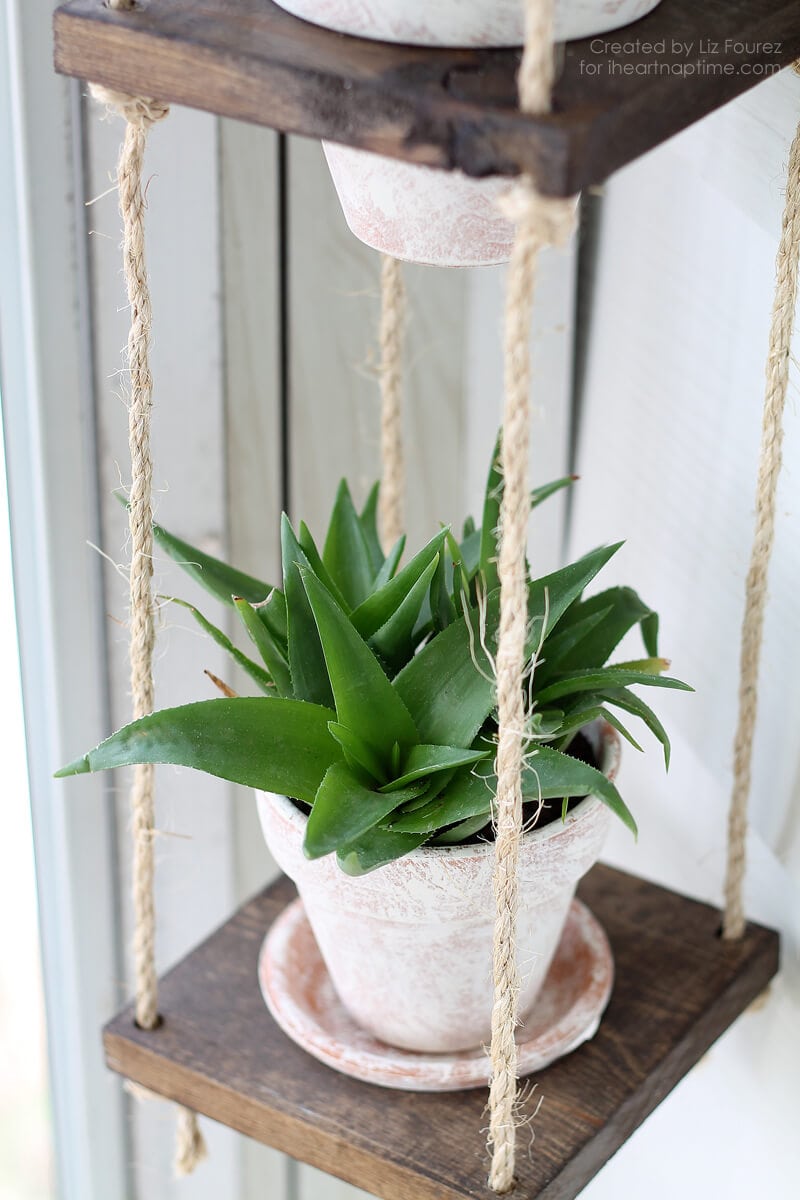
Cut four – 6 foot pieces of rope and thread them through the holes of one wood square. Tie a knot in each rope underneath the wood to hold it in place. This will be your bottom piece.
Tie another knot in each rope about 10-12″ above the last knot. Add the next wood square and slide it down to rest on the knots you just created. Repeat this process until all your wood pieces are in place. As you’re adding pieces, check to see if they are sitting level and make adjustments in your knots as needed.
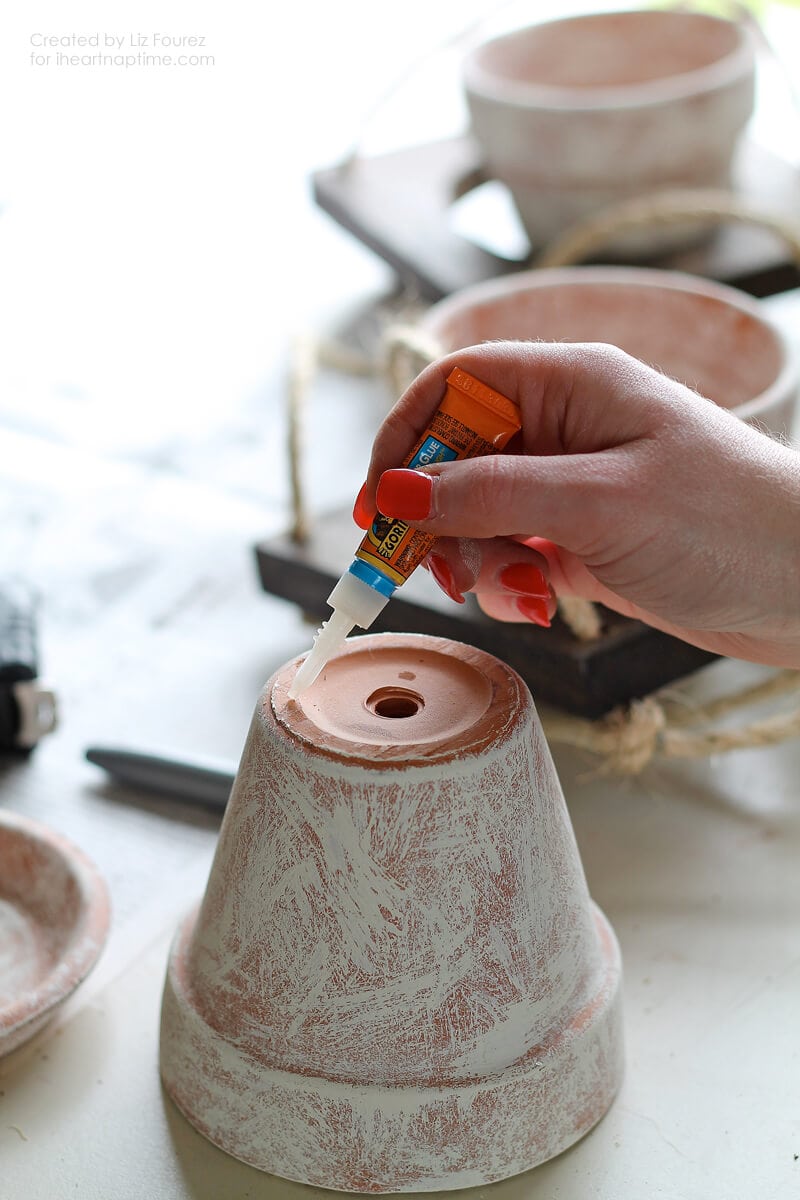
The genius behind these vertically-hanging plants is that when you are watering, any excess water will drip onto the plant below. Talk about easy watering! If you’re hanging this indoors, you’ll want to attach a bottom piece to the last pot to catch any water that runs out. I just used some super glue to attach the two pieces. If you’re planning on hanging this outdoors, you won’t need to worry about it!
The last step is to get some plants added to your pots! I chose a gorgeous variety of succulents, but you can use any kind of flower or plant that you like!
TIP: Cut a coffee filter down to fit in the bottom of your pot, then add the soil over the filter. This will allow water to drip through, but keep your soil from falling out!

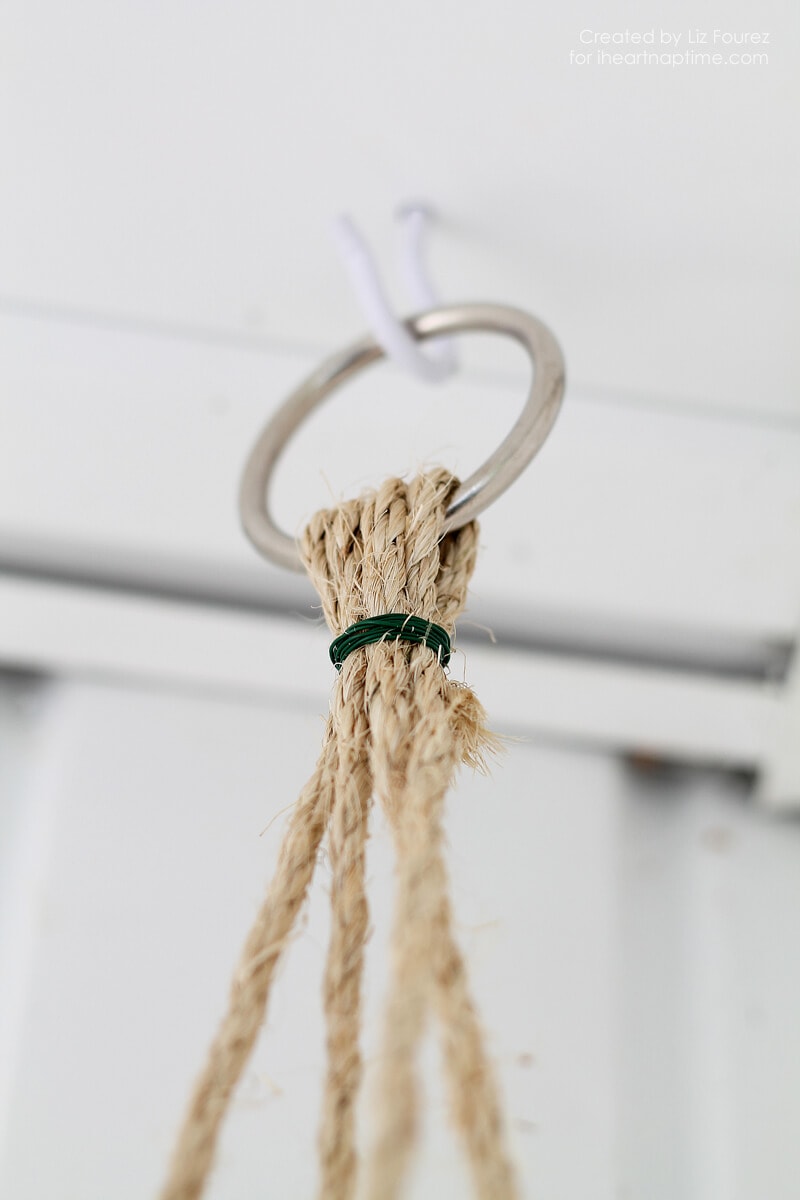
To hang your plants, pull the top of the rope pieces through a metal ring (found in the hardware section at Lowe’s, Home Depot, etc.) and secure by tying a knot or wrapping floral wire tightly around the rope.
Now step back and admire your new piece plant hanger! Depending on how tall each of your plants are, you may need to raise or lower some of the wood pieces to create even spacing. Just loosen your knots a little and move them into place!
You’ll notice in these photos that I set the bottom pot ON TOP of the wood square instead of through it. I had already super glued the bottom piece to the pot BEFORE setting it inside the wood, so I had to improvise! It still worked out nicely though!
I have my plant hanger in the corner of our breezeway right by the front door. It’s such a pretty welcome into our home!
This project is perfect for anyone who loves having plants around, but doesn’t have a lot of extra table or floor space to house them all. Hanging them vertically is a great solution!
– Inspired by a project from Design Sponge.
Have fun creating and planting! xoxo Liz


This is SO cool! Thanks so much for the tutorial.
LOVE seeing Liz over here Jamielyn! She’s so amazing. This project will be great to spruce up my new porch.
Wow what a cool idea – pinning it for later!
What a great project!!
xoxo
“The genius behind these vertically-hanging plants is that when you are watering, any excess water will drip onto the plant below. Talk about easy watering!”
If you do it like she suggests, water sparingly. If you super glue the saucer on the bottom, the pot will lack drainage and succulents will die quickly when over watered. It would be best to skip the saucer and use this as an outside feature if you are going to do succulents.
LOVE this – and such a great gift idea!!
Wow – just utterly gorgeous! Such a clever and simple project, and it looks stunning.
wonderful.
Super CUTE!!! Can’t wait to share. Thanks for the idea.
This is a great way to add vertical plants! You could even use wider pots and plants which drape, not necessarily just succulents . To ease the weight you can use packing (popcorn) material at the bottom of bigger pots. I feel it would be safer to use a galvanized or brass rope clamp, which is sold at the hardware store (next to the rope) than to use wire which will rust and break very quickly.
I am so making this tomorrow. Love the idea
I just finished making this and looks great! I ended up just cutting two, long pieces of rope and looping them through the top ring so I didn’t have to tie them off. I used fake plants so no stopper necessary on the bottom pot. Thank you for the tutorial!
Thanks for stopping by Stephanie! Glad your plant hanger turned out great! 🙂
I love this, it looks great!! I wish I had the tools to make it.
You know what else this is good for? People who have ANIMALS that like to get into ALL THE PLANTS. I have a black thumb already and even when my plants are surviving, my cat is forever eating them. This will be the perfect solution.
So true!! This is perfect for people with pets!
This is SO cute!
Hey Jaimelyn,
What was the approx thickness of your wood?
There are beautiful, I can’t wait to make them!
-G
My daughter and I made 4 of these in the last two weeks (Feb 2015) and absolutely loved the project. We painted ours an orangey-red and also applied a coat of polyurethane because we will be using them outdoors. As you can see from my photo, we have one last step … making sure that each of the pieces of wood is perfectly level. It will be easy to make those adjustments by loosening the offending knot and sliding it up or down. I am going to let my husband help me do that last step using his handy-dandy leveling tool. I could do it myself but I have learned that when he is involved this way it makes him proud to say he was a part of the lovely outcome. The biggest advantage of these plant hangers is that they seemed to have added another spatial dimension to out backyard space. Very nice.
Great idea but they left some details out of the instructions that made it much harder than it shoudl have been.
This is what I need. The Deer are eating everything in our yard, we have a large deck and everything is being grown up there in pots. Love this hanging multi pot idea.
You can buy one of these at rhobear.myshopify.com!
This is such a great idea! I have a desk that I put diagonally up against the wall, so there is an empty corner that I don’t know what to do with– now I know! I’m going to hang the plants from the ceiling and down into the corner! Thank you so much!
Hello!
We are a new website looking to turn DIY projects into affordable products for those who do not have the time our resources to accomplish the project. Our first product is this vertical plant stand. Would you be willing to partner with us to promote our DIY product website?
You can see it here at http://www.rhobear.com
We hope to hear from you soon!
Sincerely,
Rhobear
Hi! This post was actually a guest post so you will want to contact Liz from Love Grows Wild. 🙂
I am so obsessed with this! My husband and I are looking for simple ways to spruce up our small apartment porch and this would be perfect. Thanks for the inspiration, pinning!
This is so cool. I have replicated this in my little balcony ?
Easy craft, just what i need, i am with a cat socoity we spay and nuter feral cats. and we are looking for crafts for an auction.this seems perfect
This is such an adorable idea!! I can’t wait to try!
What thickness was the rope?
Quarter of an inch thick 🙂
I’m so glad I stumbled across this post! Looks fantastic & your instructions are very clear & helpful. We only have a tiny garden so this will be perfect to add a little bit of interest to it. My Hubby & I will be making this at the weekend – we plan to put herbs in our pots! Functional & beautiful. Thanks
Herbs would be perfect in this plant hanger!
What type of hook did you use to hang this? Also, did you screw it into a stud?
It is a heavy duty ceiling hook. You can find them at Home Depot or Lowes! 🙂
how an I print the pattern for vertical plant hanger to make myself?
Hi Kathy! There isn’t a pattern to print off. It is just based on what size planters you buy! 🙂 It will walk you though it step by step on this post. 🙂
Love this DIY. Very simple but inmpressive. Cant wait to make one
Thanks
Hope you enjoy this in your home!
What kind of rope did you use?