
The BEST homemade playdough recipe – make in less than 5 minutes for under a $1 and have it last for months! It is so soft and squishy and cuts perfectly with cookie cutters.
This post may contain affiliate links. Read disclosure policy.
Favorite Kids Activity
One of my kids favorite activities is playing with play dough. It is the perfect indoor activity for when it’s raining, too cold or too hot. When the weather’s nice we’ll even take it outside on the porch. My kids (age 8, 6 and 2) ALL love playing with play dough. My son pretends like he’s outgrowing it, but whenever my girls start playing with it, he always ends up joining in on the fun. I usually give them a few different colors, a mini rolling pin, some cookie cutters and let them go to town. I love seeing their imagination work.
Why is this the best homemade playdough recipe?
- It is SUPER soft and squishy, but doesn’t stick
- The play dough lasts for months in a zip top bag
- It is inexpensive to make
- It makes enough for 4-6 kids
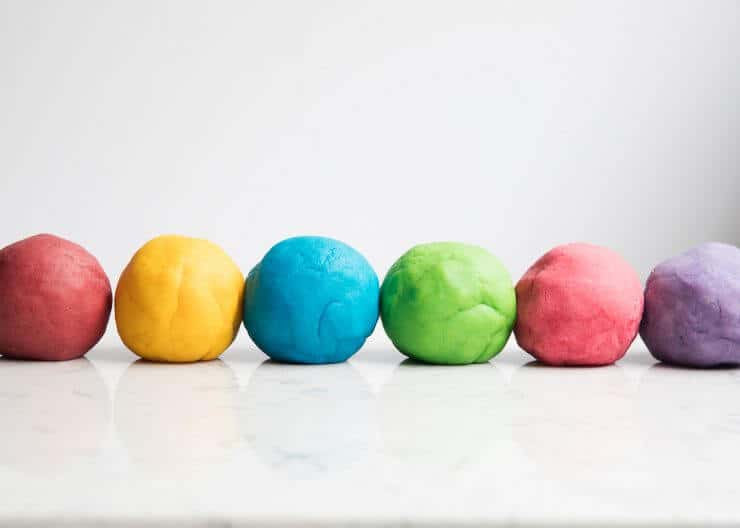
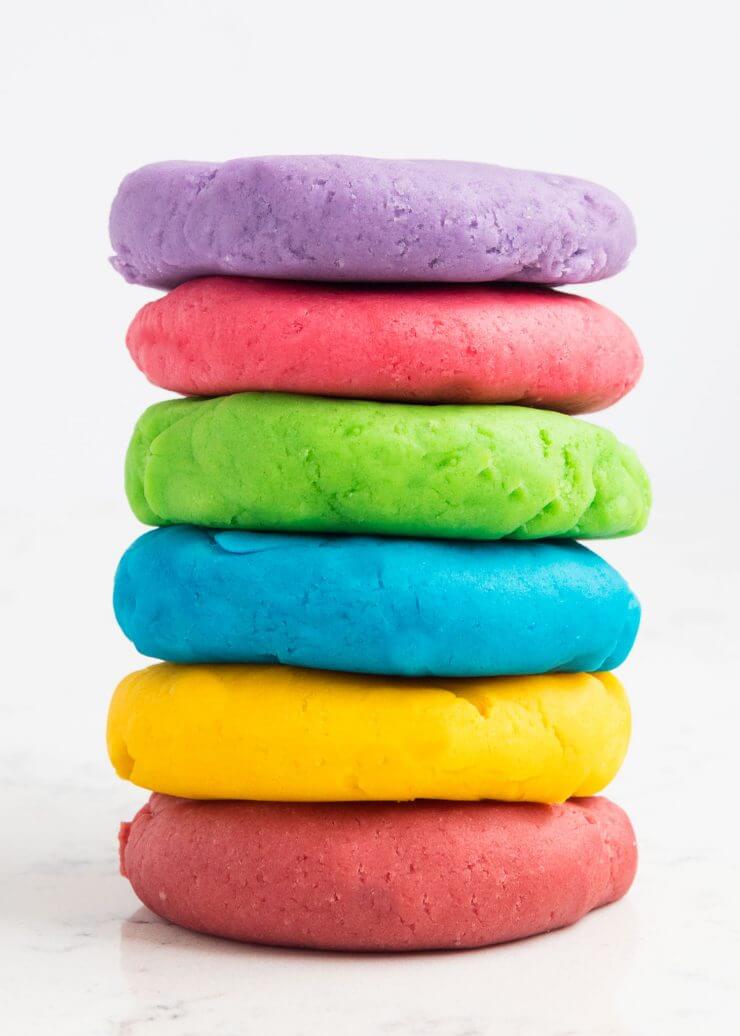
- You can add different colors and even scents to customize your dough
We love making our own play dough, because it is so much softer (and cheaper) than the store bought stuff. I find it also lasts longer as well. Over the years I’ve tried dozens of recipes and this one here is the best playdough recipe out there! I got it several years ago from my son’s preschool teacher and figured I better post it to my blog so I don’t have to keep searching for it. At their preschool, the parents take turns making the play dough a different color each month and once I used this recipe, I haven’t looked back. I have slightly adapted the original recipe over the years. The main thing that I have done is cut down on the salt, as I found it keeps the dough extra soft for months!
How to make playdough
Playdough ingredients:
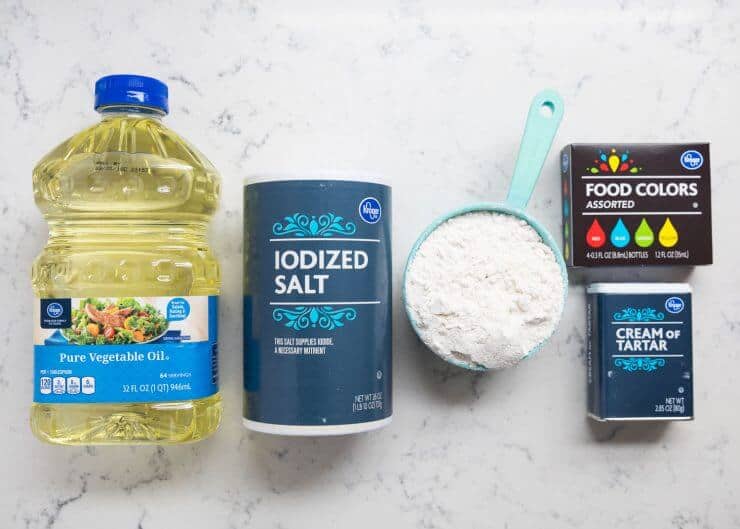
- 2 cups all-purpose flour
- 3/4 cup salt
- 4 teaspoons cream of tartar
- 2 cups lukewarm water
- 2 Tablespoons of vegetable oil (coconut oil works too)
- Food coloring, optional (I like Wilton gel food coloring or AmeriColor gel)
- Quart sized bags
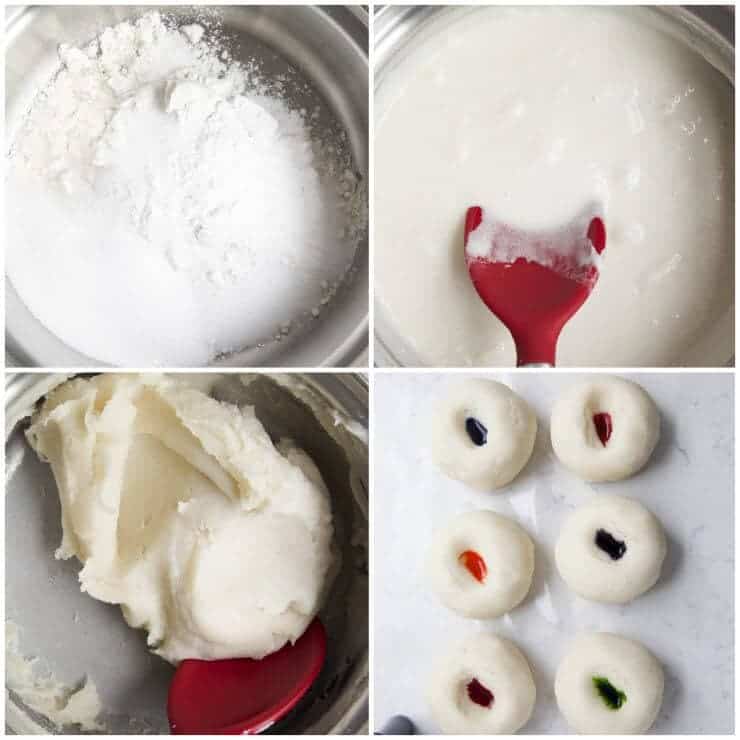
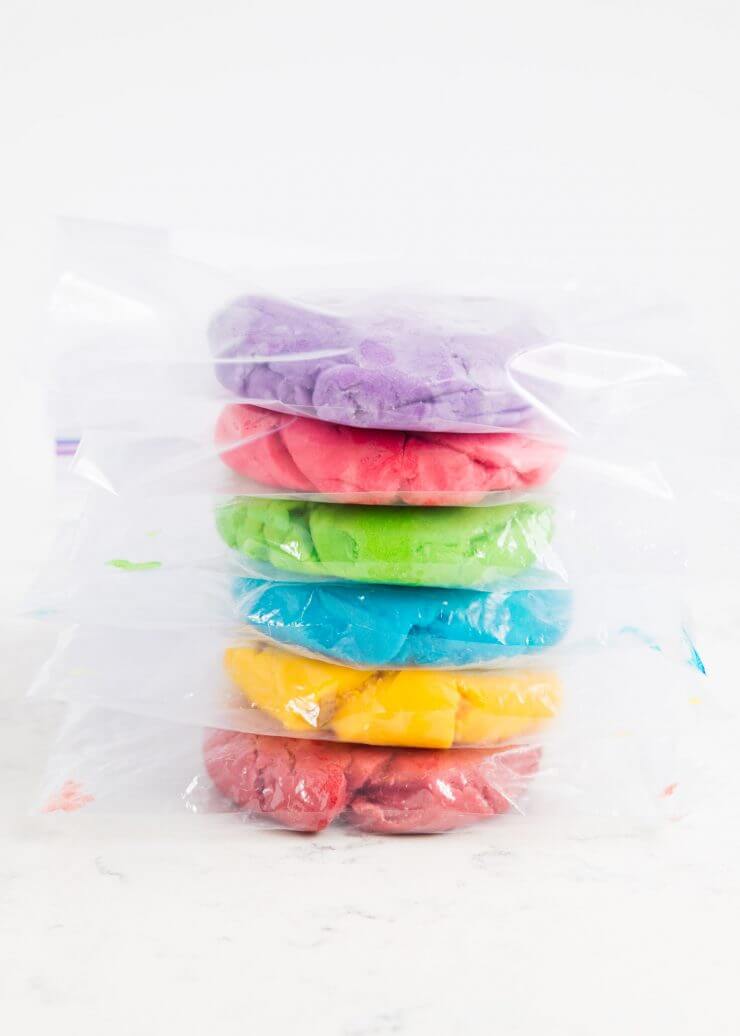
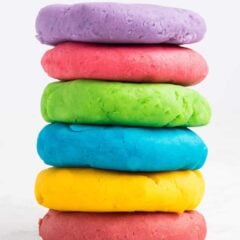
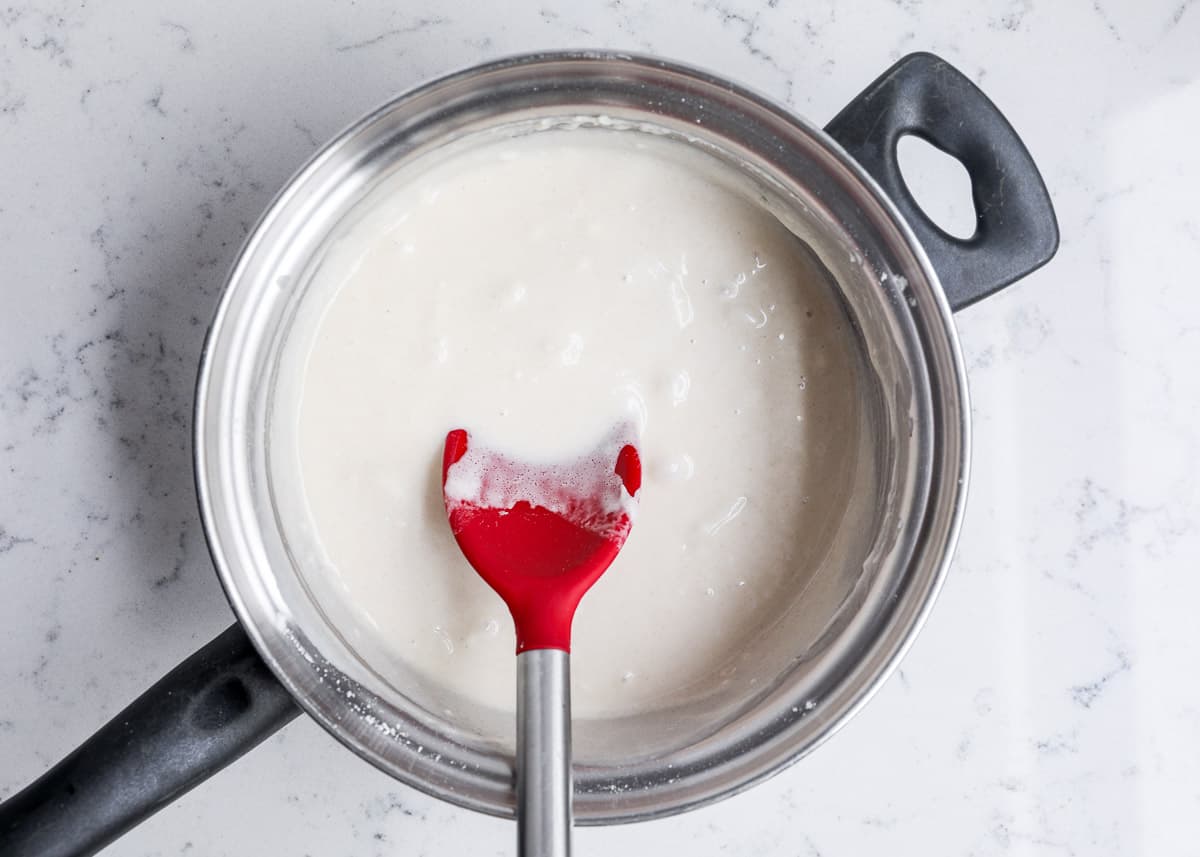
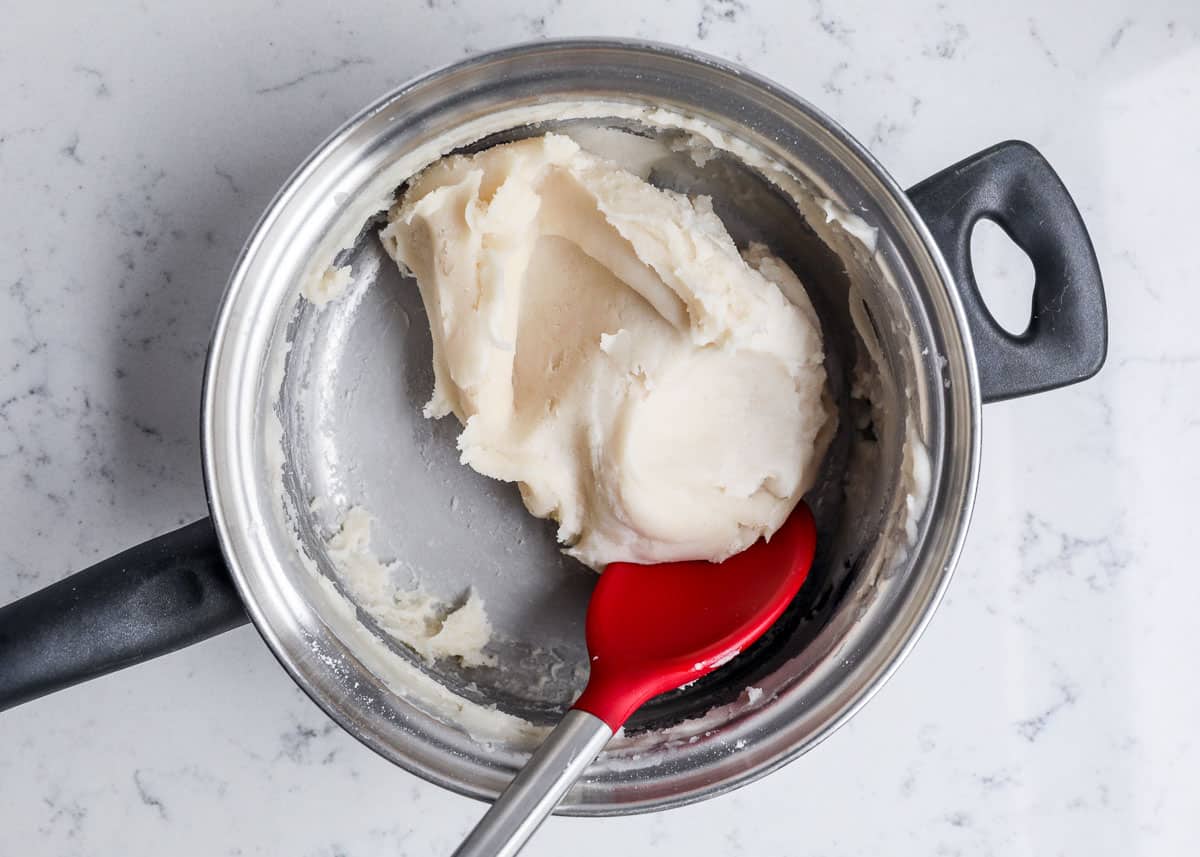
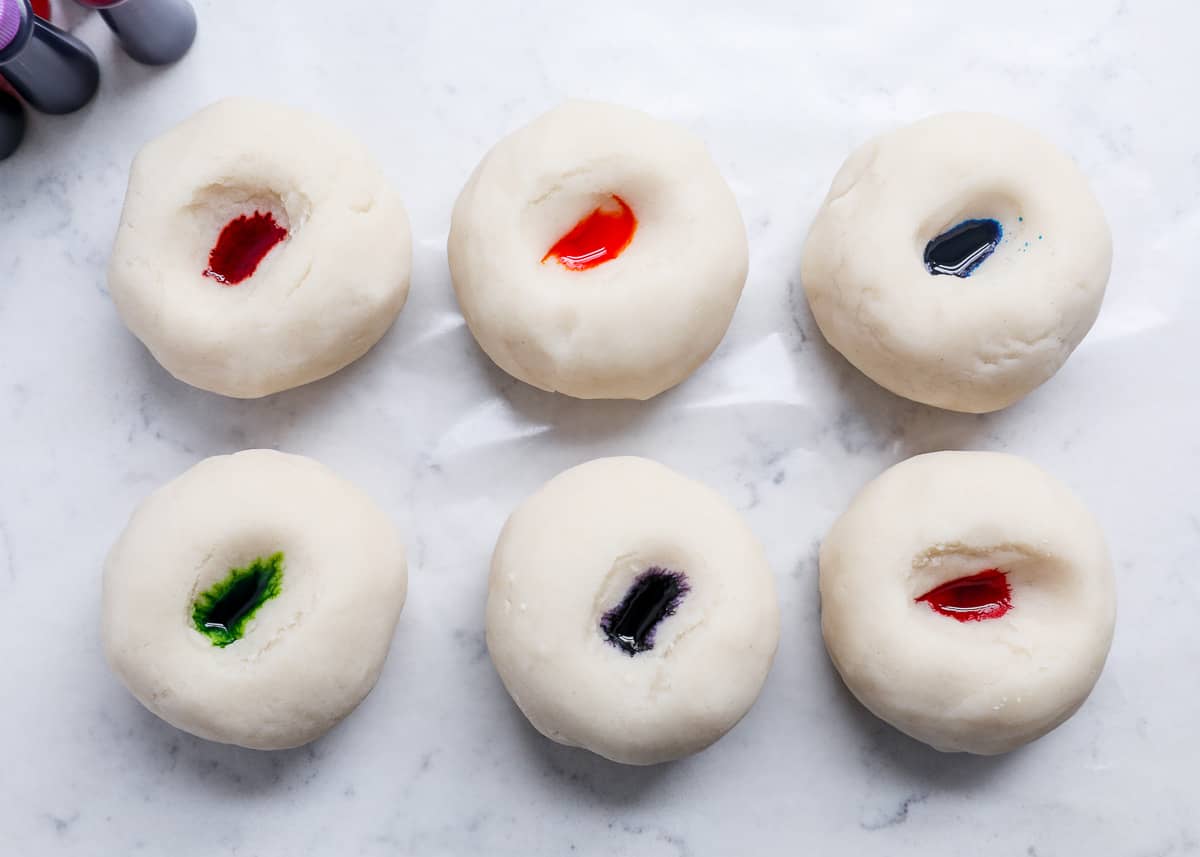
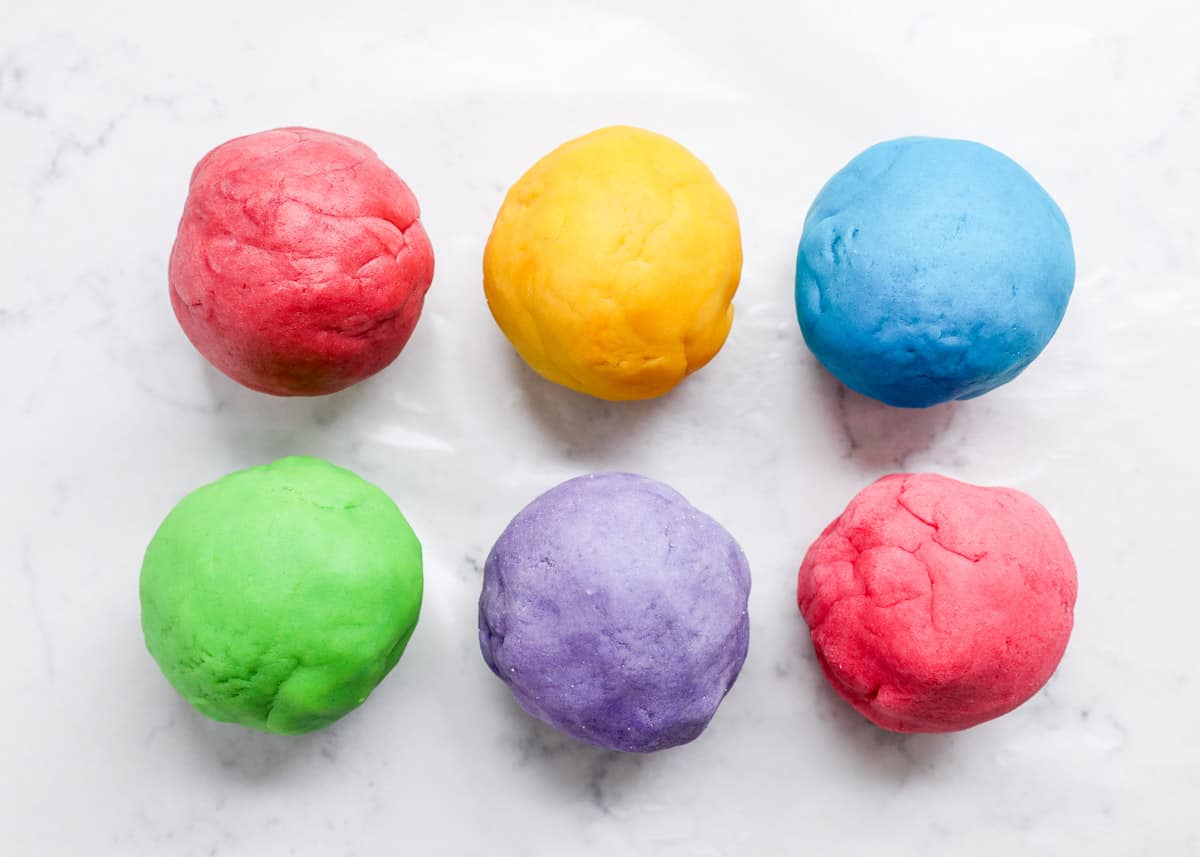
Stir together the flour, salt and cream of tartar in a large pot. Next add the water and oil. If you’re only making one color, add in the the color now as well. Cook over medium heat, stirring constantly. Continue stirring until the dough has thickened and begins to form into a ball. Remove from heat and then place inside a gallon sized bag or onto wax paper. Allow to cool slightly and then knead until smooth. If you’re adding colors after, divide the dough into balls (for how many colors you want) and then add the dough into the quart sized bags. Start with about 5 drops of color (my favorite brands are listed above) and add more to brighten it. Knead the dough, while inside the bag so it doesn’t stain your hands. Once it’s all mixed together you’re ready to PLAY.
Store the play dough inside the bags once done to keep soft. Keeps for up to 3 months.
Once the dough is finished, I like to put each dough ball into it’s own quart sized zip top bag. Then I let my kids squish the colors together. It gives the kids something to do, makes it so your hands aren’t stained and then gives the dough a home after. We use the same bag to store the dough when the kids are done playing with it. If you only plan on making ONE color, just add the food coloring into the pan when you add the water (makes it easier to mix it in). My kids can never decide on just one color, so we usually need to divide it out.
Need more kid friendly activities? Make homemade slime, fluffy slime or this recipe for butter slime, too!
How to Make Homemade Playdough
Video
Equipment
- Spoon for stirring
- Gallon size bag or wax paper for cooling
Ingredients
- 2 cups all-purpose flour
- ¾ cup salt
- 4 teaspoons cream of tartar
- 2 cups lukewarm water
- 2 Tablespoons vegetable oil (coconut oil works too)
Optional: food coloring (I use Wilton for brighter colors)
Instructions
- Stir together the flour, salt and cream of tartar in a large pot. Next add the water and oil. If you’re only making one color, stir in the the color now.

- Cook over medium-heat, stirring constantly. Continue stirring until the dough has thickened and begins to form into a ball. Remove from heat and then place inside a bowl. Allow to cool slightly and then knead until smooth.
- If you’re adding multiple colors, divide the dough into balls (for how many colors you want) and then add the dough into seperate quart sized bags. Start with about 5 drops of color and add more to brighten it. Knead the dough, while inside the bag so it doesn’t stain your hands.
- Once it’s all mixed together, you’re ready to PLAY. Store the play dough inside the bags to keep soft. If stored properly it will keep soft for up to 3 months.
Last step: Please leave a comment and rating after you make the recipe.
Notes
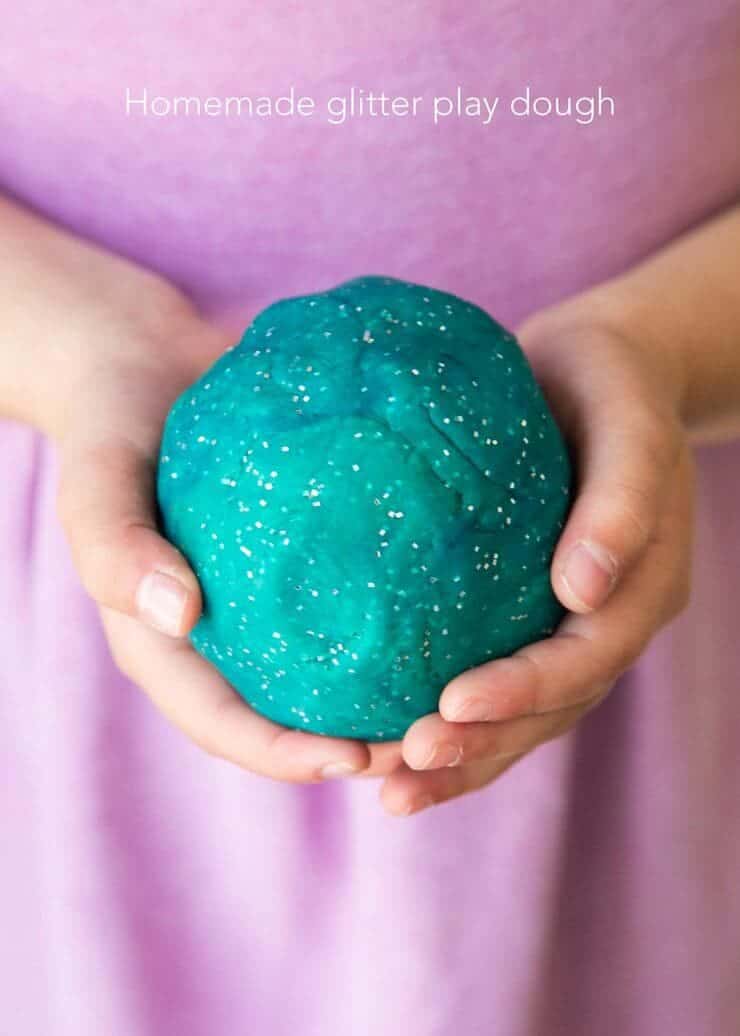
Another fun addition to the play dough is to add glitter. We added about 1/4 cup to the bag and kneaded it in with blue and yellow.
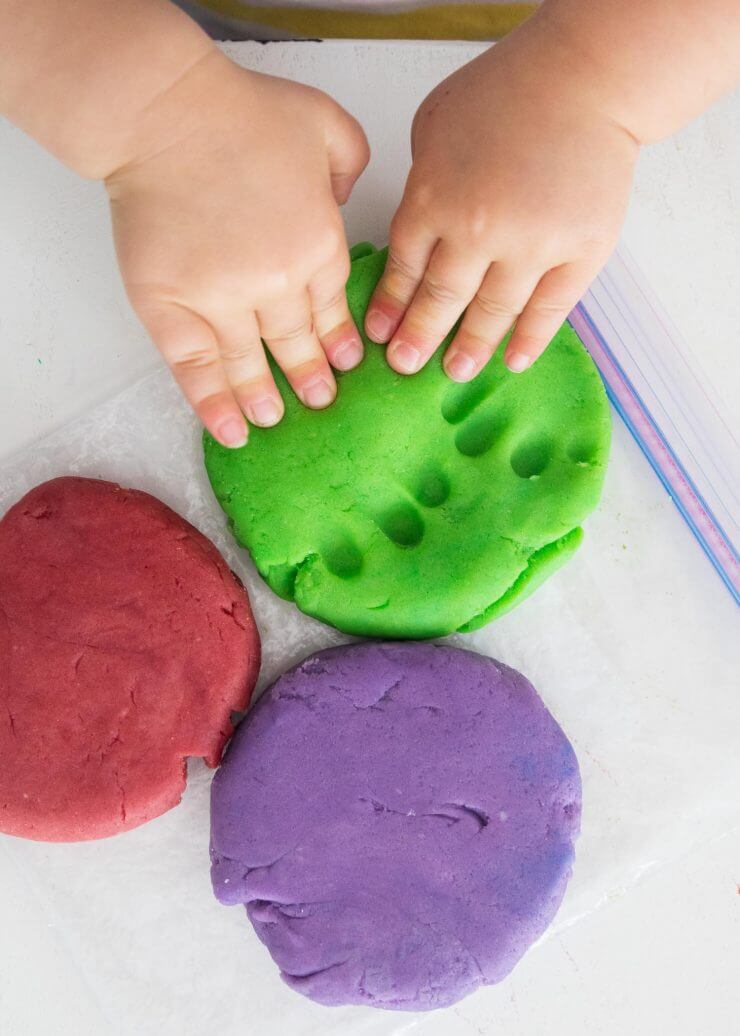
My almost 2 year old loves squishing the dough. I love watching those chubby little fingers go to work.
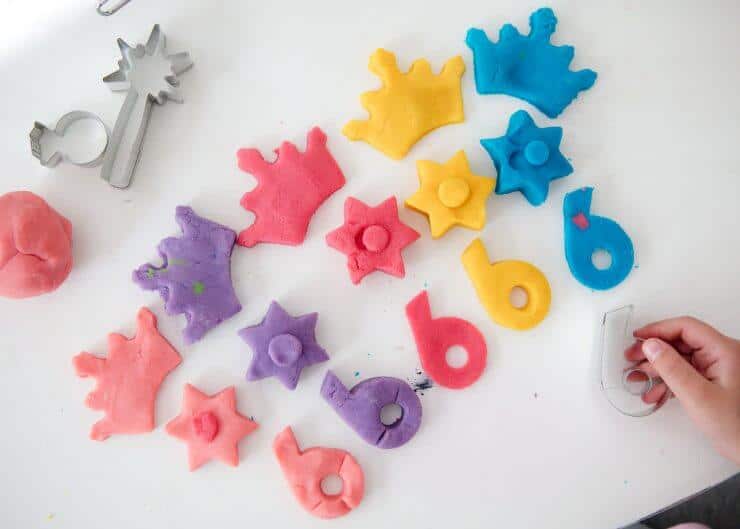
My 6 year old daughter loves pulling out the cookie cutters and making all kinds of designs! She is quite the girly girl. ;)
Make a batch for your kids once school is out for a summer to remember!

Grace Tipikin
Kids loved this! I appreciate the fact it’s not too sticky and doesn’t make a mess.
I added a generous amount of cinnamon and it smells so good!
Brooke
I use this recipe all the time. The kids love it and its super soft. After i knead it. I usually sprinkle a Tbs of flower into it at a time until it not quite as sticky. :) thanks for the recipe!
Rebekah VanderBoon
Great way to engage little ones!
Sarah @IHeartNaptime
So glad you enjoyed it!
Stacie Cooper
perfect consistency! love it
Sarah @IHeartNaptime
Thanks for making the playdough!
Elizabeth
So glad I found this recipe!! The consistency is perfect!! ❤️.
If I’m making this ahead of time for a party should I store in fridge or cupboard? Thanks in advance! 😊
Sarah @IHeartNaptime
Store in an airtight container in the cupboard (or away from direct sunlight). Enjoy!
CG
Easy to make!