

Learn how to make a sourdough starter with this easy recipe for beginners. All you need is flour and water, a little time and then use your ‘wild yeast’ to make bread and more!

This post may contain affiliate links. Read disclosure policy.
Beginner Sourdough Starter from Scratch
If you want to make homemade sourdough bread, you will need to start with a sourdough starter. While it may seem a bit hard to do, it’s easier than you think to make your own starter from scratch, even if you are a beginner!
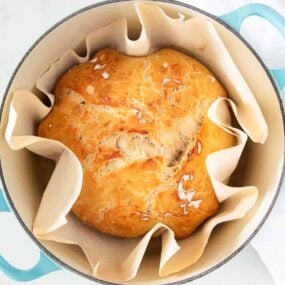
Using my easy-to-follow method and tips, your starter can be ready to use in about a week. Then use your starter to bake the best same day sourdough bread or even my sourdough pancake recipe, waffles, sourdough discard crackers or sourdough pizza dough.
What is Sourdough Starter?
A sourdough starter is ‘wild yeast’. Unlike commercial yeast sold in packets, a starter is a living active culture made from nothing but flour and water. Once those two ingredients come together, they attract the wild yeast and lactic acid bacteria naturally present in your flour and your environment.
That fermentation process is what makes sourdough different. The bacteria produce lactic and acetic acids as they work, which is where that tangy flavor comes from. A longer, slower fermentation means more complex sour flavor. A younger or faster-rising starter gives you something milder.
When your starter is ripe and active, a portion gets mixed into your dough to make it rise naturally without commercial yeast. The rest stays in the jar, ready for your next bake. With regular feeding, a starter can last for years.
Sourdough Starter Ingredients

Find the full printable recipe with specific measurements below.
- Flour: I recommend starting your sourdough starter using rye flour, whole wheat or pumpernickel flour as whole grain flour will jumpstart the fermentation process. After the initial feeding, you will also need all-purpose flour.
- Filtered water: Unfiltered tap water often contains chlorine which will sabotage your starter. I like to use a water bottle or filtered water to feed it.
Equipment You’ll Need
- Large glass jar: Mason jars or a weck jar is needed to hold and cultivate the starter. I recommend having at least two jars.
- A cover for the container: A lid or breathable cloth work.
- Kitchen scale: While in most baking recipes you can get away without using a digital scale, for sourdough I like to use a scale for precise measurements and ratios.
- Spatula: An offset spatula or plastic spatula for combining and stirring the ingredients. I don’t recommend using a metal spoon as the metal can react with the natural yeast.
How to Make Sourdough Starter
With a little patience and using these step-by-step instructions, your sourdough bread starter can be ready in about 7 days.
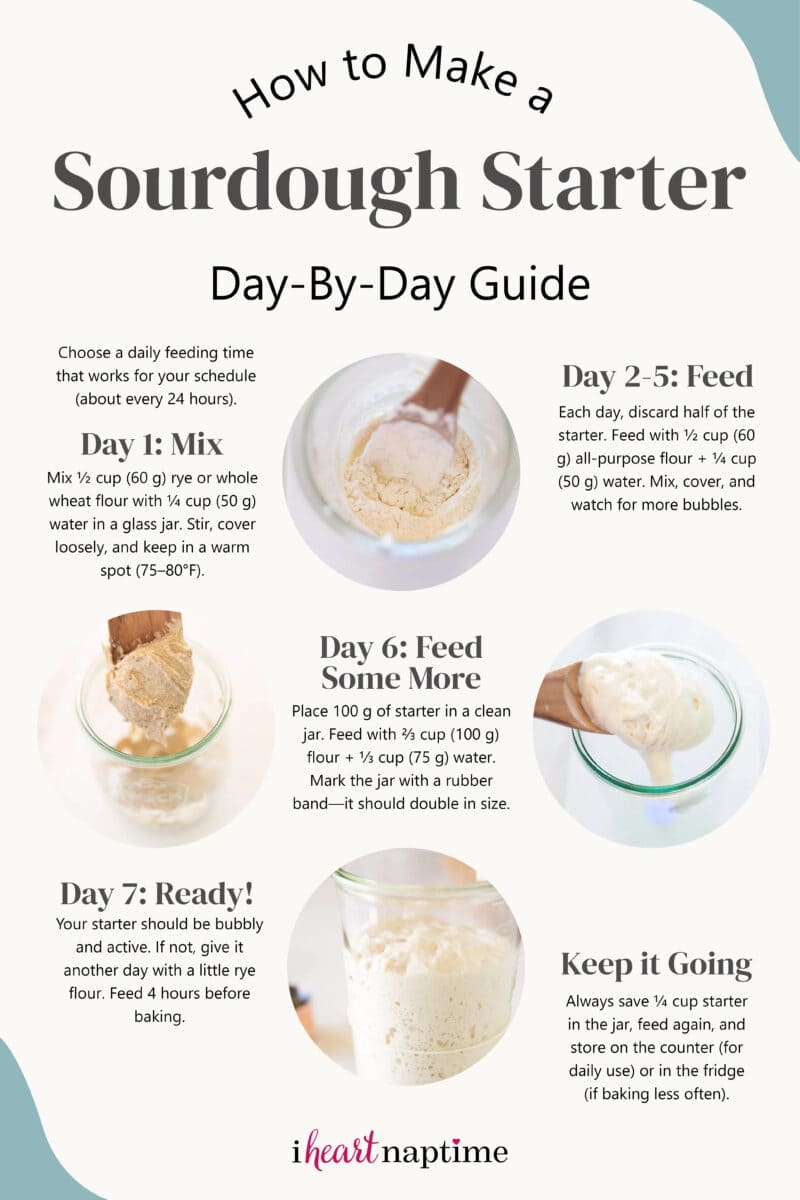
- Day one: Add 1/2 cup (60 g) rye flour and 1/4 cup (50g) water to a glass jar. Stir until combined. Cover loosely with a lid and keep in a warm spot (ideally 75-80°F) for 24 hours.
- Day two, three, four and five: Discard half of your starter from the jar. Add 1/2 cup (60 g) of all purpose flour and 1/4 cup (50 g) water. Mix well and cover.

- Day six: Place 100 grams of your starter in a new jar. Add about 2/3 cup (100 g) of all purpose flour and 1/3 cup (75 g) water to feed your starter. Mix well and cover.
- Day seven: Your starter should start to look bubbly and active and start to double in size after each feeding. Once it starts to double after feedings, it is ready to make a sourdough bread recipe!

Sourdough Starter Tips
- Use filtered water. Tap water often contains chlorine and other additives that can slow down or stall fermentation. Use filtered or bottled water at room temperature, or slightly warm. This one small swap makes a real difference, especially in the first few days.
- Find a warm spot and stick with it. Your starter does best between 75°F and 80°F. A cold kitchen will slow everything down. Good options: the oven with just the light on, the top of the refrigerator, or near a sunny window. If you move it around, fermentation gets unpredictable.
- Feed at the same time every day. Wild yeast is surprisingly routine. Feeding at a consistent time each day helps your starter develop a reliable rhythm and makes it easier to know when it should be at its peak.
- Track growth with a rubber band. After each feeding, slide a rubber band around the jar at the level of your starter. You will be able to see exactly how much it rises (or doesn’t) without guessing. Once it consistently doubles between feedings, it is ready to bake with.

Troubleshooting Your Sourdough Starter
Starting a sourdough starter is simple, but it does not always go in a straight line. Here is what to do when things look a little off.
My starter was bubbly at first, but now it has gone quiet.
This is extremely common and it is not a sign that something is wrong. Around days 3 and 4, many starters go through what is called a false rise. Bacteria in the flour cause an early burst of activity, and then things calm down before the wild yeast takes over. Keep feeding on schedule, keep it warm, and give it a few more days. The yeast will catch up.
There is a dark or grayish liquid sitting on top.
That liquid is called hooch, and it just means your starter is hungry. It is not ruined. Pour off the liquid along with the top layer of starter underneath it, then feed as usual. If hooch is appearing regularly, try feeding more frequently or increasing the amount of flour slightly.
My starter smells like alcohol, nail polish remover, or strong vinegar.
This is a sign your starter has gone too long without food. It has overfermented and the yeast is producing more acid than it should. Feed it, move it somewhere a little warmer, and try to tighten up the feeding schedule. The smell should mellow out within a day or two.
It is day 4 and nothing is really happening.
First, check the temperature. A cool kitchen is the most common reason a starter is slow to get going. If things still seem stalled, add an extra 2 tablespoons of rye flour and 2 teaspoons of water after 12 hours rather than waiting a full 24. Rye flour gives the fermentation a boost and often gets things moving again.
My starter looks pink, orange, or has fuzzy spots.
This means contamination, and unfortunately there is no saving it. Toss it, wash the jar thoroughly, and start fresh. Make sure your jar and utensils are clean before you begin again, and avoid using metal tools which can react with the natural acids in the starter.
My starter is very runny.
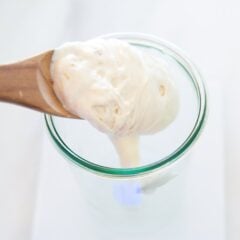
A healthy starter should be roughly the consistency of thick pancake batter. If yours is much thinner than that, try reducing the water slightly at your next feeding or using a higher ratio of flour to water. Whole wheat or rye flour can also help thicken and strengthen it.

Sourdough Starter FAQs
Your starter will be ready in as little to 7-10 days but could take up to two weeks. The warmth of your home plays a huge part in how fast it takes to cultivate the starter.
You will know the starter is ripe and at peak when it has doubled in size within a few hours of feeding. I recommend using a rubber band to mark on the jar where your starter is before feeding so you can visually see when it has doubled.
Some may like to use a float test as well to ensure it’s ready. Take a small portion of the starter and drop it into a bowl of water. If it floats in the liquid, it’s ready. If it sinks, your starter needs more time.
A warm spot helps facilitate fermentation! Here are a few ways to create a warm spot in your home. Place it in the oven with the light on (but be careful to not turn on the oven!), use a heating pad on the lowest setting, place near the oven while the oven is on, place near a sunny window or on top of the refrigerator!
This keeps the balance of the wild yeast and bacteria balanced. It also prevents the starter from developing an overly sour taste as well makes it more manageable to maintain over a long time.
Initially you may not want to keep the discard (it can taste weird), but after you starter is alive and well, you can save the discard in a separate jar in the fridge and use it to make a variety of sourdough discard recipes.

Maintaining and Feeding Sourdough Starter
Once your starter is alive and active, keep a simple maintenance and feeding schedule to keep it going for years and years!
- The first two weeks: For your starter to become more robust and strong, I advise to feed it flour and water daily for two weeks before storing in the fridge. Always discard half and then feed with fresh flour and water to keep bacteria and yeast in balance.
- Store in refrigerator: This is great if you only plan to bake a couple times a month. The cold of the fridge will slow down the fermentation process. If stored in the fridge, plan to feed your starter once a week. The day before you plan to bake, remove it from the fridge, discard and feed it so it’s good to go the next day!
- Store on the counter: If you plan to use your starter daily, it can be stored on your counter but then will also need to be fed daily! Each day discard half of the starter and feed it with equal parts flour and water by weight. This is known as a 1:1:1 ratio, meaning one part starter, one part flour, one part water.
Storing Your Sourdough Starter
- Unless you’ll be baking with it daily, keep your starter in a covered jar in the fridge. This puts the fermentation on a slow simmer, and you only need to feed it when you’re ready to bake.
- I feed my start one to two times a month, if I don’t plan on baking it, I don’t bring it to room temperature, I just discard, feed and place it back in the fridge.
- If I am planning on baking, I remove it from the fridge, bring it to room temperature then discard and feed it usually 24 hours before I plan on using it to make bread.
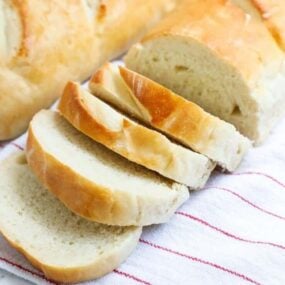
More sourdough recipes to try include sourdough French bread, sourdough pancakes, this sourdough waffle recipe and sourdough discard chocolate chip cookies!
More Homemade Bread Recipes
Sourdough Starter Recipe
Video
Equipment
Ingredients
To begin your starter
- ½ cup (55 g) rye flour , whole wheat or pumpernickel
- ¼ cup (50 g) filtered room temperature water
To feed your starter
- ½ cup (60 g) all-purpose unbleached flour , or bread flour
- ¼ cup (50 g) filtered room temperature water
Instructions
- Establish a feed time: Before you begin this process, establish the time you will feed your starter every day that works well with your schedule (you will feed about every 24 hours).
- Day one: Add 1/2 cup (60 g) rye flour (or whole wheat) and 1/4 cup (50g) water to a glass jar. Stir until combined. Cover loosely with a lid and keep in a warm spot (ideally 75-80°F) for 24 hours.
- Day 2, 3,4,5: Remove half of your starter from the jar. Add 1/2 cup (60 g) of all purpose flour and 1/4 cup (50 g) water. Mix well and cover. Each day the yeast will continue to grow and more bubbles should appear.
- Day six: Place 100 grams of your starter in a new jar. Then add about 2/3 cup (100 g) of all purpose flour and 1/3 cup (75 g) water to feed your starter. Mix well and cover. Place a rubberband or piece of tape on the jar to measure the growth. Today it should double in size.
- Day seven: Today your starter should be nice and active. If it isn't, you can give it one more day and add in half rye flour. About four hours before you'd like to begin baking give it one last feed. Once it has doubled in size and is very bubbly you can use this starter to bake with. *Make sure to leave 1/4 cup starter in the jar and feed again so you'll always have starter.
- Store: Feed your starter and you can leave it on the counter if you plan to use again the next day or you can store it in the refrigerator until you're ready to activate it again.
Last step: Please leave a comment and rating after you make the recipe.
Notes
Nutrition
Nutrition provided is an estimate. It will vary based on specific ingredients used.

Sheila
Receip does not mention when to put yeast
Sarah @IHeartNaptime
Hi Sheila, we are making natural yeast here no need for commercial yeast.
Paula
Hey. Sure love your directions but need to clarify for me… on day 6 when I put 100 grams into a new jar, which jar do I add the 2/3 cup of flour and 1/3 cup water to? Thank you.
Sarah @IHeartNaptime
Add to the same jar with the 100 grams.
Jackie
Oh no! I added to the original starter as that is how I read the instructions (“add to the starter”). It was not until I scrolled down to the comments afterwards did I see it was to be added to the NEW jar.
Is the started dead? Can I take any out?
Thank you!
Sarah @IHeartNaptime
Hi Jackie, on what day did you do that? It might depend on that. If you can provide additional information, thanks!
Hana
Once I use starter, how much do I feed it? Will it always be the same instructions as below regardless on how much starter is left in the jar?
To feed your starter
½ cup (60 g) all-purpose unbleached flour , or bread flour
¼ cup (50 g) filtered room temperature water
Or say there is 100 grams of starter left in the jar. Would I feed equivalent to that ratio and feed it 100 grams of flour and 100 grams of water?
Thanks!
Sarah @IHeartNaptime
Hi Hana, yes, just follow the directions to feed it. If you find that your starter seems too ‘stiff’ though, change it to a 100% hydration which is equal parts flour and water during a feeding. The starter should be around pancake consistency when it is at room temperature. Hope that helps!
Karen
What flour can I use to make a gluten free sourdough starter and what are the measurements? Thanks
Sarah @IHeartNaptime
Hi Karen, sorry we have not tested this gluten free and there would probably be quite a few adjustments. If you try let us know!
Trinity
What do you do with the discard when you’re first starting out? Do you just toss it or do you save it to use for discard recipes?
Sarah @IHeartNaptime
Hi Trinity, when your first starting out the discard should not be used for discard recipes as it’s not mature yet and will still contain some bacteria/wild yeast that is not yet stable to use in baking. Once your starter is mature and ready to be used for baking then your discard is also ready.
Joy
Followed Day 6 instructions. There were a few bubbles before I was following day 6. If I wanted to feed it for a couple more days, what is the ratio of starter, flour and water. Thanks!
Jamielyn Nye
Glad it’s starting to grow! Yes, the longer it grows the better. You’ll use the same feeding ratio as day 6 moving forward :)
Rosie
Could I use whole wheat flour (ground from soft white wheat berries) instead of all purpose flour?
Jamielyn Nye
Yes you could. If it’s not growing, try mixing up the flour.
Kris C
I have been wanting to do this for so long, but was SO intimidated. Your instructions made the process easy for me and it turned out! YAY!
Nina
Thank you for sharing this guide. It is really easy to follow and the tips were helpful. The bread I made came out perfect. I also love that it has a long storage life.
I Heart Naptime Community
I’m so happy your bread turned out delicious! Happy baking :)
Val Fiore
Amazing! This was my first time so I was nervous. I used whole wheat and it was so easy.