
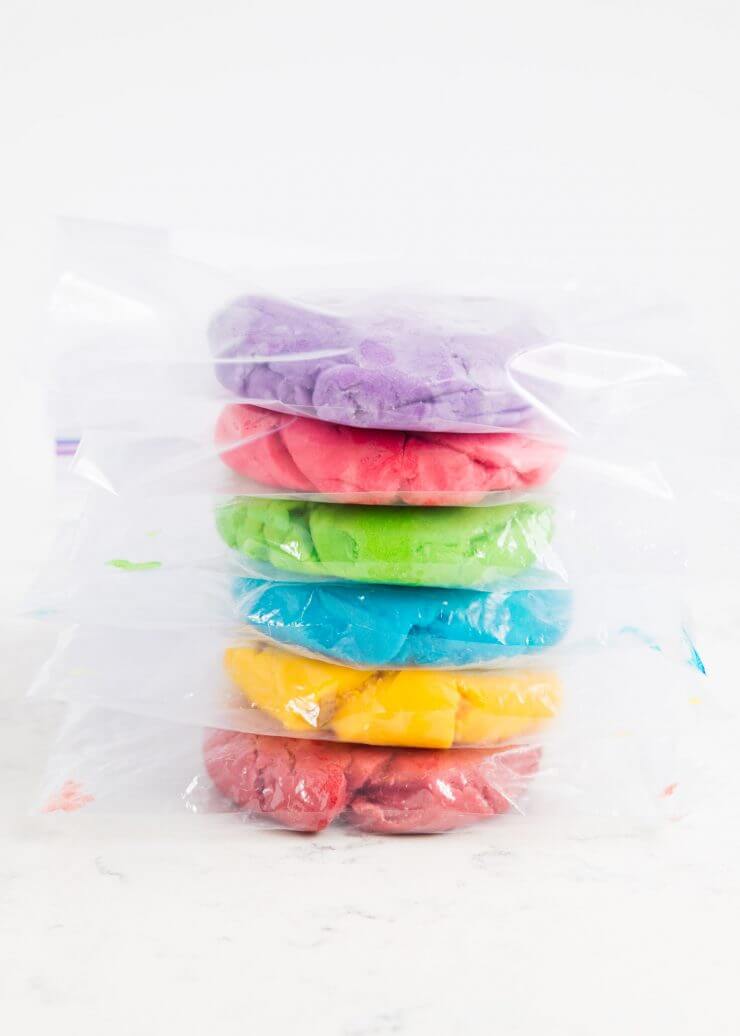
The BEST homemade playdough recipe – make in less than 5 minutes for under a $1 and have it last for months! It is so soft and squishy and cuts perfectly with cookie cutters.
This post may contain affiliate links. Read disclosure policy.
Favorite Kids Activity
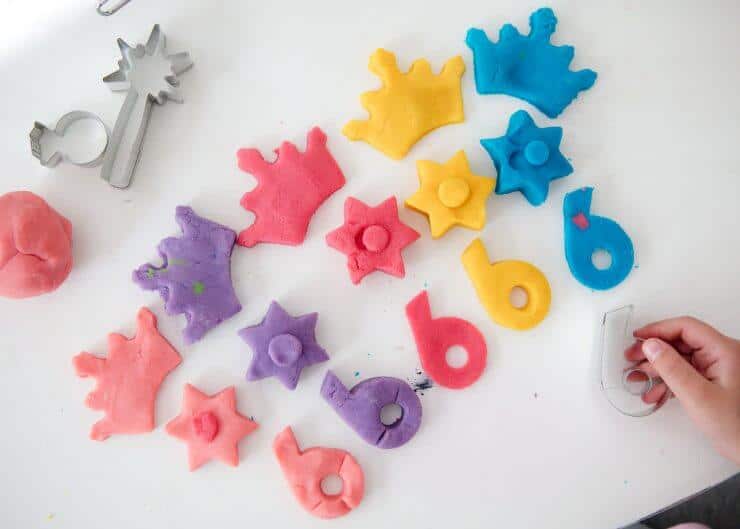
One of my kids favorite activities is playing with play dough. It is the perfect indoor activity for when it’s raining, too cold or too hot. When the weather’s nice we’ll even take it outside on the porch. My kids (age 8, 6 and 2) ALL love playing with play dough. My son pretends like he’s outgrowing it, but whenever my girls start playing with it, he always ends up joining in on the fun. I usually give them a few different colors, a mini rolling pin, some cookie cutters and let them go to town. I love seeing their imagination work.
Why is this the best homemade playdough recipe?
- It is SUPER soft and squishy, but doesn’t stick
- The play dough lasts for months in a zip top bag
- It is inexpensive to make
- It makes enough for 4-6 kids
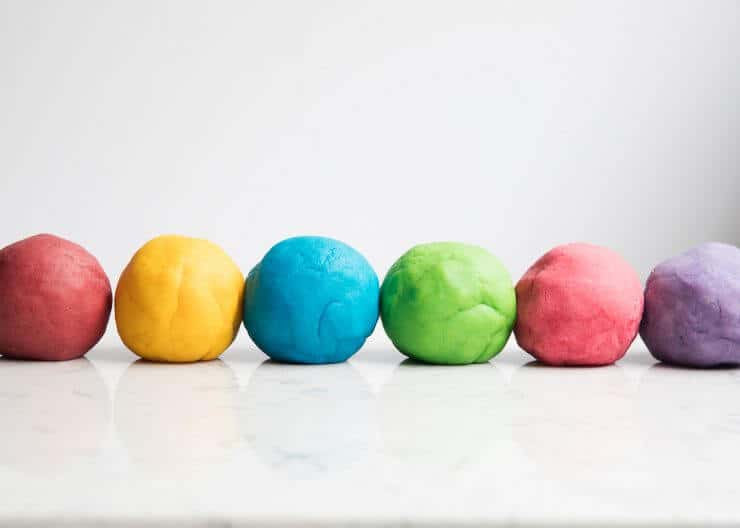
- You can add different colors and even scents to customize your dough
We love making our own play dough, because it is so much softer (and cheaper) than the store bought stuff. I find it also lasts longer as well. Over the years I’ve tried dozens of recipes and this one here is the best playdough recipe out there! I got it several years ago from my son’s preschool teacher and figured I better post it to my blog so I don’t have to keep searching for it. At their preschool, the parents take turns making the play dough a different color each month and once I used this recipe, I haven’t looked back. I have slightly adapted the original recipe over the years. The main thing that I have done is cut down on the salt, as I found it keeps the dough extra soft for months!
How to make playdough
Playdough ingredients:
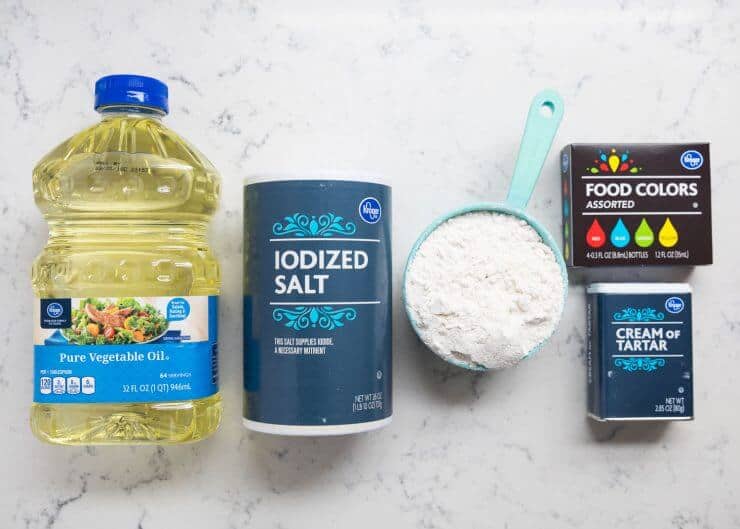
- 2 cups all-purpose flour
- 3/4 cup salt
- 4 teaspoons cream of tartar
- 2 cups lukewarm water
- 2 Tablespoons of vegetable oil (coconut oil works too)
- Food coloring, optional (I like Wilton gel food coloring or AmeriColor gel)
- Quart sized bags
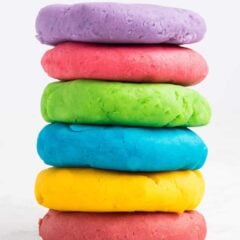
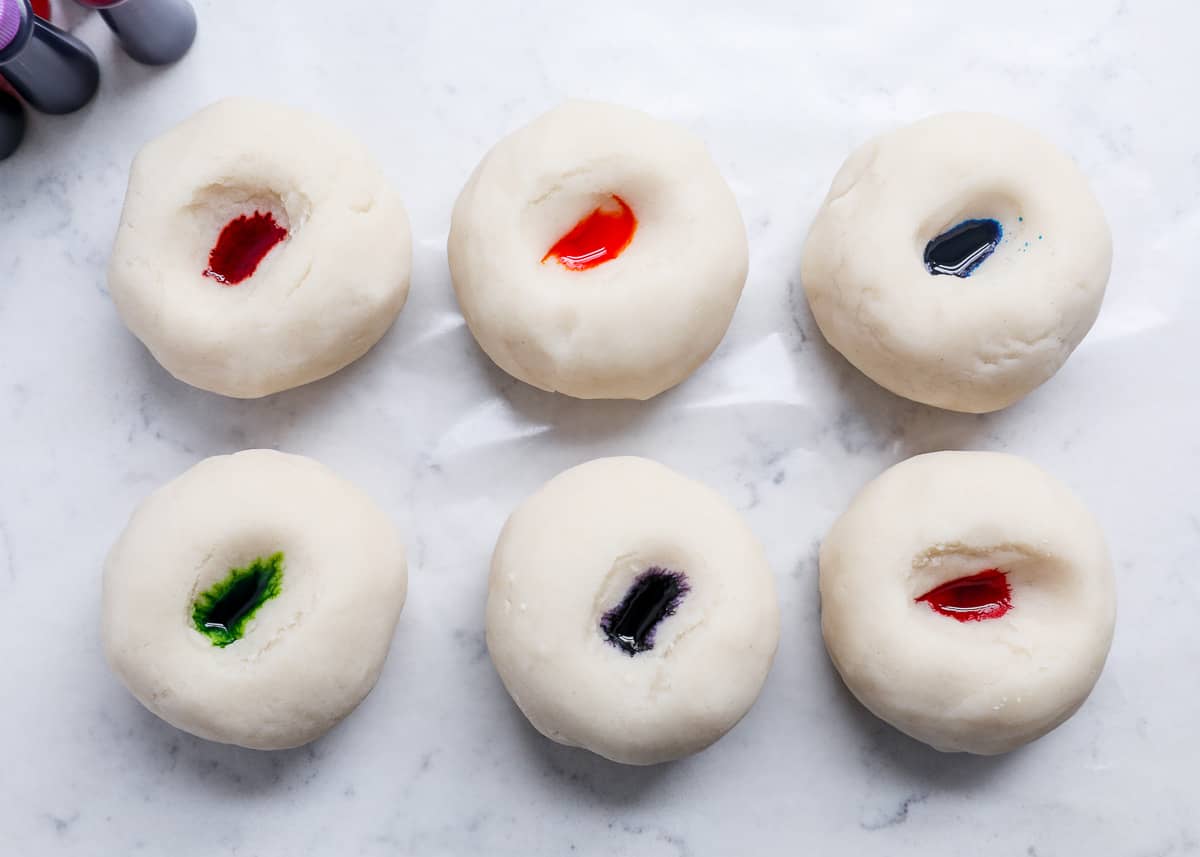
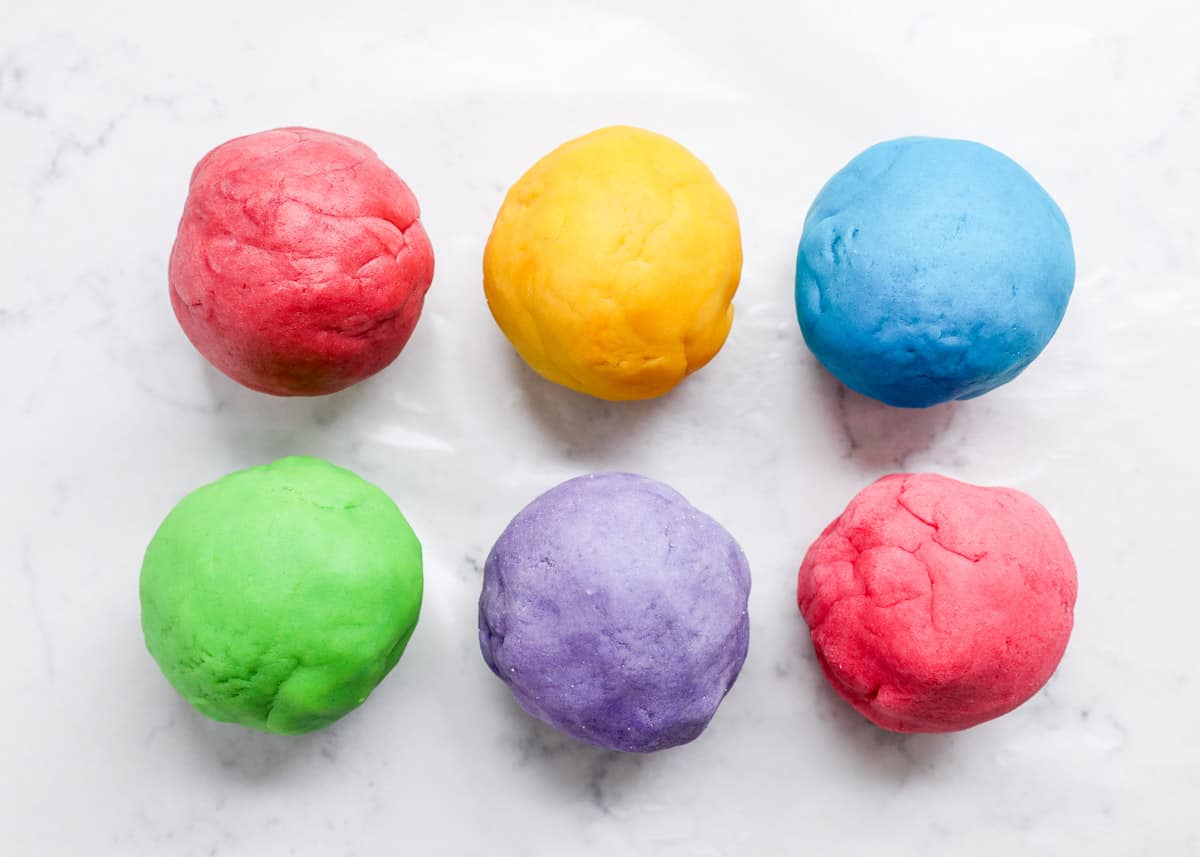
Stir together the flour, salt and cream of tartar in a large pot. Next add the water and oil. If you’re only making one color, add in the the color now as well. Cook over medium heat, stirring constantly. Continue stirring until the dough has thickened and begins to form into a ball. Remove from heat and then place inside a gallon sized bag or onto wax paper. Allow to cool slightly and then knead until smooth. If you’re adding colors after, divide the dough into balls (for how many colors you want) and then add the dough into the quart sized bags. Start with about 5 drops of color (my favorite brands are listed above) and add more to brighten it. Knead the dough, while inside the bag so it doesn’t stain your hands. Once it’s all mixed together you’re ready to PLAY.
Store the play dough inside the bags once done to keep soft. Keeps for up to 3 months.
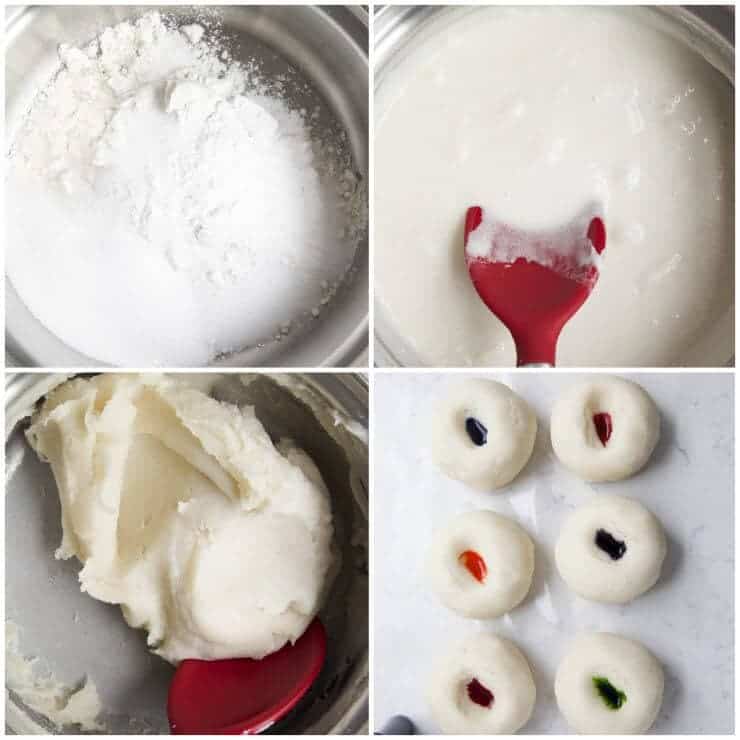
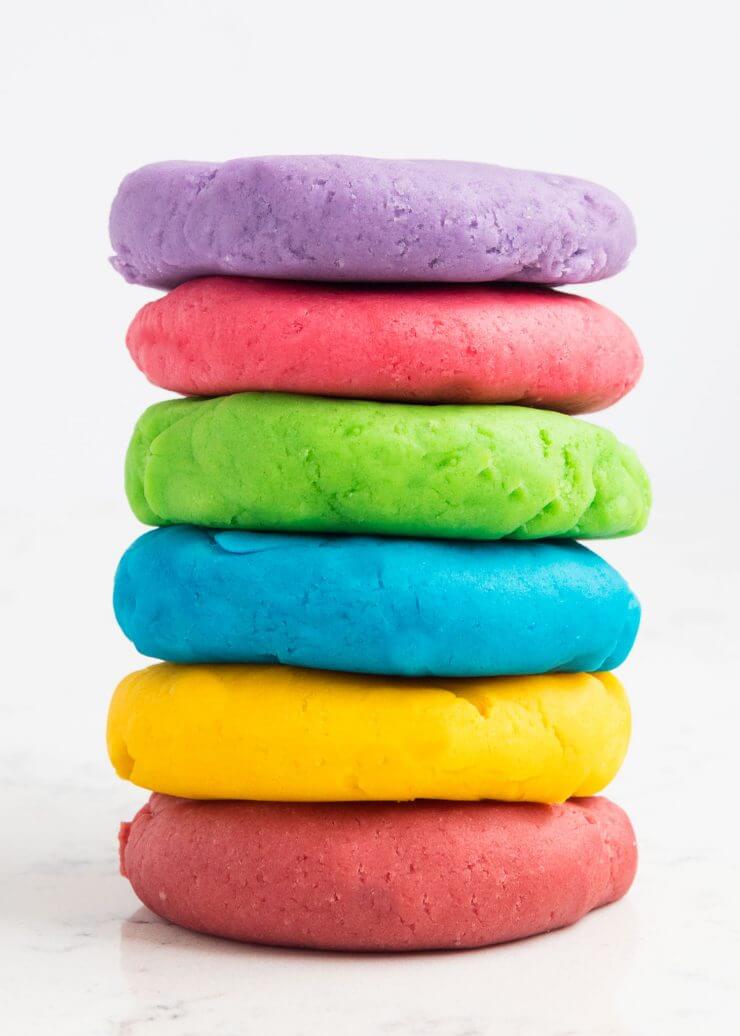
Once the dough is finished, I like to put each dough ball into it’s own quart sized zip top bag. Then I let my kids squish the colors together. It gives the kids something to do, makes it so your hands aren’t stained and then gives the dough a home after. We use the same bag to store the dough when the kids are done playing with it. If you only plan on making ONE color, just add the food coloring into the pan when you add the water (makes it easier to mix it in). My kids can never decide on just one color, so we usually need to divide it out.
Need more kid friendly activities? Make homemade slime, fluffy slime or this recipe for butter slime, too!
How to Make Homemade Playdough
Video
Equipment
- Spoon for stirring
- Gallon size bag or wax paper for cooling
Ingredients
- 2 cups all-purpose flour
- ¾ cup salt
- 4 teaspoons cream of tartar
- 2 cups lukewarm water
- 2 Tablespoons vegetable oil (coconut oil works too)
Optional: food coloring (I use Wilton for brighter colors)
Instructions
- Stir together the flour, salt and cream of tartar in a large pot. Next add the water and oil. If you’re only making one color, stir in the the color now.
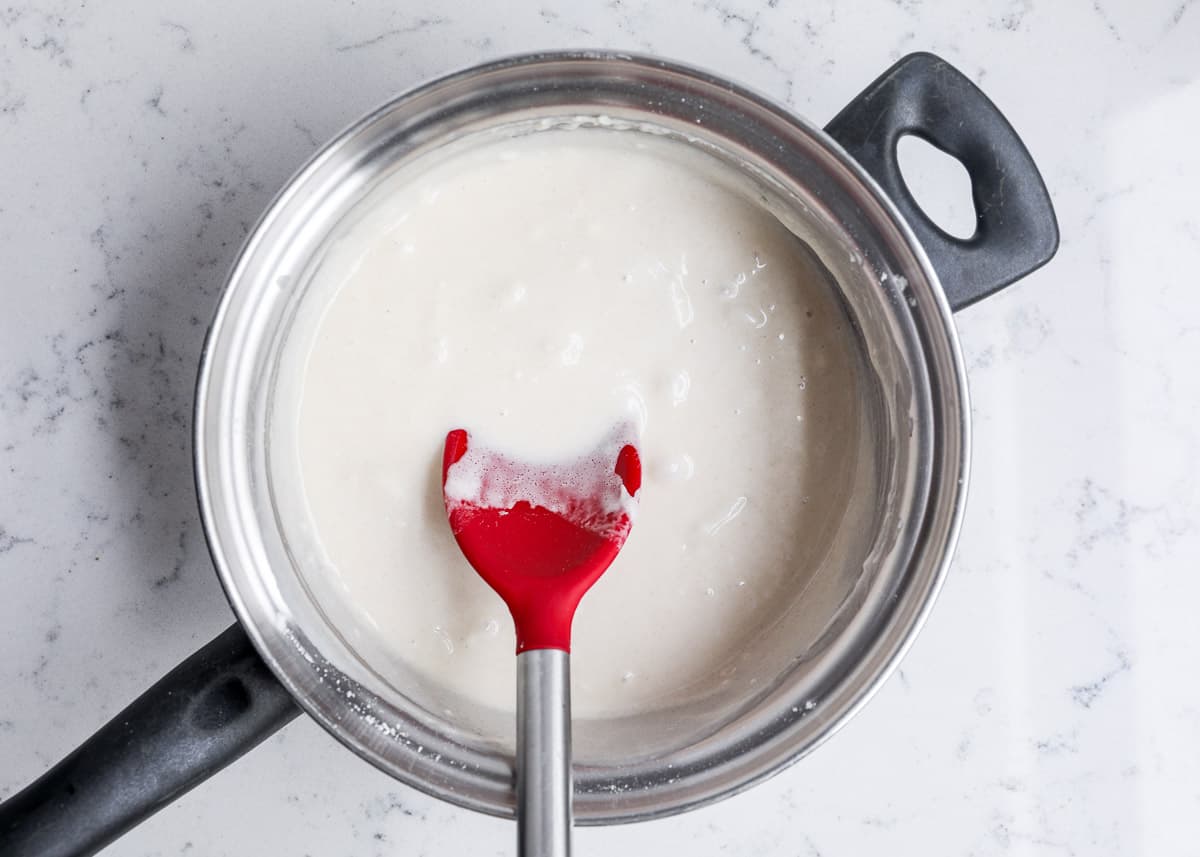
- Cook over medium-heat, stirring constantly. Continue stirring until the dough has thickened and begins to form into a ball. Remove from heat and then place inside a bowl. Allow to cool slightly and then knead until smooth.
- If you’re adding multiple colors, divide the dough into balls (for how many colors you want) and then add the dough into seperate quart sized bags. Start with about 5 drops of color and add more to brighten it. Knead the dough, while inside the bag so it doesn’t stain your hands.
- Once it’s all mixed together, you’re ready to PLAY. Store the play dough inside the bags to keep soft. If stored properly it will keep soft for up to 3 months.
Last step: Please leave a comment and rating after you make the recipe.
Notes
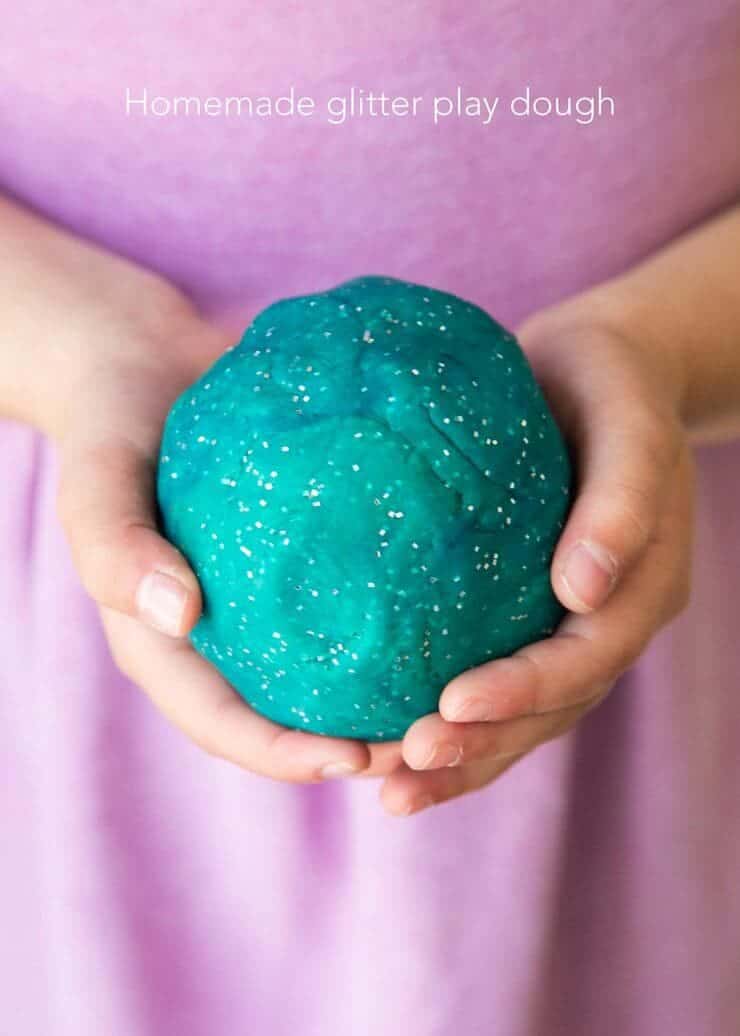
Another fun addition to the play dough is to add glitter. We added about 1/4 cup to the bag and kneaded it in with blue and yellow.
My almost 2 year old loves squishing the dough. I love watching those chubby little fingers go to work.
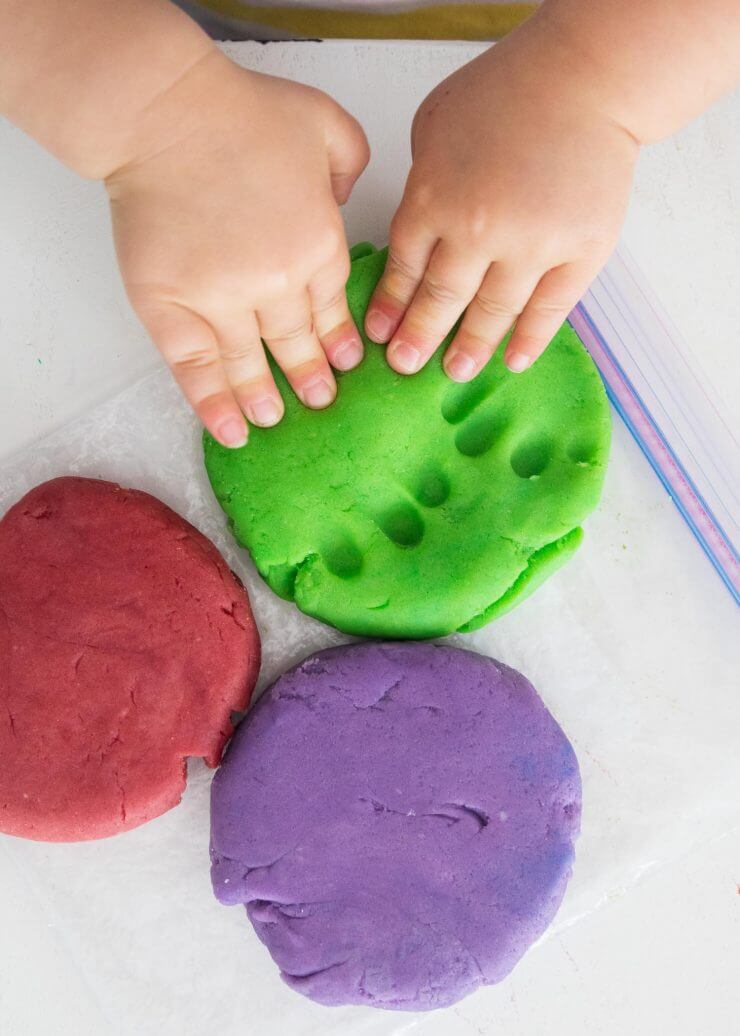
My 6 year old daughter loves pulling out the cookie cutters and making all kinds of designs! She is quite the girly girl. ;)
Make a batch for your kids once school is out for a summer to remember!

K Hen
Thank you so much for a non toxic (and fun!) project to do with the children. They really enjoyed it and it didn’t have that gritty salt feel like some other doughs get. Thank you!
I Heart Naptime
Happy to hear your kids loved it! :)
Alice H Scheeler
It’s the time of year to wash windows after a long cold and snowy winter. It is so hard to get the bugs and dirt out of the corners of the windows. I think that this homemade play dough will work for this.
I Heart Naptime
Very creative!
Sarah Pierce
This is the ONLY play dough recipe we use when the kids want to make some. It’s perfect!! Thanks for sharing it with the world!
I Heart Naptime
You are so welcome! So glad to hear you love the recipe :)
Jill
Haha, I had my 7, 10, 12, and 15 year old play with the daough they love it so much.
I Heart Naptime
Yay, so glad it was a hit with your kids, Jill! :)
Arleen
Add the food coloring to the water and mix completely before adding to the remaining ingredients. It makes the color incorporate completely and easier.
Maria
Amazing just made for my school thank you
I Heart Naptime
You are so welcome, Maria!
Stephanie
Did anyone get big clumps in theirs? What am I doing wrong?
Stephanie
Figured it out, thanks so much!
Madeleine
I made this recipe to use for a volcano project for my nieces & nephew. They made oceans and vines and flowers and life rings and whatever else their little hearts desired with it. The playdough was really nice to work with. (FYI, for the brown volcanos, I used a different recipe that called for cocoa powder, which created a really rich brown.) I gave the playdough leftovers to a neighbor’s little girl. Well, that neighbor just texted me to ask for this recipe because the dough is starting to get crumbly…after 8 months!!! Wow! Impressive!
I Heart Naptime
That volcano project sounds so fun! I’m so happy to hear the playdough has been such a success :) Thanks so much for your comment and review Madeleine!
Lisa
I make this recipe with my grandkids all the time. It turns out perfect every time and lasts in an air tight container for a very long time without getting hard or molding.
Kelley Byrd
Hi! I’m wondering if this dough can be baked to preserve the creations coming from little hands.
I Heart Naptime
Hi Kelley! I’ve never tried baking it, so I’m not sure if it would crack or not. Let me know how it goes if you give it a shot!
Gramma
Just made this with my 4 and 2 year old grandkids. Turned out perfectly, they had so much fun making it.
I Heart Naptime
Yay! So glad you all had a great time making it :)
Claire
This is actually a good recipe but if you follow the instructions precisely you will end up with a very sticky, even watery, dough. I used way more flour (3+ cups) than the recipe called for and then it was fine.
I Heart Naptime
I find that stickiness usually happens if it isn’t cooked long enough. I would recommend cooking longer or adding more flour, like you did.
Jenny
Yup, this is a case of not cooking it long enough. In my experience, cooking this 5 minutes longer than I want to is usually enough to get it to a good texture, or otherwise yeah, it’s usually several more cups of flour to avoid stickiness.
Tara
I followed the recipe precisely abs worked out perfect for me!
Hoda
Fun project to make with my girls keeps them busy for hours and i know they are safe!!! Thank you!
I Heart Naptime
You are so welcome! I’m so glad they loved it :)
Maniza
Made one batch using coconut oil. How easy to make and super soft! Thank you so much. ♥️
I Heart Naptime
You are so welcome, Maniza! :)
Susie
Just made my batch. Was wondering if keeping it in the fridge will make it last longer?
Jamielyn Nye
Not that I’m aware of. I just make sure to store in an air tight container in a cool cupboard and it lasts for months :)
Keith Spurlin
Fantastic! I made some with my granddaughters. One is two and one is four. We did a double batch and 10 colors. Fun project to do with their papa. Thanks for the recipe.
I Heart Naptime
Sounds like so much fun! Glad everyone enjoyed it :)
raeli morel
great thanks for the help.
I Heart Naptime
You are so welcome!
Khalid
I did not have any cream of tartar so I used baking powder.
Came out perfect.
Had a lot if fun with my 3 year old.
Thank you
I Heart Naptime
I’m happy to hear the substitution worked well for you!
Melissa
I share this with all the moms I know ! My kid loves to make it ourselves!!!!!
I Heart Naptime
So happy to hear this! Thanks for your comment and review, Melissa :)
Catherine
We have made this several times and it’s a hit. Thanks for sharing!
I Heart Naptime
You are so welcome, Catherine!