
Creme brulee is elegant yet simple to make for any special occasion with only 5 ingredients. This classic dessert has a creamy baked custard topped with hardened caramelized sugar!

This post may contain affiliate links. Read disclosure policy.
Table of Contents
Easy Homemade Creme Brulee Recipe
I don’t think I realized how easy it was to perfect crème brûlée at home until I started making it myself. I’ve had the same epiphany with other dessert recipes like classic cheesecake!
Crème brûlée recipes are usually reserved for special occasions at fancy French restaurants, but this recipe will rival anything you’ve ordered before!
Why This Recipe Works
- Easier than it looks. The most perfect crème brûlée is simple as long as you follow the step-by-step directions.
- Suitable for all occasions. For Mother’s Day, Valentine’s Day, Christmas, Easter, or anniversaries, this is right up there with cheesecake mousse for the perfect choice.
- Delicious! The creme is a cross between a creamy vanilla pudding and a custard along with a caramelized sugar topping, which is essentially candy!
Creme Brûlée Recipe Ingredients

Find the full printable recipe with specific measurements below.
- Heavy cream: You can also use half and half, but you’ll need enough fat in there to create a rich consistency.
- Pure vanilla extract: Since there are so few ingredients and this is a special dessert you want to make sure to use quality vanilla in here. This is where the flavor comes from! You can also use a split vanilla bean to infuse the cream instead.
- Fine sea salt: This helps to balance the sweetness and enhance the flavor of the custard.
- Large egg yolks: You’ll need 5! Custard is composed of egg yolks which is where it gets its richness from. Don’t discard the egg whites though, you can keep those for tomorrow’s breakfast.
- Granulated sugar: Used in both the custard and of course as the melted sugar topping.
How to Make Crème Brûlée
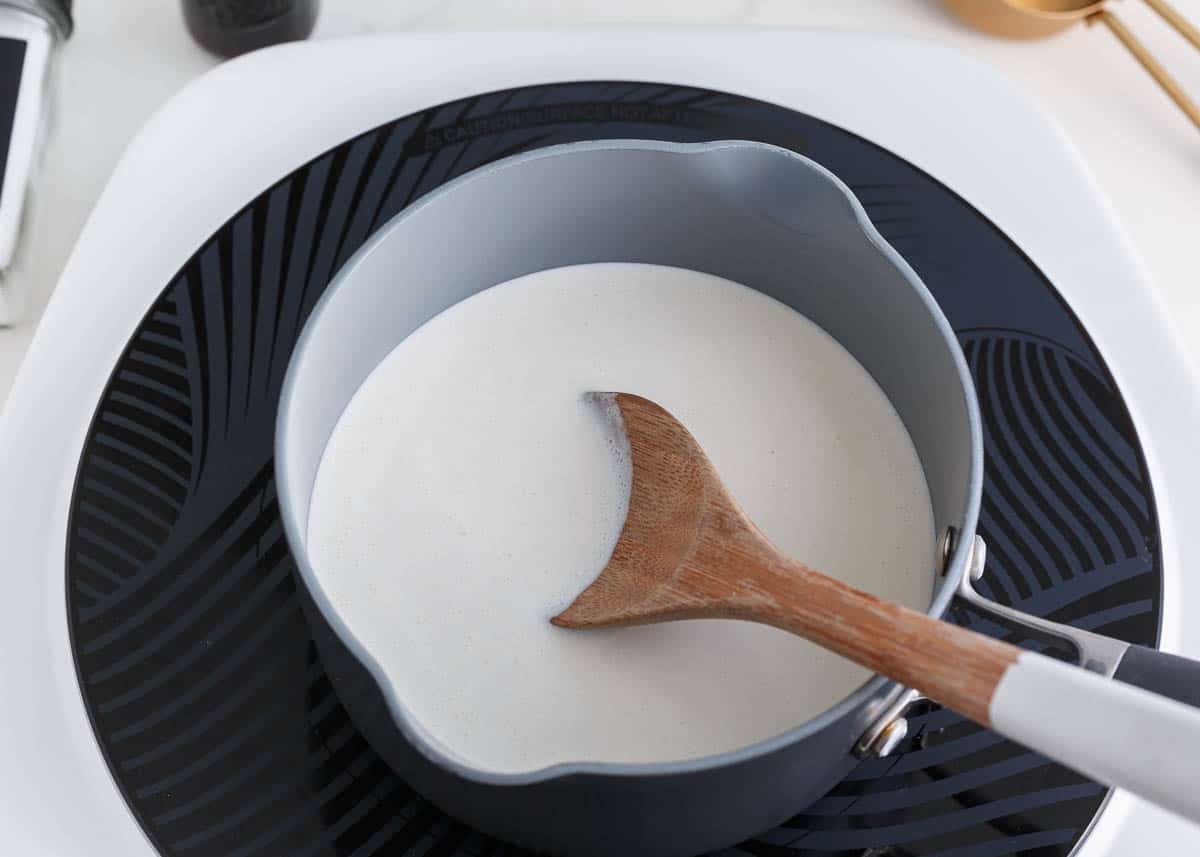
Warm the cream and salt over low heat for about 2 minutes. You don’t want it to come to a simmer. Remove it from the heat and let it sit for 5 minutes. Stir in the vanilla and then remove 1/3 cup of the mixture.
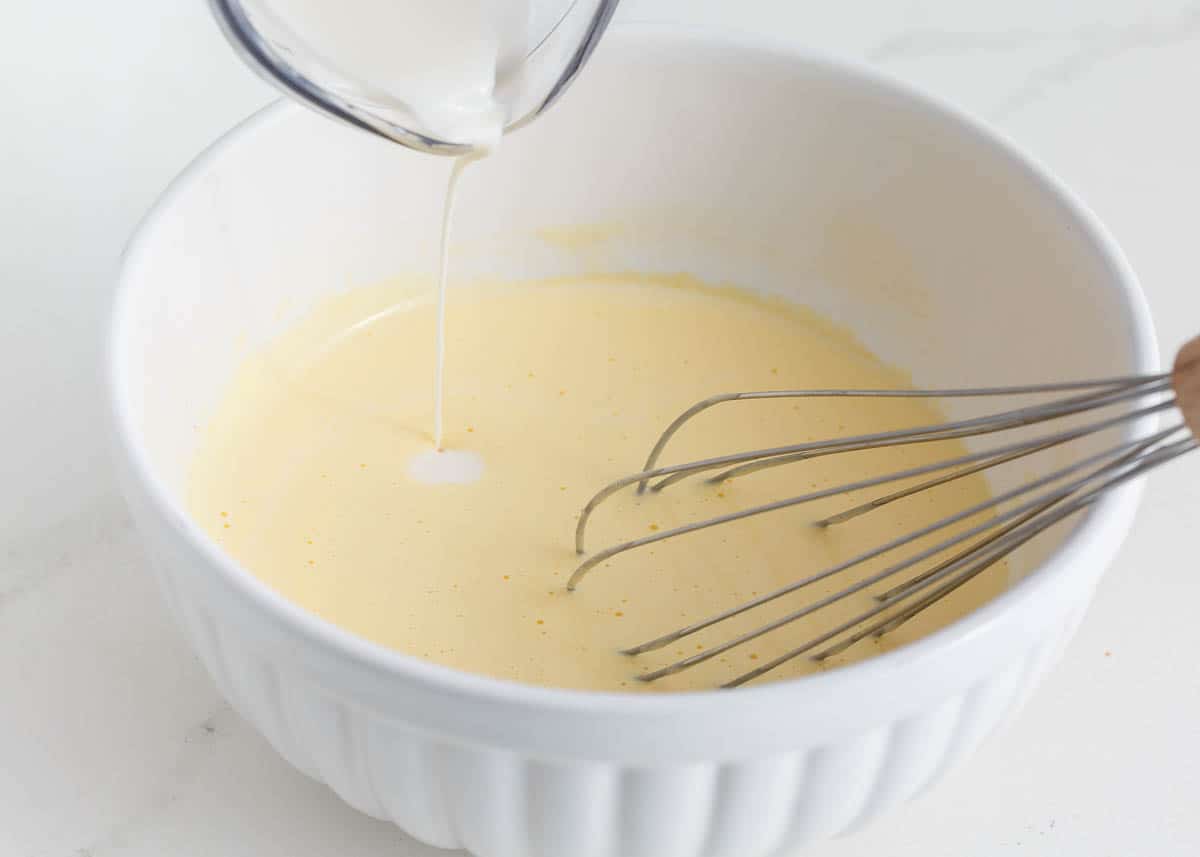
In a large bowl, beat the egg yolks and sugar on medium speed until light yellow and airy. Very slowly whisk the reserved 1/3 hot cream mixture into the egg mixture. This will temper the eggs by introducing them to the increased temperature slowly so they don’t curdle. Slowly, pour the remaining cream mixture in and whisk constantly until well combined.
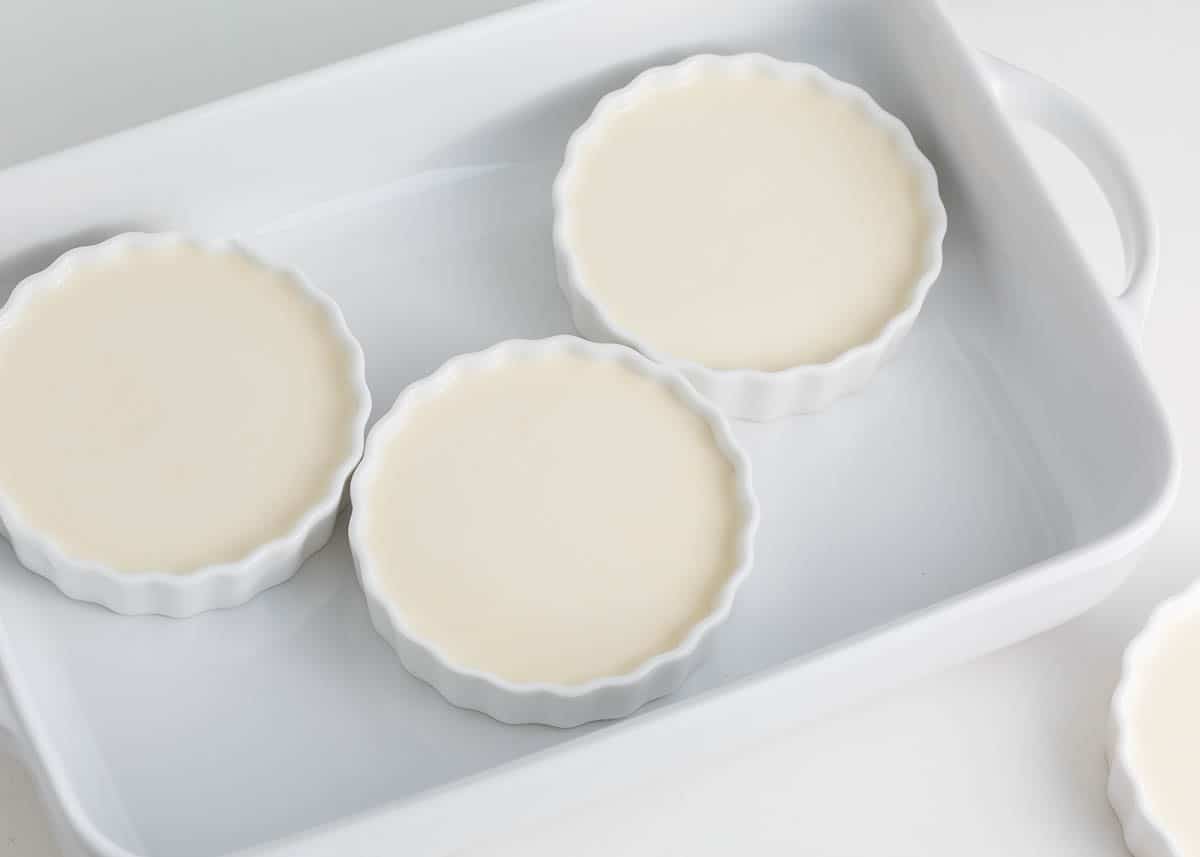
Pour even amounts into each of the 4 ramekins and transfer them to a baking dish. Carefully add the boiling hot water to the baking dish so the water bath comes up to about halfway up the sides of the ramekins. Bake for 30-40 minutes then remove baking pan from oven, rest for 5 minutes then transfer to a wire rack.
These need to be chilled in the fridge for at least 4 hours. If you’re making them in advance you can keep them stored covered in plastic wrap for up to 4 days. Then add the topping just before serving.
How to Caramelize the Sugar Topping
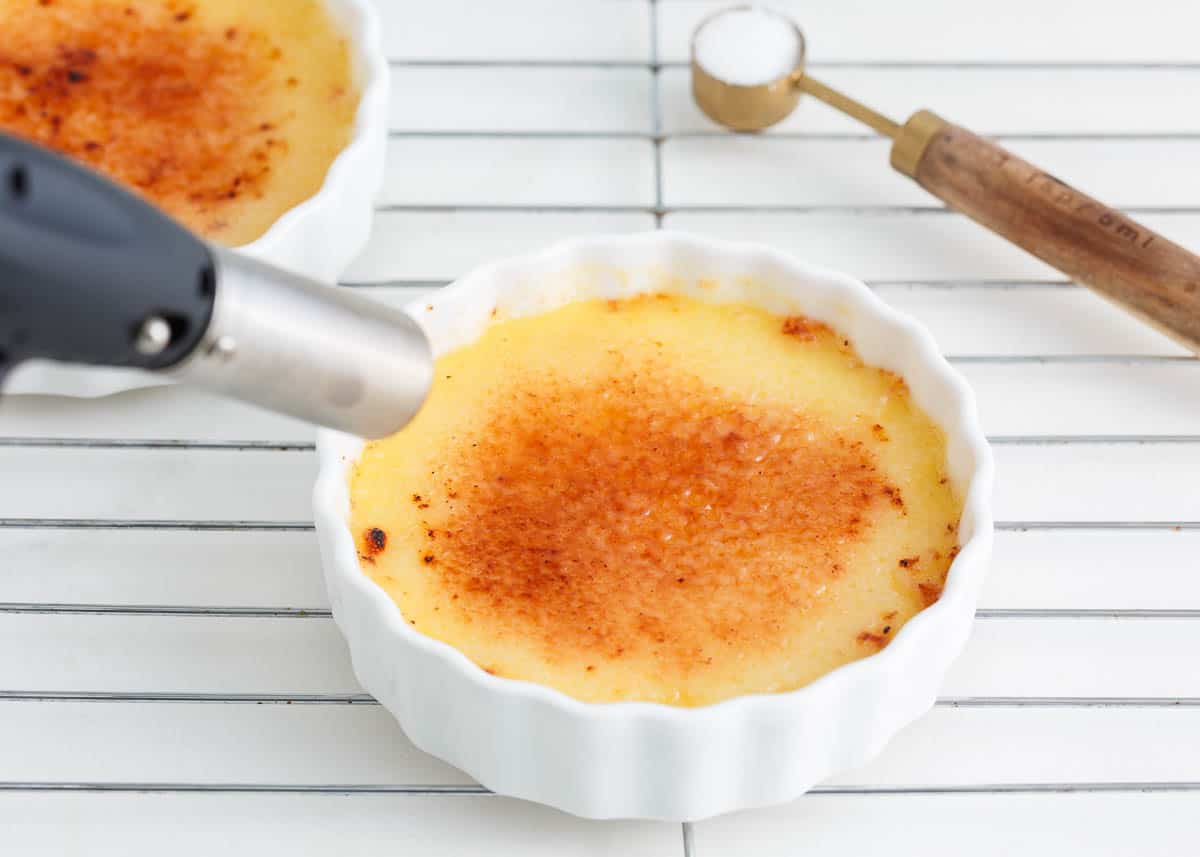
Sprinkle 1-2 Tablespoons of sugar evenly across the surface of the chilled custard. You should have an even layer on top and no sign of the custard. Covering it completely protects it from the heat.
Torch: Carefully turn on the kitchen torch and with even heat distribution, allow the intense heat to melt, caramelize, and “burn” the sugar. It will be deeply caramelized and a dark golden brown.
Broiler: If you don’t have a torch, you can place the ramekins 2-3 inches from the oven’s broiler and broil for 3-5 minutes, rotating as needed until the sugar is bubbling and caramelized.
Skip the topping: If you don’t have a torch and want to skip the hardened sugar, try these toppings instead!
Expert Tips
- Temper the eggs. This is so important to get that smooth creamy consistency in your custard. If not, you’ll basically end up with scrambled egg yolks!
- Bake time. This will depend on the depth of your ramekins. Keep an eye on them and check at the 30-minute mark if yours are about 1″ deep.
- Don’t overbake. It’s done when the edges are set but the center still jiggles like jello. If it’s still runny and moving more than jello it’s not quite ready yet.
- Maximum chill time. I recommend chilling the custard overnight. The flavor gets better the longer it sits.
- Add topping just before serving. Or at least within 2 hours. Any longer than that and the caramelized sugar topping will start to lose its crispy texture.
- If you’ve gone a bit too far with the burnt sugar (like, it’s really actually burnt), no problem! Scrape it off and start again.

Recipe FAQs
The direct translation for crème brûlée is burnt cream, which doesn’t quite have the same ring to it!
Traditionally a recipe for crème brûlée comes in an individual serving of a luscious creamy custard covered by a thin layer of hardened melted sugar. The only way to get to the custard is to crack the sugar with the side of your spoon which allows you to have tiny bits of crunchy sweetness in every spoonful of cream.
No, you can use the broiler, however, the kitchen torch does have a leg up. There is a concentrated direct heat that melts the sugar faster and it gives you a bit more control, so there’s less chance you’ll scorch it. Plus, it’s fun!
It’s served either cold or at room temperature.
You can make this easy crème brûlée ahead and store them unbaked or just bake before serving. Once you’ve prepared the custard and added it to the ramekins, cover it with plastic wrap and keep it refrigerated for up to 2 days. Then, bake as directed.
Either way, you will want to wait to make the caramelized topping until right before serving.
Storing
To store baked custard, cover it and store it for up to 3 days in advance. Add the topping and broil it just before serving.
Once the topping has been made, it’s best enjoyed within the first 30 minutes to really get that crunchy topping. You can store it for up to 3 days in the fridge, if necessary!

If you love this crème brûlée recipe you will also enjoy this chocolate mousse with chocolate chips, homemade toffee and chocolate fudge!
More Classic Dessert Recipes


Creme Brulee Recipe
Video
Equipment
- 1 Torch
Ingredients
Custard
- 2 cups heavy cream , or half-and-half
- 1 teaspoon pure vanilla extract
- ⅛ teaspoon fine sea salt
- 5 large egg yolks
- ½ cup granulated sugar
Sugar Topping
- 2 Tablespoons granulated sugar
Instructions
Custard
- Preheat the oven to 325℉. Place 4 (8-ounce) ramekins in a baking dish. Boil enough water in a tea kettle to fill the baking dish up a few inches.
- In a medium saucepan, heat the cream and salt over low heat until warmed through (about 2 minutes). Do not let come to a simmer. Remove from heat and let sit 5 minutes. Stir in vanilla. Remove 1/3 cup.
- In a large bowl, beat eggs yolks and sugar together until light yellow and airy on medium speed with an electric mixer.
- Very slowly whisk 1/3 cup cream mixture into the eggs to temper the eggs and avoid curdling. Slowly pour the remaining cream mixture in and whisk constantly until well combined. Pour into ramekins and place in baking dish.
- Very carefully add boiling water to the baking dish until it reaches halfway up the sides of the ramekins. Bake 30 to 40 minutes, or until the tops are glossy and baked and it has a uniform jiggle (the custard will set up more when it chills). You know it's done when you lightly touch the center and it will spring back slightly. Let sit 5 minutes in the baking dish before transferring ramekins with tongs to a wire rack to cool completely. Chill in the refrigerator at least 4 hours but up to 2 days.
Sugar Topping
- When ready to serve, sprinkle 1 to 2 teaspoons sugar in a thin, even layer over each custard. Tilt the ramekins from side to side to evenly distribute and tap out any excess sugar.
- Turn on the flame on a handheld torch. Move the flame in a sweeping motion over the sugar topping from a few inches away. Little droplets will start to appear on the top of the sugar and it will start to smell like caramel. Move the flame further away if the sugar starts to brown too quickly in one spot. Turn the flame off when the sugar has caramelized into a glaze and turned light golden brown.
- Chill the crème brulees 10 minutes before serving.
Last step: Please leave a comment and rating after you make the recipe.
Notes
- Whipped cream
- Caramel sauce
- Hot fudge sauce
- Fresh berries
- Unbaked custard can be covered and stored in the refrigerator up to 3 days before baking.
- Baked custard can be prepared up to 4 days in advance. Simply cover with plastic wrap once cooled completely and store in the refrigerator. Add the topping and broil right before serving.
Nutrition
Nutrition provided is an estimate. It will vary based on specific ingredients used.

Abby
I’m drowning in eggs so I wanted to make something to use some of them up and I found this recipe to try and I loved it! So easy, delicious, and simple.
Jade
Very delicious and easy! one of my favorite desserts.
Kristyn
Creme brulee is a dessert that I have recently started loving more & more!! This recipe is perfection! It’s so creamy & easy to make & the flavor is heavenly!