
You only need 3 ingredients to make this rich, creamy no-churn ice cream. There is no machine needed and it’s ready to freeze in minutes!

This post may contain affiliate links. Read disclosure policy.
Homemade No-Churn Ice Cream Recipe
One of my favorite things about summer is homemade ice cream but I don’t always feel like pulling out the machine. This 3-ingredient version is the perfect solution. It’s ultra-creamy, easy to make with just a hand mixer, and ready to customize with your favorite mix-ins.
Whether you’re in the mood for something fruity or chocolatey, this base is a great starting point for all your summer cravings.
Ingredient Notes

- Heavy cream: The high fat content makes the ice cream extra rich and creamy. Regular milk just doesn’t compare.
- Sweetened condensed milk: Acts as both the sweetener and part of the base, giving the ice cream its smooth, velvety texture and rich flavor.
- Vanilla extract: Use a high-quality pure extract for the best classic vanilla flavor.
How to Make No-Churn Ice Cream

- Beat the cream. In a large bowl, beat the cold heavy cream with a hand mixer until stiff peaks form, about 5 minutes. Gently fold in the sweetened condensed milk and vanilla until smooth.
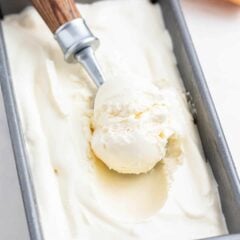
- Pour and freeze. Transfer the mixture to a 9×5-inch loaf pan or 9×9-inch dish. Smooth the top, cover, and freeze for 4 to 6 hours, or until firm. Try not to sneak too many spoonfuls before it’s set!
Flavor Ideas and Mix-in’s
This no-churn vanilla ice cream base is perfect for customizing with your favorite flavors or mix-ins. Fold in about 1 cup before freezing, or mix and match to find your own tasty combo.
- Chocolate: Omit the vanilla and add in 1 cup chocolate milk with 1/3 cup unsweetened cocoa powder, similar to this no-churn chocolate ice cream recipe.
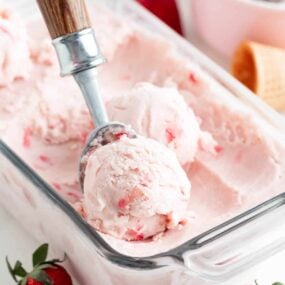
- Strawberry: Mix in 1 cup mashed berries or swirl in strawberry jam.
- Cookies & Cream: Fold in 1 cup crushed Oreos.
- Caramel Swirl: Swirl in 1 cup caramel sauce and a pinch of sea salt.
- Chocolate Chip Cookie Dough: Add 1/2 cup mini chocolate chips + 1/2 cup edible edible chocolate chip dough.
- Peppermint Chip: Mix in 1/2 tsp peppermint extract + 1/2 cup mini chocolate chips.
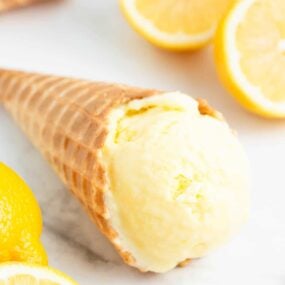
- Lemon: Stir in 1 Tbsp lemon juice + 1 tsp zest or swirl in lemon curd.

Tips for Success
- Chill the bowl and beaters. To speed up the whipping process, I like to freeze my mixing bowl and beaters for about 10 minutes before mixing. This helps the cream peak faster.
- Let soften. The consistency is going to be hard after freezing for 4 to 5 hours. Let it soften a bit on the counter before scooping any out.
- Run scoop under hot water. Run your scoop under hot water before using. The mixture will scoop out so much easier this way.
Serving Suggestions
Serve scoops plain or top with hot fudge, caramel, or homemade strawberry sauce. This ice cream is also amazing with warm desserts like peach cobbler or brownies.

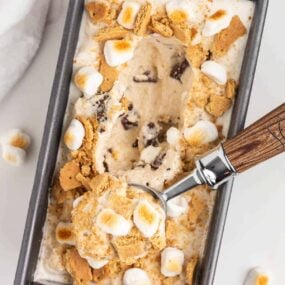
More frozen desserts to try include Disney Dole Whip, ice cream sandwich cake and frozen s’mores.
More Ice Cream Recipes
No-Churn Ice Cream
Video
Ingredients
- 1 pint heavy cream (2 cups)
- 1 (14-ounce) can sweetened condensed milk
- 1-2 teaspoons pure vanilla extract
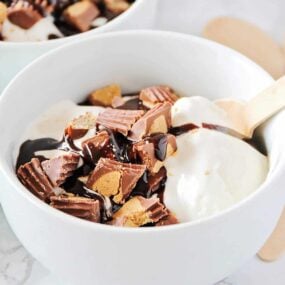
Optional mix-in's: Mixed berries, Crushed Oreos, Chopped Reese's
Instructions
- Make ice cream mixture. In a stand mixer fitted with a paddle attachment, whip 1 pint heavy cream on medium-high 5 minutes, or until a nice peak has formed. You can also use a handheld mixer. Add 14 ounce can of sweetened condensed milk and 1-2 teaspoons vanilla.
- Add desired mix-ins. Using a rubber spatula, fold in any desired mix-ins.
- Freeze. Pour mixture into a 9×5-inch loaf pan or a 9×9-inch baking dish. Cover with plastic wrap and place in the freezer 4 to 5 hours, or until firm.
- Scoop and serve. Let soften slightly on the counter before scooping to serve.
Last step: Please leave a comment and rating after you make the recipe.
Notes
- Mixed berries
- Diced peaches
- Crushed Oreos
- Chopped Reese’s
- Edible cookie dough pieces
Nutrition
Nutrition provided is an estimate. It will vary based on specific ingredients used.
FAQs
Ice crystals can form if the ice cream isn’t stored properly. Be sure to press plastic wrap directly onto the surface of the mixture (no air gaps) before sealing the container. Using a shallow container also helps it freeze evenly and stay creamy.
Stick with heavy cream for the best results. Its higher fat content makes the ice cream richer and creamier. Regular milk won’t whip the same way and can result in an icy texture.
Prep takes just 10 minutes! Then freeze for 4 to 6 hours, or until firm. If you like a softer, soft-serve texture, check it after 3 to 4 hours.
Store the ice cream in a freezer-safe container with a tight-fitting lid. For best texture, press a piece of plastic wrap directly on top of the ice cream before sealing to help prevent ice crystals. It will stay fresh in the freezer for up to 3 months. Let sit at room temperature for a few minutes before scooping if it’s too firm.

Gg
What if I want to use a ice cream maker? Are the instructions the same?
Sarah @IHeartNaptime
No, they wouldn’t be as this is specifically for no churn. Try this homemade vanilla ice cream instead.
Lee
This is so delicious, but every single time I make it in the mixer the cream flies everywhere! I even have the shield that covers the kitchen aid mixer and it still flies out through all of the openings and down the side of the mixer. Even with a cloth draped over it!! Does this happen to anyone else??
Carol
I added a splash of Torani Vanilla syrup and for me, it really brought out the taste of churned ice cream.
I Heart Naptime
I never though of that! That is a great idea. I will have to try that too. Thanks for sharing!
Esma
But I don’t know why when take out from freezer before serving around 15-30 mins, ice-cream inside have small small ice but taste still good, just texture not enough soft. Can you teach me how to make it more soft ?
I Heart Naptime
I wonder if it is the container that you are using. Thanks for letting me know! There could be a few different variations that need to be altered for it.
Michael Kesler
Is there a way to make this chocolate? Printed this out to make with my daughter, can’t wait to try it.
I Heart Naptime
You can omit the vanilla and add in 1 cup chocolate milk with 1/3 cup unsweetened cocoa powder.
Ian Harrison
Would it be OK to add something like baileys or other alcohol
I Heart Naptime
I have never used alcohol in ice cream. Let me know how it turns out!
Rhonda
Made this today. It is super delicious. Very creamy. I wondered about maybe adding more vanilla.
I Heart Naptime
More vanilla wouldn’t hurt! It can be similar to a french vanilla flavor of ice cream. I am glad that you enjoyed it!
Kc
I made this but it is so hard…how to remove????
I Heart Naptime
Warm up an ice cream scooper in hot water and see if that helps. Leaving on the countertop a few minutes before serving works well too.
Karen
Made this today—added fresh strawberries to the mix—pretty darn tasty!
Marvene Smith
can you double this???
Jamielyn Nye
Yes you can, just store in a bigger dish :)
Shadi
Oh wow, this looks so delicious. My family is going to devour it!
Ann
So simple but so delicious! We LOVE ice cream so this one is a keeper!