
Make the easiest oreo pie crust from scratch with only 2 ingredients and 15 minutes. This foolproof recipe is perfect for all your no-bake pies!
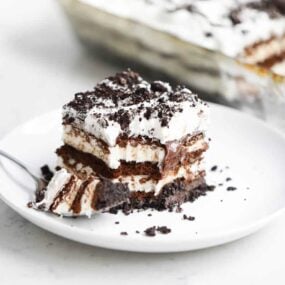
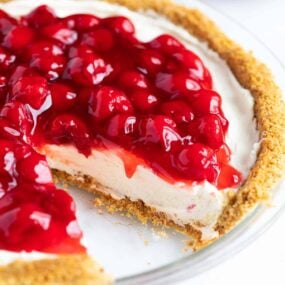
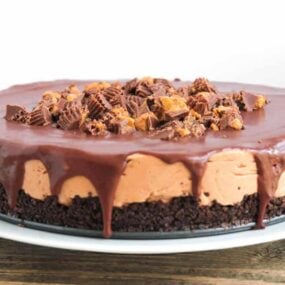
I love using this Oreo pie crust for my chocolate lasagna, chocolate silk pie and no bake Oreo peanut butter pie.

This post may contain affiliate links. Read disclosure policy.
Table of Contents
Easy Oreo Crust
I love a good classic flaky pie crust as much as the next person, but sometimes it’s nice to switch things up! It’s just as easy as a pretzel crust, a homemade graham cracker crust, or gingersnap crust, but with a chocolate twist!
The chocolaty, crunchy signature Oreo flavor, and texture shine through which will come in handy any time of the year. Delicious no-bake desserts like this frozen mud pie for summer BBQs and rich Oreo pie for holiday gatherings.
Simple Ingredients
You read that right. This pie crust comes together with barely any ingredients.

Find the full printable recipe with specific measurements below.
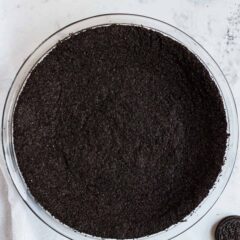
- Oreos (lots of ’em!): You need 25 Oreos and no need to take out the filling. The cream helps to bind the crust.
- Butter: Melted, unsalted butter. If you only have salted on hand, go ahead and use it but omit the added salt.
How to Make Oreo Pie Crust
I am not sure if there is an easier or more flavorful pie crust. If you can blend and stir, you can make this crust.

- Pulse: Preheat the oven and blend Oreos in a food processor or blender. It should make about 2 cups of crumbs. If you don’t have a food processor or blender, put cookies in a Ziploc bag and use a rolling pin to smash cookies into a crumble.
- Combine: Add crumbs to a bowl, stir in melted butter, sugar and salt until combined.
- Bake: Press into a 9-inch pie dish, using your hands, fingers or the bottom of a glass. Bake and set aside to cool completely.
Tip: You do not need to bake it if you will be using it for a no-bake recipe. If you will be making a baked cheesecake, you can bake once the cheesecake is fully assembled. You can also follow this recipe using golden Oreos for a slightly different flavor!

Recipe FAQs
Absolutely! Place the Oreos in a zip-top bag. Cover with a towel and use a rolling pin to crush the cookies until you get fine crumbs.
Yes! Replace the Oreos with gluten-free chocolate sandwich cookies. You may need to use more cookie crumbs if the texture seems to wet after adding the butter.
Storing Tips
You can keep it in the fridge for up to 3 days prior to using it for a pie, any longer than that, it may start to get soggy. You can freeze them for up to 3 months, wrapped in plastic then put in a Ziploc bag or airtight container.
Favorite Recipes for Oreo Pie Crust

Oreo Pie Crust
Ingredients
- 25 regular OREOS
- 5 Tablespoons unsalted butter , melted
Optional
- 1 Tablespoon granulated sugar
- Pinch salt
Instructions
- Preheat the oven to 350°F.
- In a food processor or blender, pulse the Oreos until they are fine crumbs. You should get about 2 cups.
- Stir in the melted butter, sugar, and a pinch of salt if desired until combined. Press up the sides and into the bottom of a 9-inch pie plate. You can use a measuring cup to press the mixture firmly into the pan, if you'd like.
- Bake 10 minutes or fill as-is with a no bake dessert. Let cool completely before filling with your favorite fillings.
Last step: Please leave a comment and rating after you make the recipe.
Notes
Nutrition
Nutrition provided is an estimate. It will vary based on specific ingredients used.

Meagen
This crust came out so great. Everyone raved about the pie and we will definitely be making it again soon!
Karly Strand
The crispness of this crust when baked was absolute perfection, and I can’t wait to make more desserts with this recipe!
Jamielyn Nye
I’m so glad you enjoyed it! Thanks for your comment Karly!