Learn how to make homemade caramel apples with these easy tips and tricks. These decorated treats taste amazing and are a must-make this fall!
Apples with homemade caramel is a favorite combination. We also love these apple cider caramels and caramel apple cider all season long.

Table of Contents
Easy Caramel Apples
When I think of fall, I immediately think of apple desserts and caramel apples. It’s a must to enjoy at least once during the fall season…or maybe even two. ;)
If I’m looking for a quicker alternative, sometimes I make this easy toffee apple dip and serve it with sliced apples. It tastes just like the real deal, but is quicker to make!
We usually always go apple picking at the apple orchard and look for fun ways to use them. Making homemade caramel apples is the perfect solution! They’re simple to make and are a great activity for the family to enjoy together. The kids love to help make them!
Just 2 Ingredients
We love to make all different types – some plain, others with toppings like M&M’s and crushed nuts, or even some that are dipped in both caramel and chocolate. There are so many ways to decorate this fun treat…the options are endless!

Find the full printable recipe with specific measurements below.
- Apple: You can’t have caramel apples without the apples. Just make sure they are thoroughly washed before using.
- Caramel: I love using Peter’s caramel as it melts so easily and makes the perfect caramel apple.
- Melting wafers: Melt the wafers to go on apples on the outside. Use either white or chocolate wafers. The melted chocolate will help keep the toppings sticking.
- Sticks: You can use either popsicle sticks, craft sticks, or lollipop sticks for the top of the apples. Remove the stem and place the stick straight up and down into the stem.
How to Make Homemade Caramel Apples
Bring in the fall with this delicious homemade caramel apples recipe! They are so simple to make and yet look like gourmet caramel apples when shared. Melt the caramel mixture together and create a fall favorite treat!

- Wash apples and let dry. Use Fit fruit cleaner and a scrub brush. Scrub/wash the apples with warm water for about 30 seconds, then place on a towel and let dry completely. When apples are dry, place sticks in the center of the apple (these are my favorite sticks).
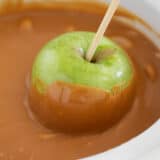
- Melt the caramel. Place Peter’s caramel in a microwavable bowl. Heat for 1 minute, stir, and then cook for an additional minute. Add more time if needed, until it’s totally melted. You can also place it in a slow cooker and allow it to melt that way.
- Dip the apples. Dip apples in the caramel, leaving about one inch around the top. Hold up the apples to allow any excess to drip off and then use a spatula to scrape it off the bottom.
- Set. Place on a parchment-lined baking sheet to set.
Dipping or Not Dipping Apples
If not dipping in chocolate: Leave as-is or coat with preferred toppings immediately. Then place in the fridge for 5 to 10 minutes to help the apples set. Do not store in the fridge.
If dipping in chocolate: Let caramel completely set before dipping in chocolate. Melt the chocolate according to package directions. Then either dip the apples in chocolate or drizzle over the top. Then add desired toppings immediately and let set.

Helpful Tips
Caramel sauce is an easy recipe to master! Follow these helpful tips to have the best caramel apples yet! The flavor is rich and creamy with a sweetness everyone loves!
- Wash your apples thoroughly. Use FIT cleaner, a scrubber, and warm water to remove the wax. You could also use fine-grit sandpaper to lightly remove the wax from the apple.
- Dry the apples completely. Any wax or moisture left on the apple will prevent the caramel from sticking.
- Prepare ingredients beforehand. Get all your ingredients ready before making the caramel, because you’ll want to move quickly once you dip them.
- Use high-quality caramel. My favorite type to use is Peter’s. I usually use half of the block for 12 apples and wrap the rest for later. It tastes so much better than Kraft caramel. Werther’s caramels will work too. You can also use a homemade caramel recipe.
- Let caramel cool before dipping. Allow the caramel to cool for a few minutes before dipping the apples.
- Allow excess caramel to drip off. Once you dip your apple, hold it up for about 20 seconds to allow any excess caramel to drip off. Then scrape off the bottom with a spatula.
Favorite Toppings
You can’t go wrong with a caramel apple! These variations and toppings can be added together or in combination with each other. Create the very best caramel apple with all these favorite toppings listed below!
- Sea salt: Give these apples a sweet and salty apple surprise! It is a classic flavor and everyone loves how simple it is.
- Drizzled chocolate: A chocolate lover’s dream! It melts perfectly and always looks so decadent and tastes delicious!
- Chopped nuts: Pecans, almonds, peanuts, or walnuts are all great ways to add a crunchy, sweet, and salty taste!
- M and M’s: Mini M&M’s or mini chocolate chips are a kid’s dream and perfect to color the apple with.
- Reese’s: Reese’s pieces or chopped peanut butter cups are all part of the chocolate and peanut butter combination!
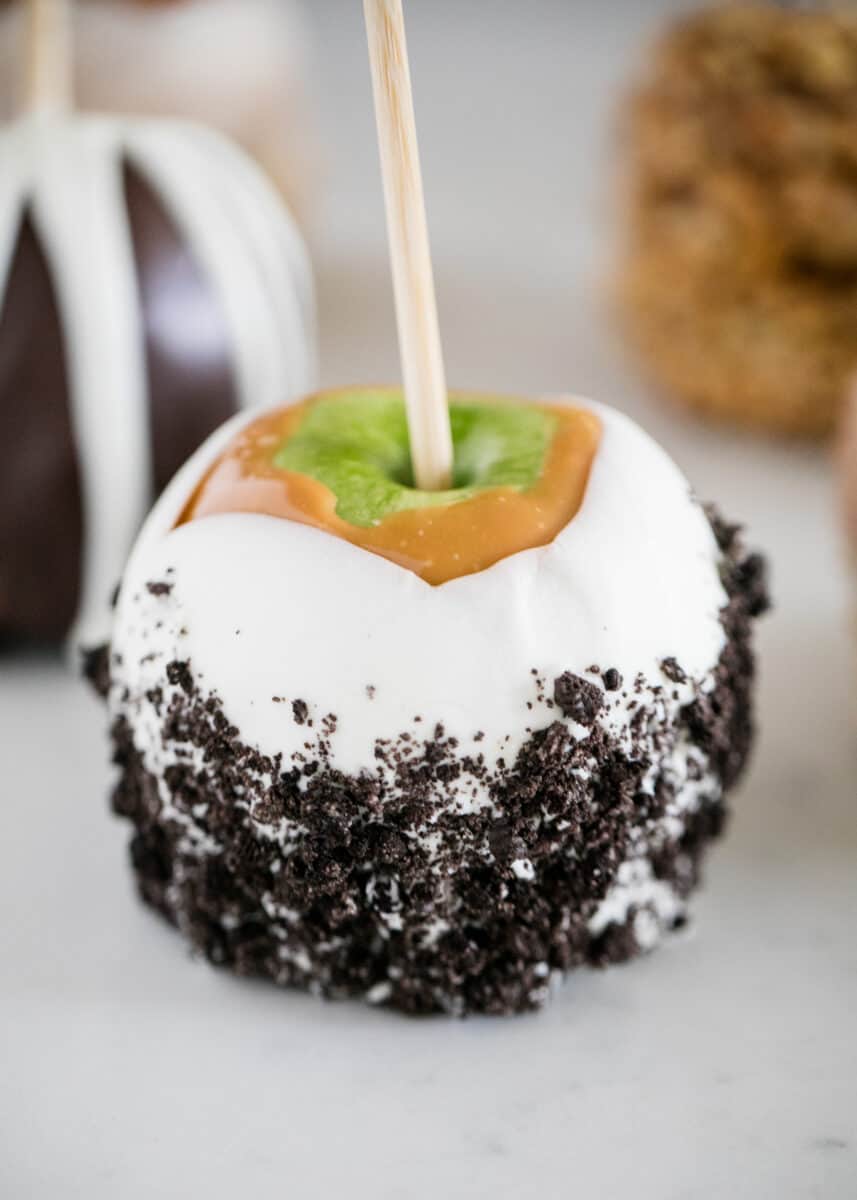
- Oreos: Crushed Oreos lay flat on the caramel or chocolate melts.
- Sprinkles: Every kid to adult loves the bright and cheerful sprinkles attached to the apples.
- Cinnamon sugar: These are a family favorite and we make these often for friends and family. Try it with the cinnamon-sugar combination!
- Crushed toffee: Add a little extra crunch and caramel flavor to the outside of the apples.
- Crushed pretzels: A slightly different add-in that takes these caramel apples to the next level.
- Candy corn: Since these are usually made in the fall, candy corn is easy to find and add to the outside.
- Flaked coconut: This is actually one of the easier add-ons to roll right onto the caramel or chocolate coating.
- Graham cracker crumbs: Make it look like a pie or add it with another topping for a delicious boost.
- Candy bars: Chopped Snickers and crushed Butterfingers are great ways to help add candy to the apples!

Recipe FAQs
Apples have a waxy coating around them that prevents the caramel from sticking if it is not washed thoroughly and dried. Make sure to have the apples cold to help prevent the caramel from falling off the apples when applied.
Both are very similar to each other. Candy apples have a hard candy coating that is made from sugar and light corn syrup whereas caramel apples are made from brown sugar, heavy cream, butter, and corn syrup for a more creamy texture.
Caramel is normally a thicker sauce but for dipping caramel apples in you may want to thin the sauce beforehand or drizzle it overtop chocolate-dipped apples. Simply add hot water or cream to the mixture and it will thin out.
It’s really up to you, but I suggest using a firm apple that is a little tart to cut through the sweetness of the caramel, such as granny smith apples, fuji, or Honeycrisp.
If I am giving these as gifts, I wrap each apple individually in cellophane bags that I line with a wax paper circle first. They may still be a little sticky, but they won’t stick to one another.
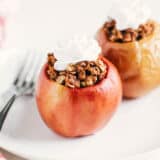
My absolute favorite combo is the “apple pie apple” inspired by my favorite caramel apples from Disneyland. Check out my other favorite Disney caramel apples for more inspiration from Disneyland.
5 star review
“These are so much fun (not to mention delicious!) we love to use different toppings like nuts or sprinkles too. The kids love it :)”
-Alexandra
Storing Caramel Apples
The apples are best eaten within one to three days. If you live in a warm or humid climate, store it in the refrigerator.
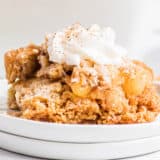
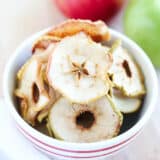
More Delicious Apple Treats


HUNGRY FOR MORE? Subscribe to my newsletter and follow on Facebook, Pinterest and Instagram for all the newest recipes!
Caramel Apples
Equipment
- Caramel Apple Sticks
Ingredients
- 2 pounds Peter's caramel
- 12-14 medium green apples
- 1 cup chocolate melting wafers , optional
- 1 cup white chocolate melting wafers , optional
Instructions
- Line a baking sheet with parchment paper or a silicone mat and lightly butter the paper. Set aside.
- Use Fit fruit cleaner and a scrubber. Scrub/wash apples with warm water for about 30 seconds each. Place on a towel and let completely dry. Once the apples have dried, place sticks in the center of each apple.
- Place the caramel in a microwavable bowl. Heat for 1 minute, stir, and microwave for an additional minute. Add additional time, if needed, until melted. You can also place the caramel in a slow cooker and let melt.
- Dip apples in the caramel, leaving about one inch around the top. Hold up the apples to let any excess caramel drip off. Use a spatula to scrape the caramel off the bottom and place it on the baking sheet. If you are not dipping in chocolate, coat with any preferred toppings immediately or leave plain. Chill 5 to 10 minutes until set and remove to the counter.
- If dipping in chocolate, let the caramel set completely before dipping. Melt the chocolate according to package directions. Either dip the caramel apples in the chocolate or drizzle over the top. Add any desired toppings and let set.
Notes
Nutrition
Nutrition provided is an estimate. It will vary based on specific ingredients used.
Did you make this recipe? Don’t forget to give it a star rating below!
Categorized as: American, Desserts, Fruit Desserts, Halloween, No-Bake

Jamielyn Nye is the founder and recipe creator at I Heart Naptime. She is also the author of the I Heart Naptime Cookbook. Here you will find easy family-friendly recipes for every occasion.

My kids and I had so much fun making these together! Our favorite fall treat we make every year.
My kids had so much fun making these with me and they loved eating them afterwards.
We made these on Saturday because it was col and rainy here and my kids LOVED them! These bring back so many memories, thank you!
Just perfect for the upcoming holiday season. Caramel apples bring back so many great memories :-)
This reminds me of my childhood so much!!! Bookmarking this for Halloween – thanks!
Hope you enjoy! :)
These are so much fun (not to mention delicious!) we love to use different toppings like nuts or sprinkles too. The kids love it :)
I’m so glad your kids loved them! :)
Definitely an excitement for kids. Best for their parties. These look so cute and creative and best that apples are so healthy too.
Love this idea! What a fun way to serve apples!
Caramel apples are my favorite! Great recipe – love that we were able to make them different ways. We’ll make them again on Halloween! Thank you
My kids and I had so much fun making these! They turned out great, thanks for the recipe!
These are great – and I am definitely trying the apple pie caramel apple! Yum!
Caramel apples are one of my favorite treats, especially when they’re covered in chocolate and other treats as well! Yum! I love the white apple pie “Mickey” you made — so cute! Great tips here.
Such a brilliant post! My favourite coating is nuts but my kids prefer crushed oreos. No surprise there!