
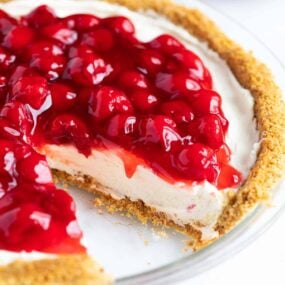
These mini cheesecakes with vanilla wafers crust have a rich and creamy filling that is so easy to make! The best bite-sized dessert when you need a sweet treat.
Some of my other favorite mini desserts include mini fruit tarts, mini cheesecakes with graham cracker crust and mini cookies and cream cheesecake bites.

This post may contain affiliate links. Read disclosure policy.
Table of Contents
Easy Mini Cheesecakes with Vanilla Wafer Crust
Bite-sized desserts are one of my favorites to make when entertaining or hosting a dinner party! They are so cute and perfect for guests to easily grab and enjoy. Some of my other favorite treats are chocolate truffles, Oreo balls and chocolate-covered strawberries.
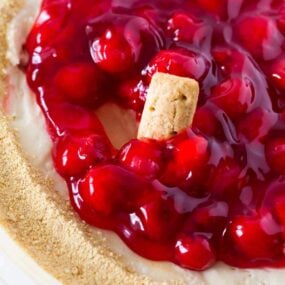
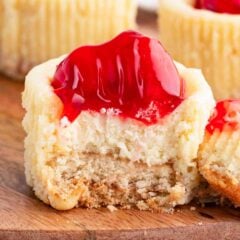
For these mini cheesecakes with vanilla wafers, I used a classic cherry pie filling, but you use different toppings as well. Fresh berries are my favorite topping for this cheesecake with sour cream topping or cheesecake bars. Hot fudge sauce is a decadent choice!
Mini Cheesecake Recipe Ingredients
This nilla wafer mini cheesecakes recipe is super easy and only requires 5 ingredients!

Find the full printable recipe with specific measurements below.
- Vanilla wafer cookies: Vanilla wafers for the cheesecake crust taste amazing and there’s no extra work required!
- Cream cheese: Make sure it’s softened before using. If it’s too cold, the filling could be lumpy and not smooth.
- Eggs: Use two large eggs. Make sure they’re fresh.
- Sugar: This helps balance out the tang from the cream cheese.
- Vanilla: For an extra boost of flavor add a little extra vanilla.
- Optional: A few teaspoons of lemon juice or a pinch of fresh lemon zest.
How to Make Mini Cheesecakes with Vanilla Wafers

- Layer. Fill a muffin pan with cupcake liners and place 2 vanilla wafers at the bottom of each one. Alternatively, you can use a silicone muffin pan if you prefer no liners.
- Combine. Preheat oven to 375°F. In a large bowl, beat cream cheese and sugar.
- Creamy cheesecake filling. Then mix in eggs (one at a time), lemon juice (optional, see note below), and vanilla.
- Add batter. Divide cheesecake batter between 12 liners, filling each cup up to about 1/4 inch from the top.
- Bake cheesecake. Bake for 15-18 minutes or until a toothpick comes out clean. Remove from oven and let them cool completely. You can also chill in the fridge for at least 30 minutes, or until firm.
- Cherry topping. Once chilled, add your favorite toppings before serving.

Mini Cheesecakes with Nilla Wafers Topping Ideas
When it comes to mini cheesecakes the topping ideas are almost endless!
- Cherry pie filling
- Fresh strawberries or raspberries
- Lemon curd with blueberries
- Apple pie filling
- Crushed cookies
- Caramel sauce
- Hot fudge or chocolate ganache
- Crushed candy bars
- Chocolate chips
- Chopped nuts
- Whipped cream

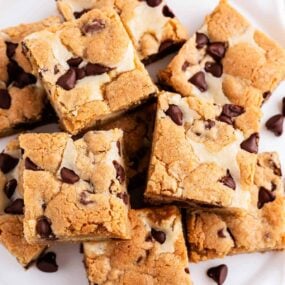
If you love fruit desserts, try blackberry cheesecake bars, this fruit and veggie platter, and this fresh fruit tart as well!
More Cheesecake Recipes
Mini Cheesecakes with Vanilla Wafers
Video
Ingredients
- 16 ounces cream cheese , softened
- ¾ cup granulated sugar
- 2 eggs
- 1 teaspoon vanilla extract
- 24 Nilla Wafer Cookies
Optional toppings: Canned pie filling, fresh berries, whipped cream, chocolate or caramel sauce
Instructions
- Make cheesecake filling. Preheat oven to 375°F. In a large bowl, beat 16 ounces cream cheese and 3/4 cup granulated sugar. Then mix in 2 eggs (one at a time), lemon juice (optional, see note below), and 1 teaspoon vanilla.
- Add vanilla wafers to muffin pan then filling. Fill a standard muffin pan with cupcake liners and place 2 vanilla wafers at the bottom of each one. Alternatively you can use a silicone muffin pan if you prefer no liners. Divide batter between 12 liners, filling each cup up to about 1/4 inch from the top.
- Bake. Bake for 15-18 minutes or until a toothpick comes out clean. Remove from oven and let them cool completely. You can also chill in the fridge for at least 30 minutes, or until firm.
- Chill. Once chilled, add your favorite toppings before serving.
Last step: Please leave a comment and rating after you make the recipe.
Notes
- You can make a graham cracker pie crust and press about 1/4″ into the bottom of a silicone muffin pan. I would use 2/3 cup crushed graham crackers, 2 Tablespoons melted butter and 2 Tablespoons sugar.
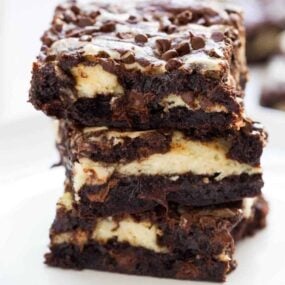
- You could also use an OREO as the base and add crushed OREOS to the top like I do in these mini oreo cheesecakes.
Nutrition
Nutrition provided is an estimate. It will vary based on specific ingredients used.
Recipe FAQs
It is a little bit hard to know when your cheesecakes are done because they are a light golden color. To know when your mini cheesecakes are done, give the pan a little jiggle to know what is firm but also wiggles a bit.
Once the cheesecakes cool starts to contract during this time. As it is contracting and the edges are stuck to the pan crack form. Try not to overbake these treats. The center needs to be a little jiggly and the edges need to be apart to stop the cracks.
Yes! You could use a graham cracker pie crust or Oreo crust if you would like. Just press the graham cracker crumbs or Oreo crumbs into the base of the silicone muffin pan (or inside a liner), then add the filling on top.
These will last about 3 to 5 days if stored in the refrigerator. They never last that long in our house though…my family eats them right up. Just make sure to store them in an airtight container when storing them in the fridge.
Yes! I’d recommend wrapping each of your cheesecake bites in plastic wrap, then adding it to a zip-top freezer bag. They’ll last in the freezer for about a month. When ready to eat, thaw at room temp for 5-10 minutes to soften before enjoying.
