
Homemade silver dollar pancakes are the cutest mini pancakes, with fluffy middles and golden, crisp edges. They come together fast with everyday ingredients for an easy breakfast or brunch.

This post may contain affiliate links. Read disclosure policy.
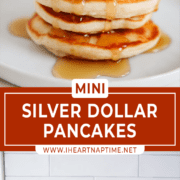
Mini Silver Dollar Pancakes
These silver dollar pancakes are fluffy mini pancakes with lightly crisp edges and the perfect size for stacking, dipping, and drizzling with maple syrup. Made with simple pantry staples, they’re quick for a weekday breakfast yet cute enough for weekend brunch board.
They’re a favorite for kids and toddlers, and easy to portion with a tablespoon or small cookie scoop. If your batter feels thick, just stir in a splash of milk until it pours easily. You can also make mini versions using my buttermilk pancake recipe or banana pancakes.
Recipe Ingredients

Find the full printable recipe with specific measurements below.
- Flour: Measure flour correctly so you do not add too much. Extra flour can make silver dollar pancakes dry and dense.
- Baking powder: Use fresh baking powder for the best lift and fluffy texture.
- Milk: Higher-fat milk makes a richer batter. You can also use buttermilk for even fluffier pancakes (or make a quick buttermilk substitute).
- Unsalted butter: Using unsalted butter helps you control the salt. With mini pancakes, too much salt is easy to notice.
How to Make Silver Dollar Pancakes
In a large bowl, whisk together the flour, sugar, baking powder, baking soda, and salt until combined and lump-free.
Stir in the milk, melted butter, and vanilla just until the batter comes together and most lumps are gone. The batter should pour easily. If it feels too thick, add 1 to 2 tablespoons milk to thin it out.


Coat a preheated griddle with butter. Scoop about 1 Tablespoon of batter (or use a small cookie scoop) for each pancake, leaving a little space between them. Cook about 2 minutes, or until bubbles form on the surface and the edges look set.

Flip the mini pancakes and cook the other side for 1 more minute until golden brown. Repeat until the batter is done and enjoy!

Recipe Tips
- Use medium heat: Mini pancakes cook fast, so medium heat helps the centers cook through without over-browning.
- Butter the griddle between batches: It prevents sticking and gives those lightly crisp, golden edges.
- Do not overmix: Stir just until combined. A few small lumps are fine.
- Adjust batter thickness: The batter should pour easily. If it feels thick, add milk 1 tablespoon at a time.
- Keep warm: Hold cooked pancakes on a baking sheet in a 175°F oven while you finish the batch.
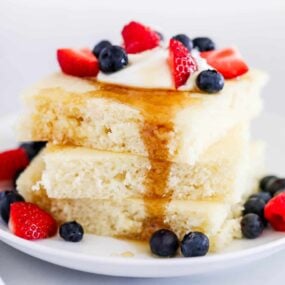
Silver Dollar Pancake Toppings
Top silver dollar pancakes just like regular pancakes, or set out a simple “pancake board” with a few options for everyone to mix and match.
- Syrup: maple syrup, cinnamon syrup, or buttermilk syrup
- Fruit sauce: blueberry sauce or strawberry sauce (thicker than syrup and extra cozy)
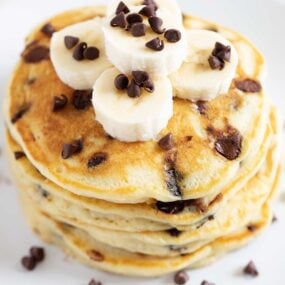
- Fresh fruit: blueberries, strawberries, blackberries, or sliced bananas
- Whipped cream: a classic for mini pancake stacks
- Nut butter: peanut butter, almond butter, cashew butter, or hazelnut spread

More pancake recipes to try include my blueberry pancakes, pumpkin pancakes, and apple cinnamon pancakes.
More Pancake Recipes


Mini Silver Dollar Pancakes
Video
Ingredients
- 2 cups (260 grams) all-purpose flour
- ¼ cup (50 grams) granulated sugar
- 3 teaspoons baking powder
- ¾ teaspoon fine sea salt or table salt
- 1 ⅓ cups milk , at room temperature, plus more as needed
- 5 Tablespoons unsalted butter , melted, plus more for griddle
- 1 teaspoon vanilla extract
For serving: Butter, Syrup, Fresh berries
Instructions
- Combine. In a large bowl, combine 2 cups flour, 1/4 cup sugar, 3 teaspoons baking powder, and 3/4 teaspoon salt. Stir in 1 1/3 cups milk, 5 Tablespoons butter, and 1 teaspoon vanilla with a wooden spoon just until most of the lumps are gone. Add 1 to 2 Tablespoons milk, if needed (you don't want the batter too thick).
- Preheat a griddle or skillet to medium-low (about 260°F).
- Make pancakes. Coat the griddle with a good amount of butter. Using a small cookie scoop or tablespoon, pour batter onto the heated griddle. Cook for 2 minutes, or until bubbles appear. Flip the pancakes and cook the other side for 1 minute, or just until lightly browned. Add more butter to the skillet when cooking the next batch and repeat.
- Serve. Serve immediately or keep pancakes warm on a baking sheet in the oven at 175°F.
Last step: Please leave a comment and rating after you make the recipe.
Notes
Nutrition
Nutrition provided is an estimate. It will vary based on specific ingredients used.

Jessica
Have you ever tried making ahead and freezing for an event?
Sarah @IHeartNaptime
Hi Jessica, while we don’t have that specific information, they are able to be frozen and reheated. Hope that helps!
David
Batter I quite thick and more milk definitely needs to be added.
Also these are not the thin little silver dollar pancakes, I think they have too much baking powder. I cut it in half and they worked much better
Melisha
Sorry, forgot the stars! 5/5 will make again!
Sarah @IHeartNaptime
Thanks for the review Melisha!
Melisha
These were delicious! I made them for a brunch and my 11 year old was obsessed!
Sarah @IHeartNaptime
So happy to hear that the silver dollar pancakes were a hit!
April
Mini foods are the best! My kids love these (and so do I!)
Ashley
My family was so excited to see these on the table! My kids even love the leftovers for lunches (so I have to make a double match!).
Toni
Such an amazing day starter! My family loves it! Thanks!
Sara
Turned out great! Love that they have no eggs, perfect for current times. Did some with chocolate chips and some with a blueberry or two.
Jamielyn Nye
Yes, these mini pancakes are a great option without eggs! Glad you enjoyed them!
Journa Liz Ramirez
These pancakes are fun to eat! My kids can’t get enough of these cute little pancakes. Such a great idea!
Taylor @ I Heart Naptime
I’m so glad your kids love them, Journa! They are a hit at our house too :)
Rebecca Hubbell
My kids are obsessed with these pancakes – they are great for freezing too!
Jamielyn Nye
Yes, they freeze great!
Julia
My kids were so obsessed with these pancakes!! such a good idea to make a simple breakfast super special! Thanks for the recipe!
Jamielyn Nye
A kid fave for sure!
Allyssa
Super great recipe! Very easy to make and really creative! Loved how it turned out! Will have this again, thanks for sharing!
Jamielyn Nye
So glad to hear! Thanks for your review Allyssa