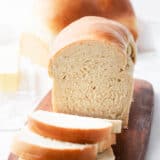
This is the BEST easy homemade bread recipe that’s simple to make with super soft and tender results. A slice of this fluffy white bread is perfect for sandwiches and freezes well.
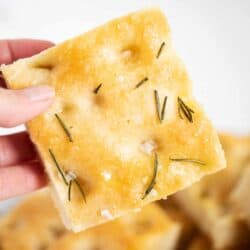
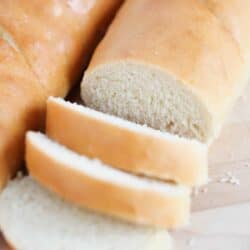
We love to top this bread recipe with butter and homemade jam! Other favorite breads to make include homemade French bread and this no knead Dutch oven bread.

Table of Contents
Easy Bread Recipe
There really is nothing better than a warm slice of bread with butter and homemade strawberry jam on top. While I love making artisan bread, I tend to make this white bread recipe for my family the most!
I learned to make this bread when I was 12 and have been making it ever since. The evaporated milk adds the best flavor and the perfect texture. I even made a brioche bread, but this original recipe will always have my heart!
I’m excited to share all my bread making tips with you. Don’t let yeast intimidate you, this easy bread recipe is fool proof. Seriously there is nothing better in my opinion than a warm loaf of homemade bread to go with dinner or to make a sandwich for lunch .
Ingredients

Find the full printable recipe with specific measurements below.
- Warm water: The water temperature is key. If it’s too hot, it will kill the yeast. I like to keep it around 105°F.
- Active dry yeast: Make sure you are using fresh yeast. If your yeast is old, your bread will not rise.
- Granulated sugar: This adds the perfect sweetness.
- Butter: The butter adds the perfect flavor.
- Salt: The salt will bring all the flavors together.
- Evaporated milk: This is the secret ingredient that really adds the perfect flavor and tenderness. You can substitute with milk if needed.
- Flour: I’ve made this recipe with bread and all-purpose flour, both will work well. Be careful not to add too much, add slowly at the end.
Variations
- Cinnamon swirl bread: Your family will love the cinnamon sugar swirl!
- Raisin bread: Follow the cinnamon swirl bread instructions and add up to 2 cups raisins.
- Whole wheat flour bread: I love to make this variation to use with avocado toast.
- Homemade bread bowls: These are perfect for soup, dips and more!
How To Make Bread
Follow these step by step instructions and tips on how to form your homemade bread for best results.

- Proof the yeast: Let the yeast bubble up in warm water. You want the yeast mixture to be foamy and dissolved before you add to the flour.
- Mix together: Add a little more flour and keep mixing until the dough comes off the edge of the mixer. You know it’s done when your finger no longer sticks to the dough.
- First rise: While you’re letting the dough rise, cover the bowl with a warm towel and set by a window. You can also turn the oven to 175°F and then turn it off. Then place the bowl inside the oven and let it rise there. Make sure the dough has doubled in size before touching it.
- Shape the dough: When the dough is ready to be formed, punch the dough and then cut in half to make two loaves on a lightly floured surface. Press the dough down removing any air bubbles and start kneading for a couple minutes. Form a loaf and tuck the ends under.
- Second rise: Stick the two loves in bread pans and then let the dough rise until it has doubled in size or formed the perfect size bread.
- Bake: Then it’s ready to bake! Bake until golden brown and then butter the tops.
Expert Tips
- Weather can affect ingredients: The weather outside can affect the overall consistency of the dough. If it is too humid, your dough may be too sticky. Add in additional flour 1/4 cup at a time until the dough no longer sticks to the sides of your mixer (and your finger doesn’t stick to the dough when you press on it).
- Temperature can affect the rise: If your house is on the cooler side, your dough can take a lot longer to rise. Whenever I bake bread in the winter, I let it rise in the oven. Turn on the oven for 2-3 minutes, then turn if off to trap in the heat and place your bowl inside.
- Food thermometer: Using a thermometer is an easy way to make sure the temperature of your water is just right. It should feel like warm bath water, around 105°F.
- Stand mixer is best to fully knead: Although you can knead by hand, using a KitchenAid stand mixer with a dough hook saves you time and energy. It’s a game changer for making the best homemade bread recipe!
- Towel: You’ll need a towel to cover the bowl while the dough rises. I love using these flour sack towels because they’re just the right width – not too thick and not too thin.
- Bread Pans: This recipe makes two loaves, so you’ll need two 9×5″ bread pans. You can also use loaf pans that are ceramic, glass or cast iron.

FAQs
I use active dry yeast. You need about 2 1/2 teaspoons to make 2 loaves of homemade white bread.
Yes! I just prefer using bread flour when making this recipe, but all purpose tastes great too. Make sure you accurately measure the flour before getting started.
Yes you can use regular milk, I just prefer the flavor with evaporated. It makes the bread more rich.
Sure! Just simply cut the ingredients in half to make 1 loaf instead of 2.
Although I haven’t tried, others have had success using a bread machine to make this recipe. Follow the manufacturer directions for layering the ingredients in the bread maker pan as well as you may need to adjust for instant yeast.
5 star review
“I tried various recipes when I decided to make bread for my family instead of buying it from the store. This one is by far the best! The loaves are soft and fluffy every time. The whole family enjoys it and my kids say it tastes better than store bought. I use regular milk and it turns out perfect.”
-Amanda

Uses for Leftover Homemade Bread
Use your bread in some of these favorite recipes!
- To make a buttery grilled cheese sandwich.
- Toasted with chicken salad or egg salad on top.
- For breakfast as french toast or french toast sticks.
If you have leftover bread that has gone a little hard, don’t pitch it! It’s perfect for making homemade croutons, breadcrumbs, crockpot stuffing or overnight French toast casserole. It’s a great way to stretch the bread even further.
Storing and Freezing Instructions
The bread will keep for up to 5 days if stored in an airtight container or bag. It will also stay fresh if tightly wrapped in foil.
To freeze the bread after it’s been baked, simply let cool completely then wrap in foil or saran wrap. Then stick in a freezer bag. Freeze for up to 3 months. You can also freeze the dough after it rises the first time. Just make sure to let it rise again as it thaws.

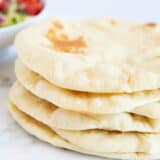
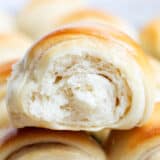
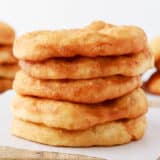
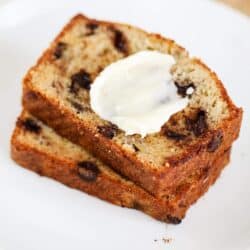
Love homemade bread recipes? Try these other favorites such as naan bread, dinner rolls or these easy breadsticks!
More Homemade Bread Recipes
Browse all
HUNGRY FOR MORE? Subscribe to my newsletter and follow on Facebook, Pinterest and Instagram for all the newest recipes!
Homemade Bread Recipe
Video
Equipment
- 2 9×5-inch bread pans
Ingredients
Proofing Yeast
- 2 ½ teaspoons active dry yeast
- ½ Tablespoon granulated sugar
- 2 cups warm water , at 105°F
Bread
- ¼ cup melted butter , plus 1 Tablespoon for brushing on top
- ¼ cup granulated sugar
- ½ cup evaporated milk
- 1 Tablespoon Kosher salt
- 6-7 cups bread flour , or all-purpose flour
- 1 Tablespoon shortening , or butter
Optional topping: Butter and Jam
Instructions
Proofing the Yeast
- In a small bowl, add the yeast and sugar. Pour the warm water over the yeast mixture and let it sit 5 to 10 minutes, or until nice and bubbly. If it doesn't foam, toss it and start over. The water was either too hot or the yeast was not fresh (check the expiration date to be sure it isn't old).
Bread
- In the bowl of a stand mixer fitted with a paddle attachment, mix together the butter, sugar, evaporated milk, and salt on medium low. Mix in the yeast mixture just until combined.
- Swap out the paddle attachment for a dough hook. With the mixer on low, add 3 cups flour until combined. Add 1 cup flour at a time and stir until combined. After adding a total of 6 cups flour, add 1/2 cup flour at a time until the dough is no longer sticking to the sides. It’s ready when the dough is no longer sticky. You can knead by hand, if needed.
- Cover the ball of dough and sides of the bowl with shortening. Cover the bowl with a warm towel. Set by a window and let rise 1 hour, or until doubled in size. When it has risen over the bowl, punch it down, and transfer to a floured surface.
- Spray 2 9×5-inch bread pans with nonstick cooking spray.
- Knead the dough 2 to 3 minutes. Cut into 2 equal pieces. Using a rolling pin, roll one piece into a rectangle. Starting at the shorter side, roll the dough up and tuck the ends under. Place into a bread pan. Repeat with the remaining piece.
- Preheat oven to 375°F and place the rack in the middle of the oven.
- Let the loaves rise about 30 minutes. When it looks like a good loaf of bread, place in the oven and bake 25 to 35 minutes, or until golden on top and cooked through. If the tops are browning too fast, tent the top with foil.
- Remove from the pans to a cooling rack. Brush the tops with butter. Slice once slightly cooled. Enjoy with butter and jam, if desired.
Notes
Nutrition
Nutrition provided is an estimate. It will vary based on specific ingredients used.
Did you make this recipe? Don’t forget to give it a star rating below!
Categorized as: American, Bread, Freezer-Friendly, Nut-Free, Reader Favorites, Vegetarian, Yeast Bread

Jamielyn Nye is the founder and recipe creator at I Heart Naptime. She is also the author of the I Heart Naptime Cookbook. Here you will find easy family-friendly recipes for every occasion.