
This fall charcuterie board makes entertaining guests easy this fall! A colorful autumn inspired charcuterie is the best colorful appetizer spread to serve at holidays all season long.
The best part of snack boards is that you can make them year-round! Try a Christmas charcuterie board or Italian antipasto platter or a s’mores charcuterie board!

This post may contain affiliate links. Read disclosure policy.
Table of Contents
- Autumn Charcuterie Board
- What is a Charcuterie Board?
- Why You’ll Love This Fall Themed Charcuterie
- What You Need To Get Started
- The Basics of an Autumn Charcuterie
- Fall Charcuterie Board Ideas
- How to Make a Fall Charcuterie Board
- Tips for the Best Autumn Harvest Charcuterie
- More Fall Favorites
- Recipe Card
- Recipe FAQs
Autumn Charcuterie Board
As fancy as a fall charcuterie board sounds and as beautiful as it looks, it’s one of the easiest ways to impress a crowd! Whether I’m hosting a gathering or bringing something to the party, a platter of different options is what I call easy entertaining.
I love that I can make simple charcuterie board ideas casual or upscale. Sometimes I’ll have a simple fruit and cheese platter and sometimes I’ll jazz it up with nuts, dips and gourmet cheese and deli meats. No matter which one of my platters I’m presenting, it’s always met with “oohs and ahhs”!
I’m sharing my top tips for creating the best charcuterie board while adding a fall flare and it’s something even the kids can help put together!
What is a Charcuterie Board?
Charcuterie is a French term that was coined back in the day before people had fridges and needed a way to preserve their meat. A charcuterie board is a way to present these meats in an arranged, and eye-catching way.
As they become more and more popular, people are getting creative with them and adding cheeses, nuts, dips, chocolate, fruit, vegetables, crackers, the list is endless!
Why You’ll Love This Fall Themed Charcuterie
- An experience. A fall charcuterie board is not only a colorful showstopper but a whole experience! From being able to pick up finger foods with toothpicks or cocktail forks, cutting cheese wedges, dipping bread and crackers, and deciding which to do first.
- Something for everyone. With a wide range of goodies to choose from, this easy fall appetizer is sure to include a little something for everyone, even picky eaters!
- Showcase seasonality. An easy snack platter is the perfect way to show off fresh fall fruits and veggies, as well as your favorite fall dips and treats. Fresh apple slices, roasted pumpkin seeds and any fun Halloween or Thanksgiving treats.

What You Need To Get Started
- A board – My recommendation would be to find a beautiful wood board that you can invest in, although an type of tray or baking sheet is fine. My two favorites are this round reclaimed wood board and this regular wood serving tray.
- Utensils/toothpicks – Think about what you’re serving and how you’d like people to take it off the platter. Cocktail forks and spoons, a pair of tongs, a cheese knife, or a bunch of toothpicks may be in order.
- Ramekins/small bowls – Great for dips, or to separate oily olives, jelly, salty nuts, pickles, etc. They’re a great way to keep them from running onto everything else.
The Basics of an Autumn Charcuterie
To put together a fantastic fall charcuterie board, you need the 5 following things:
- A board with small bowls to place the food on.
- A variety of foods that are popular during the fall season.
- The taste of what’s on your board has familiar fall flavors.
- There are variety of textures and autumn colors like red, orange, and brown.
- It looks nice! It’s presented beautifully and you may even have placed some cute decorative items on there.

Fall Charcuterie Board Ideas
If you’re wondering what is normally on a fall charcuterie board, you’ll typically find a selection of different cheeses, meats, fruit, veggies, crackers, dips, nuts and more. Below are some snack board ideas.
- Fruit – Fresh apple slices, or dried apple chips, orange slices, dried apricots, grapes, cranberries, pears or figs.
- Delicious dips like these sweet pumpkin cheesecake dip and toffee caramel dip. Or savory homemade hummus and skinny dill dip.
- Cheeses – Slices of cheddar, blue cheese, swiss, Havarti, manchego, goat cheese or gouda can be used. You could also make the centerpiece a cheese ball or a baked brie with spicy jelly.
- Bread and crackers– Naan bread, pita bread, Ritz, pretzels, tortilla chips, multi-grain crackers, or sliced French baguette.
- Veggies such as baby carrots, celery sticks, cherry tomatoes, sliced bell peppers, etc.
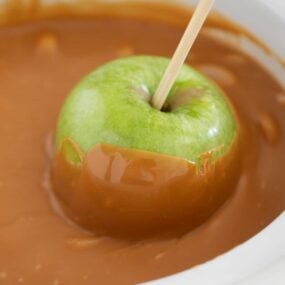
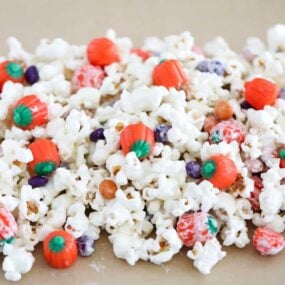
- Treats like popcorn, caramel corn, candy corn, chocolate covered pretzels, red or black Twizzlers, chocolates, maple cookies, and caramel candies.
- Nuts like almonds, walnuts, pecans, cashews, pistachios etc. Mixed candied nuts are always a great idea.
- Meat – Your favorite cured meats like salami, prosciutto, ham, pepperoni, etc.
- Decorative items – Check out your local dollar store for things like mini pumpkins or faux fall colored leaves.
How to Make a Fall Charcuterie Board
- Pick up to 10 items per board. Different colors, sizes, textures, and types of food. Mix sweet, spicy, savory, and salty. Crunchy, smooth, and crispy. Alternatively, you can separate your boards into separate “sweet” or “savory” boards rather than mix and mingle.
- Use bigger items as your focal point. This could be a decorative item such as a pumpkin, a larger food item such as a group of apples, a bowl of popcorn, or a big wedge of cheese or a loaf of bread.
- Start placing larger items on first. This could be larger centerpieces, cheese, crackers, fruit, meat, etc. Try not to clump all one item together, but spread them out, perhaps some on one end, and the rest on the other. Separate by color and texture to create variety.
- Fill in the gaps with the smaller items, whether it be small bowls of dip, honey, nuts, seeds, candies, etc. You don’t want spaces. Fill in any gaps with any extra colorful items or decoration (edible or not!).

Tips for the Best Autumn Harvest Charcuterie
- Convenience. Make it even easier by picking up as many store-bought items as you can. I love Trader Joe’s for all things charcuterie, but if you have a favorite local specialty cheese shop that sells preserves and jelly, or a gourmet chocolate shop that sells nuts, pretzels, and candies as well, by all means, do that.
- ‘3 3 3 3 rule’: Charcuterie boards often follow a rule of 3 – 3 cheeses, 3 starches, 3 meats and 3 accompaniments. With this fall-themed one, feel free to get creative so it fits your autumn gathering.
- Kids charcuterie. More than likely, you’ll have more items than can fit on one tray. As you’re assembling a bigger one, assemble a smaller snack platter on the side for your kids to enjoy!
- Add dips last. Add your dips onto the board last just before serving. This way they stay fresh in the fridge until then.
- Have fun with it! Get creative and remember it doesn’t have to be perfect. There is no right or wrong way (sort of) to assemble a charcuterie board. Don’t forget, once people start picking at it, it won’t be long before it no longer looks as put together!

Need more charcuterie ideas? Make a pancake charcuterie board for brunch or share a Valentine’s Day charcuterie board with your loved ones!
More Fall Favorites
Fall Charcuterie Board
Video
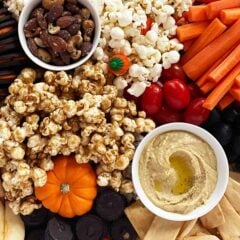
Ingredients
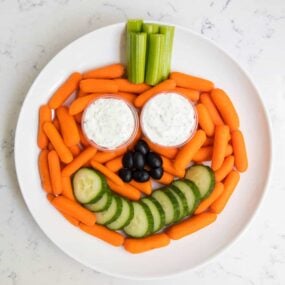
- 1 cup pita crackers
- ½ cup hummus
- ½ cup mixed nuts
- ½ cup black olives
- 1 cup baby carrots
- ½ pint cherry tomatoes
- 2 cups popcorn
- 2 cups caramel corn
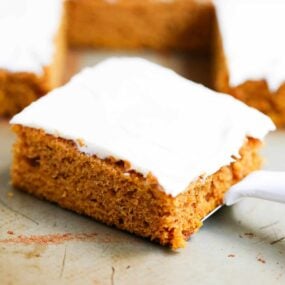
- 1 to 2 cups fall cookies
- 2 apples , sliced
- ½ cup caramel dip
Instructions
- Arrange. Lay 3 bowls on top of the board. Wash fruit, vegetables and slice. Pour hummus, nuts and dip into small bowls. Then start arranging ingredients around the bowls.
- Fill in spaces. Add remaining ingredients to charcuterie board and assemble as desired. Refrigerate until ready to serve.
Last step: Please leave a comment and rating after you make the recipe.
Notes
- Fruit – Fresh apple slices, or dried apple chips, orange slices, dried apricots, grapes, or figs.
- Delicious dips like these sweet pumpkin cheesecake dip and toffee caramel dip. Or savory homemade hummus and skinny dill dip.
- Cheeses – Slices of cheddar, blue cheese, swiss, Havarti, or gouda can be used. You could also make the centerpiece a cheese ball or a baked brie with spicy jelly.
- Bread and crackers– Naan bread, pita bread, Ritz, pretzels, tortilla chips, multi-grain crackers, or sliced baguette.
- Veggies such as baby carrots, celery sticks, cherry tomatoes, sliced bell peppers, etc.
- Treats like popcorn, caramel corn, candy corn, chocolate covered pretzels, red or black Twizzlers, chocolates, maple cookies, and caramel candies.
- Nuts like almonds, walnuts, pecans, cashews, pistachios etc. Mixed candied nuts are always a great idea.
- Meats – Your favorite cured meats like salami, prosciutto, ham, pepperoni, etc.
Nutrition
Nutrition provided is an estimate. It will vary based on specific ingredients used.
Recipe FAQs
You can assemble the board a few hours prior to serving if needed. Simply cover and store in the refrigerator until ready to serve.
If traveling with a charcuterie, I recommend covering the edges of the board with plastic food wrap and then tucking the remainder underneath. This keeps the snacks from falling off the sides of the board as the car moves.
In my opinion, a little bit of everything! I love to include a variety of cheeses to add different flavors and textures. Smoky, salty, soft, creamy…a good cheese board has it all!
If you’re looking for a few more appetizers to serve alongside a charcuterie, a few of my favorites are these crockpot BBQ meatballs, bacon wrapped dates or a tray of easy deviled eggs.

Erica
What a great spread!
Toni
This is such an amazing idea for fall entertaining! Thanks so much for sharing!
I Heart Naptime
Enjoy! :)
Kristyn
What a delicious spread!! I’m totally making this for our next family movie night!! I know it will be gone within minutes!
Natalie
Such beautiful colors!! My family would love everything on here & I know it’d be a hit for any occasion this fall!